How to Propagate Low northern sedge?
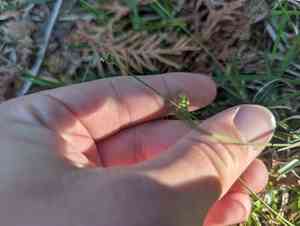
This diminutive, shade-loving plant, low northern sedge, is readily multiplied by means of division. Gently divide the plant clusters, making sure every segment possesses an adequate root system. Promptly reintroduce them into a porous growing medium and maintain consistent dampness in the vicinity to foster successful integration.
What Is the Best Time To Propagate Low Northern Sedge?
Propagation Type
Splitting
Propagation Season
Spring,Autumn
What Tools Are Used in Low Northern Sedge Propagation?
Garden Fork
A garden fork is crucial for gently lifting and loosening low northern sedge clumps without harming the roots. Its tines facilitate easy plant separation, minimizing root disturbance.
Pruning Shears
Pruning shears are utilized to trim any dead or damaged roots and foliage from low northern sedge. Clean cuts promote quicker healing and lessen disease risk during propagation.
Sharp Knife
A sharp knife is vital for precisely dividing low northern sedge root clusters. It ensures clean cuts, preventing bruising and infection, and aids easier, more successful replanting.
Watering Can with Fine Rose
A watering can with a fine rose spray assists in gently watering newly divided low northern sedge plants, ensuring the soil stays moist without causing erosion or waterlogging.
Potting Mix with Good Drainage
A high-quality potting mix with good drainage is essential for newly divided low northern sedge to establish strong roots quickly. It provides necessary nutrients and prevents water retention, which could cause root rot.
Plant Labels
Plant labels help identify low northern sedge divisions. Accurate labeling ensures proper organization and tracking of plant growth and care requirements throughout the propagation process.
How to Propagate Low Northern Sedge?
Propagation Type
Simple
How to Care for Your Newly Propagated Low Northern Sedge?
How to Care for Your Newly Propagated Low Northern Sedge?
Post-propagation, maintain consistent watering to keep soil uniformly moist, especially during the initial growing season. Watch for stress or disease signs. Apply a balanced, slow-release fertilizer in spring to support growth. Ensure plants receive partial to full sun, and regularly remove dead or damaged foliage to maintain plant health. Mulch annually to conserve soil moisture and control weeds. Prune as needed to encourage a neat growth habit.
Common Mistakes to Avoid When Propagating Low Northern Sedge
Overwatering
Excessive moisture can lead to root rot and fungal issues, negatively impacting the plant's health and development.
Incorrect Soil Type
Using an unsuitable soil type, such as one with poor drainage, can suffocate roots and impede proper growth.
Inadequate Light
Providing either too much or too little light can hinder plant development, resulting in weak, leggy growth.
Improper Handling
Damaging delicate roots during transplanting or propagation can decrease the plant's survival rate.
Spacing Issues
Planting low northern sedge too closely can lead to resource competition, resulting in stunted growth.
Tips For Propagating Low Northern Sedge
Well-Drained Soil
Ensure the soil drains excellently to prevent waterlogging and root decay.
Moderate Watering
Water the plant sufficiently but allow the soil to dry slightly between irrigation sessions.
Partial Shade
Provide partial shade to mimic its natural environment and avoid direct, intense sunlight.
Gentle Transplanting
Handle roots carefully to prevent damage and enhance the chances of successful propagation.
Appropriate Spacing
Plant low northern sedge with ample space between each specimen to allow for healthy growth and root expansion.


