How to Transplant Heartleaf bittercress?
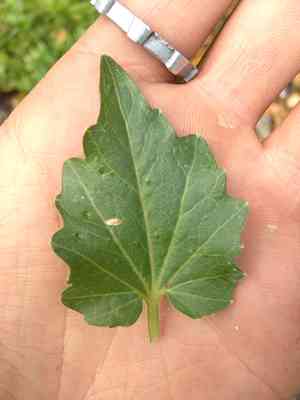
Heartleaf bittercress flourishes when relocated during the gentle warmth of late spring or early summer, facilitating robust root development. It prefers areas with partial shade and soil that is damp yet drains effectively. Shield it from intense sun exposure, and provide regular watering after transplanting to achieve optimal growth.
What Preparations are Needed Before Transplanting Heartleaf Bittercress?
What is the Ideal Time for Transplanting Heartleaf Bittercress?
The best period for relocating heartleaf bittercress is from late spring through mid-summer. During this time, the ground is warm and sunlight is plentiful, both aiding root development. Moving heartleaf bittercress then promotes vigorous growth and minimizes transplant shock, leading to a healthier, more robust perennial.
How Much Space Should You Leave Between Heartleaf Bittercress Plants?
When moving heartleaf bittercress, provide ample room for each plant to expand by placing them 12-18 inches (30-45 cm) apart. This ensures proper air circulation and sufficient root space.
What is the Best Soil Mix for Heartleaf Bittercress Transplanting?
Prepare a well-draining, nutrient-rich soil for heartleaf bittercress. Incorporate organic compost into the soil to supply essential nutrients. Ensure the pH is slightly acidic to neutral, around 6.0-7.0, for optimal growth.
Where Should You Relocate Your Heartleaf Bittercress?
Position heartleaf bittercress in an area that receives partial to full shade. This perennial prefers cooler conditions and can flourish without direct sun exposure for most of the day.
What Equipments Should You Prepare Before Transplantation Heartleaf Bittercress?
Gardening Gloves
To safeguard your hands while handling soil and plants.
Shovel or Spade
For excavating the new planting hole and carefully lifting the plant from its original spot.
Garden Trowel
Useful for more precise digging and assisting with placing the plant in its new location.
Watering Can or Hose
Crucial for hydrating the plant both before and after its relocation.
Wheelbarrow
Helpful for moving the plant if the initial and final spots are not close by.
Mulch
To assist in maintaining moisture and temperature levels around the newly transplanted plant.
Stakes and Ties
To offer support if the plant is large or has weak stems.
How Do You Remove Heartleaf Bittercress from the Soil?
How Do You Remove Heartleaf Bittercress from the Soil?
From Ground: First, moisten the soil around the heartleaf bittercress plant. Then, dig a wide trench around the plant using a shovel or spade, making sure the root ball stays intact. Carefully work the spade beneath the root ball to lift the plant from its initial position.From Pot: Thoroughly water the heartleaf bittercress plant, then gently turn the pot on its side and tap the edges to loosen the soil. Carefully slide the plant out of the pot, supporting the root ball as you do so.From Seedling Tray: Water the heartleaf bittercress seedlings completely, then use a garden trowel or your fingers to gently remove each seedling, ensuring as much soil as possible remains around the roots.
Step-by-Step Guide for Transplanting Heartleaf Bittercress
Prep the New Site
Excavate a hole in the new spot that is twice as wide and equally deep as the heartleaf bittercress plant's root ball. Ensure the hole is prepared before extracting the plant from its current location.
Remove the Plant
Follow the appropriate removal procedure based on where your heartleaf bittercress plant is currently situated.
Place the Plant
Carefully position the heartleaf bittercress plant into the hole, ensuring it stands upright and its root ball is level with the surrounding soil.
Backfill the Hole
Refill the hole with soil, gently pressing around the base of the heartleaf bittercress plant to eliminate any air pockets. Be careful not to over-compact the soil, as this can impede root development.
Water Thoroughly
Water the heartleaf bittercress plant generously immediately after transplanting to help settle the soil and give the plant a good start.
Apply Mulch
Add a layer of mulch around the base of the heartleaf bittercress plant to help retain moisture and regulate soil temperature.
How Do You Care For Heartleaf Bittercress After Transplanting?
Watering
Keep the soil around the heartleaf bittercress consistently damp, but not waterlogged, for the initial few weeks post-transplant to encourage strong root development.
Mulching
Maintain a layer of mulch around the plant to preserve soil moisture and keep the roots cool.
Monitoring
Regularly inspect the plant for indications of stress such as wilting or yellowing leaves, and adjust care as needed.
Staking
If the heartleaf bittercress plant is tall or has weak stems, provide support with stakes and ties to help it remain upright until it re-establishes itself.
Troubleshooting Common Issues with Heartleaf Bittercress Transplantation.
When is the best time to transplant heartleaf bittercress?
Late spring to mid-summer is optimal for relocating heartleaf bittercress, ensuring ideal growth conditions.
How should I prepare the soil for transplanting heartleaf bittercress?
Loosen soil to a depth of 12 inches (30 cm) and incorporate compost to enrich it.
What is the recommended spacing for transplanting heartleaf bittercress?
Space heartleaf bittercress plants 12-18 inches (30-45 cm) apart to allow sufficient room for growth.
How do I avoid transplant shock for heartleaf bittercress?
Water thoroughly before and after moving heartleaf bittercress, keeping roots moist but not saturated.
What should I do if leaves wilt after transplanting heartleaf bittercress?
Ensure consistent watering and temporarily shade the plant if necessary to reduce stress.
How deep should I plant heartleaf bittercress during transplanting?
Plant heartleaf bittercress at the same depth it was originally growing, fully covering the roots.
Can I fertilize heartleaf bittercress immediately after transplanting?
Avoid immediate fertilization; allow a couple of weeks for the plant to establish itself.
What type of mulch is best for heartleaf bittercress after transplanting?
Use organic mulch like straw or wood chips to retain moisture and regulate soil temperature.
How often should I water heartleaf bittercress after transplanting?
Water heartleaf bittercress thoroughly every few days for the initial weeks, then weekly as required.
What common mistakes should I avoid when transplanting heartleaf bittercress?
Avoid planting too deeply, inconsistent watering, and transplanting in extreme temperatures.



