How to Propagate Heartleaf bittercress?
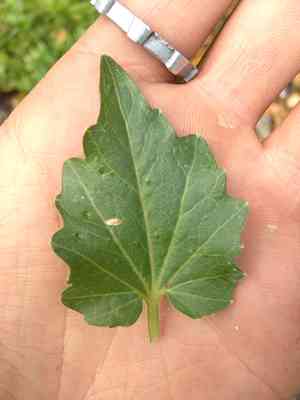
Cardamine cordifolia flourishes in damp, low-light settings, frequently beside waterways. To achieve successful reproduction, plant seeds in adequately draining substrate, maintaining steady hydration. Young plants require filtered light and shelter from intense solar exposure. Lightly embed seeds into the soil's top layer without fully burying them. Consistent irrigation during the early growth period fosters robust progress.
When Is the Optimal Time to Propagate Heartleaf Bittercress?
Propagation Method
Seeding
Propagation Period
Spring
What Equipment Is Utilized for Heartleaf Bittercress Propagation?
Seed Trays
Seed trays are vital for planting heartleaf bittercress seeds, offering a controlled setting for their sprouting. Ensure trays have adequate drainage to avoid waterlogging, which can harm delicate seedlings.
Seed Starting Mix
Employing a premium seed starting mix provides a sterile, light medium that fosters robust root growth and prevents damping-off disease, critical for successful heartleaf bittercress seed germination.
Humidity Domes
Humidity domes maintain necessary moisture levels, creating a micro-environment that supports ideal germination conditions for heartleaf bittercress. This is crucial during early seedling development.
Heat Mat
A heat mat delivers consistent bottom warmth, which benefits heartleaf bittercress seed germination. Maintaining a stable, warm temperature speeds up sprouting and encourages uniform development.
Labeling Stakes
Labeling stakes help track various seed batches and important details like sowing dates. This is especially useful when propagating multiple heartleaf bittercress batches to ensure proper monitoring and care.
Fine Mist Spray Bottle
A fine mist spray bottle is perfect for gently watering heartleaf bittercress seeds, ensuring delicate seeds and seedlings are undisturbed. This helps maintain necessary moisture without causing damage.
How to Propagate Heartleaf Bittercress?
Propagation Type
Simple
How to Nurture Your Newly Propagated Heartleaf Bittercress?
How to Nurture Your Newly Propagated Heartleaf Bittercress?
Ensure heartleaf bittercress receives partial to full sun and maintain consistent soil moisture. Mulch around plants to retain moisture and suppress weeds. Monitor for pests and diseases, managing them promptly for healthy growth. As plants mature, thin overcrowded areas to promote air circulation and prevent fungal issues.
Common Errors to Avoid When Propagating Heartleaf Bittercress
Overwatering
Excessive watering can cause root rot, which is harmful to heartleaf bittercress. Root rot hinders successful root development and can kill young plants.
Improper Soil Use
Using soil that is too dense or poorly draining can suffocate roots. Proper soil aeration and drainage are vital for preventing waterlogging and providing roots with essential air.
Inadequate Light
Propagating heartleaf bittercress in low-light areas can lead to weak, leggy growth. Insufficient light reduces photosynthesis, impacting the plant's energy production and overall health.
Ignoring Pests and Diseases
Neglecting to monitor and control pests or diseases can result in infestations that weaken or kill young plants. Regular inspections and timely interventions are crucial.
Incorrect Cutting Techniques
Taking cuttings improperly or at the wrong node can lead to poor root development. Ensuring precise and clean cutting practices is essential for successful propagation.
Advice For Propagating Heartleaf Bittercress
Utilize Well-Draining Soil
Ensure the soil mix drains effectively to prevent waterlogging and root rot. A blend of sand, perlite, and peat moss can be beneficial.
Moderate Watering
Water plant cuttings moderately, allowing the topsoil to dry between waterings to prevent root rot and encourage healthy root growth.
Optimal Light
Position cuttings in a spot with ample indirect sunlight to ensure robust growth without causing leaf burn or excessive drying.
Regular Monitoring
Inspect cuttings frequently for signs of pests or diseases. Early detection and treatment are crucial for maintaining healthy plants.
Proper Cutting Practices
Use sterilized tools to take cuttings just below a node, ensuring they are about 4-6 inches long. Remove lower leaves to reduce water loss and plant stress.



