How to Transplant Small Camas?
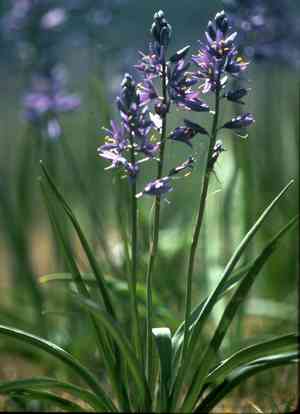
Relocate young Camas once the ground thaws, during the revitalizing period of early spring. Select a location offering filtered light and adequately draining earth. Moving them with a clump of bulbs facilitates a smooth adjustment to their new dwelling.
Essential Preparations Before Relocating Small Camas
Optimal Timing for Moving Small Camas?
For small Camas, early spring is the best time for relocation, aligning with its natural growth cycle. During this period, mild temperatures and increasing daylight promote strong root development. Moving small Camas then takes advantage of the season's gentle weather, reducing stress and allowing it a full season to adapt and strengthen before winter. Additionally, moist spring soil simplifies transplanting, making it easier for roots to penetrate the ground, which is neither too wet nor too dry. With a gentle start, small Camas can thrive in its new home as spring begins.
Required Spacing Between Small Camas Plants?
Before planting small Camas, ensure adequate room for each plant to flourish. Maintain a distance of approximately 4-6 inches (10-15 cm) between them. This allows your plants to grow without competing for essential resources.
Best Soil Mixture for Small Camas Transplanting?
Proper soil preparation is crucial for small Camas's healthy development. Well-draining soil, such as sandy or loamy types, will keep it content. Incorporate a phosphorus-rich base fertilizer before planting for added nutrients, which will support root growth.
Where to Replant Your Small Camas?
Selecting the perfect spot for small Camas is important. It enjoys sunlight, but it should be indirect or filtered. A location that is slightly shaded and receives morning or late afternoon sun will be ideal!
Equipment Needed Before Transplanting Small Camas?
Gardening Gloves
To safeguard your hands while handling soil and plants.
Shovel or Garden Spade
To assist in digging the hole and easily removing soil around roots.
Garden Trowel
Ideal for smaller digging tasks, it helps extract the plant without causing harm.
Watering Can or Hose
Required to water newly planted small Camas and its surrounding area.
Mulch
Applying it helps maintain soil warmth, retain moisture, and control weeds.
A bucket or wheelbarrow
Useful for moving the plant from its original spot to the new location.
How to Extract Small Camas from the Soil?
How to Extract Small Camas from the Soil?
From Ground: Ideally, wait for cooler, overcast weather to minimize stress on the small Camas plant. Loosen the soil around the small Camas using a shovel or spade, ensuring the root ball remains intact. Carefully work the spade beneath the root ball to lift the plant. Clean the roots if needed and keep them moist until replanting. From Pot: Water the small Camas in its pot an hour prior. Gently invert the pot while supporting the plant. Tap the bottom and sides of the pot to loosen the soil and roots. From Seedling Tray: Grasp the small Camas seedling with your fingers, being careful not to damage the stem. Gently push up from the bottom of the tray or use a small trowel to ease it out. Avoid harming the roots during this process.
Step-by-Step Guide for Transplanting Small Camas
Preparation
Dig the planting hole before removing small Camas from its initial spot. The hole should be twice as wide as the root ball, providing ample space.
Planting
Place the small Camas in the hole, ensuring the plant's crown is level with or slightly below the soil surface. Backfill the hole with soil, pressing it firmly around the roots.
Watering
After transplanting, thoroughly water the small Camas. Irrigate well, but avoid saturating the area.
Mulching
Apply mulch around the small Camas, keeping it away from the stem, to conserve water and prevent weed growth.
Post-Transplant Care for Small Camas
Monitoring
Observe the small Camas over the next few days for signs of transplant shock, such as wilting or yellowing leaves. If this occurs, provide shade and reduce water.
Protection
Consider using a plant stake if the small Camas is tall or in a windy, exposed area. This can support the plant as it establishes itself in its new location.
Pruning
Trim any damaged or dead stems after transplanting to encourage new growth.
Temperature
Small Camas prefers cooler temperatures; excessive heat can stress the plant. Ensure they are in a location with appropriate light but not extreme heat.
Troubleshooting Common Issues with Small Camas Transplantation.
When is the best time to transplant small Camas?
Relocate small Camas during S1. This season offers ideal climate conditions for their growth.
What is the proper spacing for small Camas?
Ideally, space small Camas bulbs 4-6 inches (10-15 cm) apart. This provides sufficient room for the plants to grow and develop properly.
What to do if small Camas wilts after transplanting?
Do not be concerned if small Camas wilts post-transplant. It is likely experiencing shock. Keep it adequately watered, but avoid overwatering, and it should recover within a week.
How deep should I plant small Camas bulbs?
Plant small Camas bulbs at a depth of 2-3 inches (5-7.5 cm). This is the optimal depth for the bulbs to anchor and begin growing.
Why isn't my small Camas blooming after being transplanted?
Small Camas may not bloom after transplanting due to stress or insufficient nutrients. Try a mild fertilizer and ensure it receives adequate sunlight, water, and time.
How much should I water the small Camas after transplanting?
Ensure small Camas is well-hydrated after moving, but avoid overwatering. Water just enough to moisten the soil. Too much water can lead to root rot.
What type of soil is ideal for small Camas?
Small Camas thrives best in well-draining, humus-rich soil. If this is not available, consider amending your soil with organic matter to improve its texture and nutrient content.
Can small Camas survive in full sun after transplanting?
While small Camas can tolerate full sun, it prefers partial shade. After transplanting, a spot with morning sun and afternoon shade would be ideal.
What if the leaves of small Camas start to yellow?
Yellowing leaves could indicate overwatering or nutrient deficiencies. Adjust your watering schedule and consider adding some organic compost to the soil.
Why aren't my transplanted small Camas growing?
Small Camas may not grow due to several factors, including unsuitable soil, improper spacing or bulb depth, or insufficient light and water. Review these aspects to troubleshoot.



