How to Transplant Japanese morning glory?
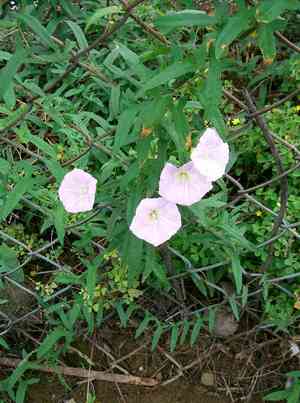
Relocate japanese morning glory once winter's chill recedes and spring's warmth emerges, generally from the initial signs of spring growth until the verge of early summer. Select a location that receives ample sunlight but is protected from strong breezes. When placing japanese morning glory, preserve the soil structure to facilitate adaptation.
What Preparations are Needed Before Transplanting Japanese Morning Glory?
What is the Ideal Time for Transplanting Japanese Morning Glory?
The optimal period for relocating japanese morning glory spans from the refreshing onset of early spring through the vibrant peak of late spring. This timeframe ensures the ground is adequately warm for root establishment and allows them to benefit from the forthcoming growth cycle. Carefully transplanting japanese morning glory during this window leverages nature's renewal, providing your japanese morning glory a strong foundation. Embrace this season to boost the vitality and health of your japanese morning glory.
How Much Space Should You Leave Between Japanese Morning Glory Plants?
Greetings, gardening enthusiast! Prior to settling your japanese morning glory into its new spot, ensure each plant has ample personal room â approximately 18-24 inches (45-60 cm) apart. This spacing will guarantee they have sufficient area to flourish and display their beautiful blossoms!
What is the Best Soil Mix for Japanese Morning Glory Transplanting?
Your japanese morning glory will thrive in soil that offers good drainage and is abundant in organic matter. Incorporate some compost or a balanced slow-release fertilizer to give them a robust beginning. Loamy soil is an excellent choice for these perennials, ensuring they receive the necessary nutrients for strong development.
Where Should You Relocate Your Japanese Morning Glory?
Sunlight is a great ally for your japanese morning glory! Locate a garden spot that receives full sun to partial shade. Aiming for six to eight hours of bright light will help your plants reach their full potential and reward you with a vivid display.
What Equipments Should You Prepare Before Transplantation Japanese Morning Glory?
Gardening Gloves
To safeguard your hands while handling soil and plants.
Shovel or Garden Trowel
For excavating holes and moving earth.
Wheelbarrow or Garden Cart
To transport the plant and soil if required.
Watering Can or Hose
To hydrate the plant before and after its relocation.
Pruning Shears
To trim any dead or superfluous parts of the plant.
Root Pruning Knife or Sharp Spade
To cleanly sever roots if they are pot-bound.
Mulch
To aid in retaining soil moisture and regulating temperature around the new planting area.
Measuring Tape
To maintain proper spacing between newly transplanted specimens.
How Do You Remove Japanese Morning Glory from the Soil?
How Do You Remove Japanese Morning Glory from the Soil?
From Ground: Start by watering the japanese morning glory plant to facilitate soil removal. Carefully dig a wide circle around the plant with a shovel to prevent root damage. Gently pry beneath the root ball with your shovel and lift the entire plant from the ground.From Pot: Thoroughly water the japanese morning glory plant to help the roots detach from the container sides. Grasp the plant's base, and carefully tilt the pot sideways while easing the root ball out. If the plant is stuck, tap the pot's sides and bottom to loosen it.From Seedling Tray: Water the seedlings beforehand. Use a garden trowel or a spoon to carefully extract individual japanese morning glory plant seedlings. Ensure to include the roots and surrounding soil to avoid disturbing the root system.
Step-by-Step Guide for Transplanting Japanese Morning Glory
Digging the New Hole
Excavate a hole in the ground twice the width of the japanese morning glory plant's root ball and roughly the same depth, being careful not to disrupt the immediate soil structure.
Inspecting the Roots
Before placing your japanese morning glory into the new hole, examine the root ball and gently untangle any circling roots. Use a root pruning knife if necessary to make vertical cuts to encourage outward growth.
Placement in the New Location
Carefully position your japanese morning glory in the center of the hole, ensuring it sits at the same depth as it was in its original spot. The plant's crown should be level with the soil surface.
Backfilling Hole
Refill the hole with native soil and any organic material that was removed, then gently press around the base of the japanese morning glory to eliminate air pockets.
Initial Watering
Water your transplanted japanese morning glory thoroughly to settle the soil and hydrate the roots, making sure no water stands around the stem to prevent rot.
Adding Mulch
Apply a layer of mulch around the base of japanese morning glory, taking care to keep the mulch a few inches away from the stem to prevent moisture buildup on the bark.
How Do You Care For Japanese Morning Glory After Transplanting?
Watering
Irrigate the japanese morning glory deeply and slowly to promote deep root development and avoid shallow, frequent waterings that lead to superficial roots.
Weed Management
Keep the area around your japanese morning glory clear of weeds, which can compete for nutrients and water.
Pruning
Trim any damaged or dead leaves and stems to direct the japanese morning glory's energy towards establishing new growth.
Monitoring
Regularly inspect your japanese morning glory for signs of stress, such as wilting or discoloration, and take appropriate action if needed.
Troubleshooting Common Issues with Japanese Morning Glory Transplantation.
What's the best time of year to transplant japanese morning glory?
It's optimal to transplant japanese morning glory when the weather begins to warm, from early to late spring.
How far apart should I space japanese morning glory when transplanting?
Allow each japanese morning glory plant ample room to thrive by spacing them 18-24 inches (46-61 cm) apart.
How deep should the planting hole be for japanese morning glory?
The hole should be as deep as the root ball and twice as wide to encourage proper growth.
What type of soil is best for transplanting japanese morning glory?
Rich, well-draining soil with good fertility supports healthy japanese morning glory transplant development.
How much water does japanese morning glory need after transplanting?
Water generously immediately after transplanting, then consistently to keep the soil moist but not waterlogged.
What should I do if the leaves of japanese morning glory wilt after transplanting?
Ensure the soil is adequately moist and the plants are shielded from intense midday sun to prevent wilting.
Can I use mulch around transplanted japanese morning glory?
Yes, mulch helps retain moisture and suppresses weeds, which benefits the newly transplanted japanese morning glory.
How do I protect my transplanted japanese morning glory from pests?
Monitor regularly for pests and employ suitable measures, such as organic pesticides, to keep them under control.
Should I apply fertilizer after transplanting japanese morning glory?
Wait 4-6 weeks before applying a balanced, slow-release fertilizer to avoid damaging the roots.
What if my japanese morning glory doesn't bloom after transplanting?
Patience is crucial; ensure it receives full sun to part shade and sufficient water, and blooms should follow.



