How to Transplant Hairy bindweed?
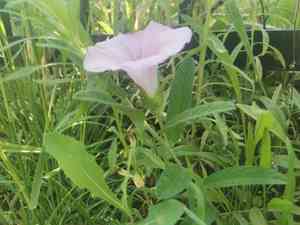
The most favorable periods for relocating hairy bindweed are the transitional seasonsâas spring transitions to summer or autumn colors intensifyâenabling it to establish roots comfortably in mild conditions. Select a location offering abundant light and soil that drains effectively. Careful handling is crucial to safeguard its fragile root system.
What Preparations are Needed Before Transplanting Hairy Bindweed?
What is the Ideal Time for Transplanting Hairy Bindweed?
Revitalize your garden by moving hairy bindweed during the mild warmth of late spring into early summer, or when autumn asserts its cool dominance from mid-fall through late fall. This timing enables hairy bindweed to settle into its new spot with moderate temperatures and sufficient rainfall, promoting strong root development before summer's heat or winter's cold. By selecting these supportive seasons, hairy bindweed's relocation is aided by nature's cycles, ensuring a robust recovery with less plant stress.
How Much Space Should You Leave Between Hairy Bindweed Plants?
When allocating room for your hairy bindweed, aim to provide each plant ample space to thrive. A separation of approximately 18-24 inches (45-60 cm) between plants will ensure they have sufficient area to establish their root systems and expand.
What is the Best Soil Mix for Hairy Bindweed Transplanting?
Prepare a welcoming environment for your hairy bindweed by selecting soil that drains effectively. Mixing organic compost into the soil will offer a nutrient-rich beginning. A balanced, slow-release fertilizer will also encourage vigorous growth, so apply it appropriately before planting.
Where Should You Relocate Your Hairy Bindweed?
Find a sunny location in your garden that receives abundant light, as hairy bindweed thrives in sunshine. Ideally, you want a spot that gets at least 6 hours of daily sunlight, supplemented by partial shade to offer protection during the hottest parts of the day.
What Equipments Should You Prepare Before Transplantation Hairy Bindweed?
Gardening Gloves
To safeguard your hands while handling soil and the plant.
Spade or Shovel
For excavating around and lifting the hairy bindweed, especially when extracting it from the ground.
Garden Fork
Useful for loosening soil and carefully separating roots if required.
Watering Can or Hose
To hydrate the hairy bindweed before and after its relocation.
Wheelbarrow or Garden Cart
For moving the hairy bindweed and soil without causing excessive disruption to the root ball.
Pruning Shears
To trim off any dead or superfluous parts of the hairy bindweed prior to transplanting, promoting healthy development.
How Do You Remove Hairy Bindweed from the Soil?
How Do You Remove Hairy Bindweed from the Soil?
From Ground: First, water the hairy bindweed to moisten the soil, making it easier to manage. Then, carefully dig a wide circle around the plant with a spade or shovel, being cautious not to harm the root ball. Gently slide the shovel beneath the root ball to lift the hairy bindweed from the ground, minimizing root disturbance.From Pot: Water the hairy bindweed thoroughly beforehand. Turn the container on its side and gently tap to loosen the soil. Grasp the base of the hairy bindweed and carefully extract it from the pot, ensuring the root ball is supported and doesn't break apart.From Seedling Tray: Water the seedlings to ensure the soil is damp. Use a garden fork or a similar small tool to gently lift the hairy bindweed from its compartment. Hold the seedling by its leaves rather than the stem to lessen the chance of damage.
Step-by-Step Guide for Transplanting Hairy Bindweed
Preparation
Before extracting the hairy bindweed from its original spot, prepare the new site by digging a hole twice the width of the plant's root ball and equally deep, ensuring the roots can spread comfortably without being constricted or sharply bent.
Root Ball Care
When lifting the hairy bindweed, strive to keep the root ball as intact as possible. If the plant is root-bound in the pot or seedling tray, gently untangle the roots without causing undue stress or breakage. This will help the hairy bindweed adapt to its new surroundings more quickly and easily.
Placement
Lower the hairy bindweed's root ball into the prepared hole, making sure it sits at the same level as it did in its previous location. Fill in around the root ball with soil, gently firming it down to eliminate air pockets that could dry out the roots.
Initial Watering
Once the hairy bindweed is in place, water it thoroughly to settle the soil and ensure good contact between the roots and their new environment. This initial deep watering also helps reduce transplant shock.
How Do You Care For Hairy Bindweed After Transplanting?
Monitoring
Ensure that the hairy bindweed is not exhibiting signs of transplant shock, such as wilting or leaf drop. It's normal for the plant to take some time to adjust, but persistent symptoms may require intervention.
Mulching
Apply a layer of organic mulch around the base of the hairy bindweed to help retain soil moisture and regulate temperature. Be careful not to pile the mulch against the stem or leaves to prevent rot.
Regular Watering
For the subsequent few weeks, maintain consistent watering to aid the hairy bindweed in establishing its roots. However, be wary of overwatering as this can lead to other issues like root rot.
Support Structures
If the hairy bindweed is a climbing plant, provide trellises or stakes early on to guide its growth without disturbing the roots later. This will help the hairy bindweed begin to establish its preferred growth pattern in its new location.
Observation
Keep a close watch on the hairy bindweed's growth and development, adjusting care as needed. Be patient and allow the plant time to recover from the transplanting process.
Pruning
After the hairy bindweed has had a chance to settle for a few days, prune any damaged or dead stems or leaves to encourage new, healthy growth. Ensure you do not prune aggressively, as the plant is still in a delicate state post-transplant.
Troubleshooting Common Issues with Hairy Bindweed Transplantation.
When is the best time to transplant hairy bindweed?
The optimal transplanting periods are from late spring to early summer or from mid-fall to late fall.
How far apart should I space hairy bindweed when transplanting?
Ideal spacing for hairy bindweed is 18-24 inches (45-60 cm) to allow ample room for growth.
What soil conditions favor hairy bindweed after transplanting?
Ensure rich, well-draining soil, as proper drainage is vital for hairy bindweed's successful transplantation.
How much should I water hairy bindweed after transplanting?
Water hairy bindweed generously after transplanting to establish roots, then adjust to moderate watering as needed.
Why are my transplanted hairy bindweed's leaves wilting?
Wilting can occur from shock. Maintain consistent moisture and protect from harsh sunlight for recovery.
Can I transplant hairy bindweed on a hot day?
Transplanting in cooler conditions is best to reduce shock. Avoid hot, sunny periods for this task.
How deep should the hole be for transplanting hairy bindweed?
The hole should be as deep as the root ball and twice as wide to accommodate growth.
My hairy bindweed didn't bloom post-transplant. What's wrong?
Blooming may be affected by transplant shock. Ensure proper care and give it some time to adjust.
How do I protect hairy bindweed from transplant shock?
Minimize root disturbance, water thoroughly, and provide shade initially to help hairy bindweed overcome transplant shock.
Should I fertilize hairy bindweed after transplanting?
It's not necessary immediately. Wait until hairy bindweed is established, then follow regular fertilization schedules.



