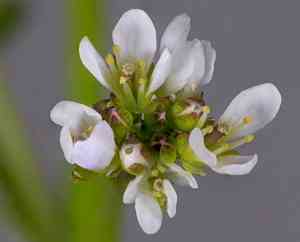
How to Transplant Turkish wartycabbage?
The most suitable period for relocating turkish wartycabbage is in the revitalizing months, spanning from the beginning of spring's melt to the arrival of summer's heat. Select a location that receives abundant sunlight and possesses soil that drains effectively. Bear in mind that turkish wartycabbage flourishes when given sufficient area for expansion, so ensure considerable distance separates individual plants.
What Preparations are Needed Before Transplanting Turkish Wartycabbage?
What is the Ideal Time for Transplanting Turkish Wartycabbage?
Moving turkish wartycabbage from indoor containers to your garden during the gentle spring days, roughly from the season's cheerful beginning to its abundant end, is perfect. This timing allows turkish wartycabbage to adapt to the stable, moderate conditions, ensuring vigorous development. By placing turkish wartycabbage in the ground after the frost has departed, you provide them with the best start, with the entire growing season ahead for root establishment and thriving.
How Much Space Should You Leave Between Turkish Wartycabbage Plants?
When relocating turkish wartycabbage, it's best to allow ample room for growth. Position them approximately 8-12 inches (20-30 cm) apart. This spacing ensures they have sufficient area to develop robustly and healthily without competing for nutrients or sunlight.
What is the Best Soil Mix for Turkish Wartycabbage Transplanting?
For turkish wartycabbage, prepare a location with soil that drains well. If your soil is dense, incorporate organic matter like compost to improve drainage and fertility. Before planting, mix in a balanced foundational fertilizer to give your turkish wartycabbage an excellent start!
Where Should You Relocate Your Turkish Wartycabbage?
Choose a sunny spot for turkish wartycabbage as they flourish with abundant sunlight. Aim for an area that receives at least 6 hours of direct sun daily. This sun-loving plant will reward you with strong growth when bathed in the perfect amount of light.
What Equipments Should You Prepare Before Transplantation Turkish Wartycabbage?
Gardening Gloves
To safeguard your hands while handling soil and the turkish wartycabbage.
Shovel or Spade
For excavating the turkish wartycabbage from its original spot and preparing the new location.
Watering Can or Hose
To hydrate the turkish wartycabbage before and after relocation, ensuring adequate moisture.
Wheelbarrow or Garden Cart
To move the turkish wartycabbage from one place to another if necessary.
Pruning Shears
For trimming any dead or damaged roots or foliage during the relocation process.
Garden Trowel
For refining planting holes or extracting the plant from pots or trays.
Organic Mulch
To help the relocated turkish wartycabbage retain moisture and suppress weeds around the new site.
How Do You Remove Turkish Wartycabbage from the Soil?
How Do You Remove Turkish Wartycabbage from the Soil?
From Ground: First, thoroughly water the turkish wartycabbage to make the soil easier to manage. Use a shovel or spade to carefully dig a wide circle around the plant, going deep enough to encompass the entire root ball. Gently pry and lift the turkish wartycabbage out, keeping as much soil attached to the roots as possible.From Pot: Water the turkish wartycabbage to moisten the soil. Turn the pot on its side, support the plant with one hand, and gently tap the bottom and sides of the pot to loosen the root ball. Carefully ease the plant out while keeping the soil around the roots.From Seedling Tray: Moisten the soil in the tray to prevent root damage. Use a garden trowel or a craft stick to gently lift each turkish wartycabbage seedling out by pushing up from the bottom of the cell.
Step-by-Step Guide for Transplanting Turkish Wartycabbage
Preparation
Water the turkish wartycabbage thoroughly before beginning the relocation process, as a hydrated plant will better handle the shock of being moved.
Digging Hole
Excavate a hole at the new site that is twice as wide and the same depth as the root ball of the turkish wartycabbage.
Root Pruning
Use pruning shears to snip away any damaged or excessively long roots, promoting healthier growth after relocation.
Placement
Position the turkish wartycabbage in the center of the new hole. Gently spread out the roots and place the plant so it's at the same level it was growing previously.
Backfilling Soil
Refill the hole with the removed soil, gently firming it around the roots of the turkish wartycabbage to eliminate air pockets.
Watering
After relocating, water the turkish wartycabbage thoroughly to settle the soil around the roots and help reduce transplant stress.
How Do You Care For Turkish Wartycabbage After Transplanting?
Initial Watering
Provide the turkish wartycabbage with a good watering immediately after relocation to help the roots settle and recover from the shock.
Regular Water Schedule
Establish a consistent watering routine for the first few weeks, keeping the soil around the turkish wartycabbage moist to encourage root development.
Mulching
Apply a layer of organic mulch around the base of the turkish wartycabbage to maintain moisture levels and regulate soil temperature.
Observation
Monitor your turkish wartycabbage for signs of transplant shock, such as wilting or yellowing leaves, and take appropriate action.
Protection
Shield your newly relocated turkish wartycabbage from harsh conditions like strong winds or heavy rain until it is well established.
Troubleshooting Common Issues with Turkish Wartycabbage Transplantation.
Why is my turkish wartycabbage not thriving after transplant?
Ensure it was moved during the suggested period from early to late spring, and correctly spaced 8-12 inches (20-30 cm) apart for optimal development.
How deep should I plant turkish wartycabbage seedlings?
Plant seedlings to the same depth as their original container, allowing roots to spread without bending.
Can I transplant turkish wartycabbage on a hot day?
Relocate turkish wartycabbage on a mild day to prevent shock; overcast conditions are ideal to minimize stress.
What soil type is best for transplanting turkish wartycabbage?
Well-draining, fertile soil with organic matter is best for relocating turkish wartycabbage. Avoid heavy clay or waterlogged areas.
How much should I water turkish wartycabbage after transplanting?
Water thoroughly after relocation, keeping soil consistently moist for the first few weeks until established.
Why are the leaves of my turkish wartycabbage wilting after transplanting?
Wilting could be due to transplant shock; maintain moist soil and provide shade to help plants recover.
Should I fertilize turkish wartycabbage immediately after transplanting?
Wait 2-4 weeks post-relocation before applying a balanced fertilizer to avoid burning the roots.
How can I protect my newly transplanted turkish wartycabbage from frost?
Use frost cloths or plant covers if an unexpected late spring frost is predicted.
How often should I check the soil moisture for turkish wartycabbage?
Check soil moisture daily; turkish wartycabbage needs consistent moisture but avoid overwatering which can lead to root rot.
What should I do if turkish wartycabbage isn't showing new growth?
Be patient; plants may be establishing roots. If after 4-6 weeks there's no growth, check for root pests/problems.


