How to Transplant Bulbinella trinervis?
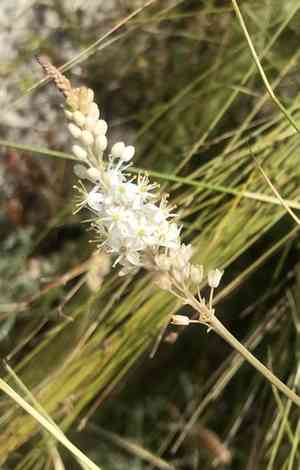
Bulbinella trinervis, a perennial species, thrives optimally when relocated between the onset of early spring and the peak of late spring. Select a bright location featuring soil that drains effectively. Verify that the earth is suitably readied to foster its robust growth.
What Preparations are Needed Before Transplanting Bulbinella Trinervis?
What is the Ideal Time for Transplanting Bulbinella Trinervis?
The optimal period for relocating bulbinella trinervis spans from early to late spring. This timeframe allows the plant to develop its root system prior to the intense warmth of summer. Moving it during this window promotes peak growth and vitality, as the ground is sufficiently warm for root expansion while avoiding harsh seasonal weather extremes.
How Much Space Should You Leave Between Bulbinella Trinervis Plants?
To provide bulbinella trinervis ample room for development, position each plant approximately 12 inches (30 cm) apart. This spacing ensures sufficient area for their roots to spread and flourish.
What is the Best Soil Mix for Bulbinella Trinervis Transplanting?
For bulbinella trinervis, utilize soil that drains well, enriched with some organic compost. Incorporating a balanced base fertilizer containing equal parts nitrogen, phosphorus, and potassium will supply the necessary nutrients for robust growth.
Where Should You Relocate Your Bulbinella Trinervis?
Select a sunny location for transplanting bulbinella trinervis where it will receive direct sunlight for at least 6 hours daily. This guarantees the plant obtains enough light for optimal development and flowering.
What Equipments Should You Prepare Before Transplantation Bulbinella Trinervis?
Gardening Gloves
To safeguard your hands while handling soil and plants.
Trowel/Shovel
For excavating and lifting vegetation.
Garden Fork
To loosen the earth around roots without causing harm.
Pruning Shears
For trimming any damaged roots or foliage.
Watering Can
To keep the soil moist during and after relocation.
Organic Compost
To enrich the planting site.
Mulch
To aid in moisture retention and soil temperature regulation.
How Do You Remove Bulbinella Trinervis from the Soil?
How Do You Remove Bulbinella Trinervis from the Soil?
From Ground: First, hydrate the bulbinella trinervis plant to moisten the soil. Next, excavate a wide trench around the plant using a shovel or spade, ensuring the plant's root ball remains intact. Carefully work the spade beneath the root ball to lift the plant from its original spot.From Pot: Water the bulbinella trinervis plant thoroughly before extraction. Gently tilt the container on its side and tap the base to loosen the soil. Carefully slide the plant out, supporting the root ball with your hand to prevent damage.From Seedling Tray: Dampen the soil in the tray to facilitate removal. Use a pencil or stick to gently push the seedling up from the bottom. Carefully lift the seedling by its leaves, not the stem, to avoid injury.
Step-by-Step Guide for Transplanting Bulbinella Trinervis
Prepare Planting Hole
Dig a hole twice as wide and equally deep as the root ball of your bulbinella trinervis plant. Incorporate some organic compost to enrich the soil.
Plant Placement
Position the bulbinella trinervis plant in the hole, ensuring it is at the same depth as it was in its previous location. Backfill around the root ball with soil, gently tamping down to eliminate air pockets.
Water
Immediately irrigate the plant thoroughly to settle the soil around its roots.
Mulch Application
Apply a 2-3 inch layer of mulch around the plant's base, keeping it a few inches away from the stem to prevent rot.
How Do You Care For Bulbinella Trinervis After Transplanting?
Watering
Keep the soil surrounding the bulbinella trinervis consistently moist, but not waterlogged, for the initial weeks post-transplant to aid in root establishment.
Monitoring
Regularly inspect the plant for indications of stress, such as wilting or yellowing foliage, and adjust care as necessary.
Protection
Initially shield the plant from harsh weather conditions by providing shade or wind protection if required.
Troubleshooting Common Issues with Bulbinella Trinervis Transplantation.
When is the best time to transplant bulbinella trinervis?
Early to late spring provides ideal conditions for successfully relocating bulbinella trinervis.
How much space should I leave between transplants?
Maintain a 12-inch (30 cm) separation between each bulbinella trinervis for healthy development.
How should I prepare the soil for transplanting bulbinella trinervis?
Ensure well-draining soil, enriched with compost or organic matter, to promote bulbinella trinervis's growth.
What should I do if bulbinella trinervis isn't establishing well after transplanting?
Ensure the soil remains consistently moist but not saturated to help bulbinella trinervis establish its roots.
How deep should I plant bulbinella trinervis when transplanting?
Plant bulbinella trinervis at the same depth it was in its prior location.
What should I do if the leaves of bulbinella trinervis become yellow after transplanting?
Check soil drainage and confirm bulbinella trinervis receives adequate water without being waterlogged.
How do I protect bulbinella trinervis from transplant shock?
Water thoroughly after transplanting and apply a mulch layer to keep roots cool and hydrated.
What type of mulch is best for bulbinella trinervis after transplanting?
Utilize organic mulch such as straw or bark chips to maintain soil moisture and temperature.
Should I fertilize bulbinella trinervis immediately after transplanting?
Wait a few weeks post-transplant before lightly fertilizing to prevent root burn.
How to ensure bulbinella trinervis thrives in its new location?
Select a site with partial to full sun and maintain proper irrigation and spacing.



