How to Transplant Arctic brome?
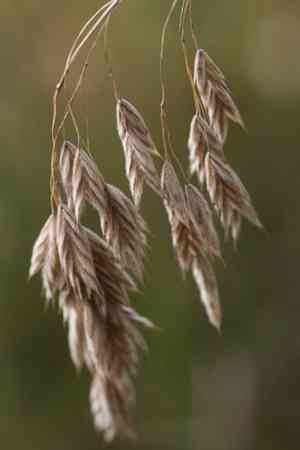
Relocate arctic brome as the moderate temperatures of mid-spring transition into the mild warmth of early summer, fostering vigorous development. Choose a bright spot with soil that drains effectively. A helpful tip: Maintain consistent moisture for the roots and minimize disturbance following the transfer.
What Preparations are Needed Before Transplanting Arctic Brome?
What is the Ideal Time for Transplanting Arctic Brome?
The perfect time to move arctic brome is at the transition from late spring to early summer. During this period, mild temperatures and extended daylight hours create optimal conditions for root development, minimizing transplant stress and encouraging robust growth. Relocating at this time allows roots to adapt and benefit from summer growth, setting arctic brome up for success. With careful timing, your arctic brome will flourish, showing resilience and elegance in its new spot.
How Much Space Should You Leave Between Arctic Brome Plants?
When preparing to rehome arctic brome, remember they appreciate their individual space! Aim to position them approximately 8-16 inches (20-40 cm) apart. This spacing will provide ample room for them to grow and thrive without overcrowding.
What is the Best Soil Mix for Arctic Brome Transplanting?
Let's get a comfortable spot ready for your arctic brome! They prefer soil that drains well, with a bit of balanced, slow-release fertilizer mixed in. This small boost will help them settle in and begin growing!
Where Should You Relocate Your Arctic Brome?
Your arctic brome enjoys soaking up the sun but appreciates some shade during the warmest part of the day. Find a location in your garden that receives full sun to partial shade, where they can enjoy morning light and afternoon protection.
What Equipments Should You Prepare Before Transplantation Arctic Brome?
Gardening Gloves
To safeguard your hands while handling soil and plants.
Shovel or Garden Spade
Crucial for excavating and lifting the plant's root mass.
Pruning Shears
For trimming any damaged roots or foliage prior to transplanting.
Watering Can or Hose
To hydrate the plant before and after relocation to lessen shock.
Wheelbarrow
For moving the arctic brome plant, soil, or any debris.
Garden Fork
To loosen the soil around the plant's root ball if necessary.
How Do You Remove Arctic Brome from the Soil?
How Do You Remove Arctic Brome from the Soil?
From Ground: Begin by watering the arctic brome to moisten the surrounding soil. Carefully dig a circle around the plant with a shovel, leaving ample space to avoid root damage. Gently slide the shovel under the root ball and lift the plant, keeping the root ball as intact as possible.From Pot: Water the arctic brome thoroughly. Tilt the pot sideways and tap the bottom to loosen the plant. Support the arctic brome by its base, and carefully extract the plant from the pot while maintaining the root ball's integrity.From Seedling Tray: Water the seedlings to make the soil damp. Use a spoon or a small tool to gently lift the seedling out, taking care not to harm the delicate roots or stem.
Step-by-Step Guide for Transplanting Arctic Brome
Digging Hole
Excavate a hole in the planting area that is twice the width of the arctic brome's root ball and of equal depth, ensuring the plant will sit at the same level as it did originally.
Testing Fit
Place the arctic brome into the hole to check its fit. The plant should rest comfortably with the top of its root ball level with the surrounding ground.
Placing Plant
Gently position the arctic brome in the center of the hole. Spread out any bunched roots to encourage outward growth.
Refilling Hole
Partially backfill the hole with the removed soil, firming it around the root ball to eliminate air pockets. Water the soil halfway through the backfilling process to help it settle.
Completing Backfill
Finish filling the hole with soil. Gently press down the soil around the plant's base to secure it, but avoid compacting it too much, as this can hinder water from reaching the roots.
Final Watering
Provide the arctic brome with a thorough watering after planting to ensure moisture reaches the deeper roots, aiding in the plant's establishment in its new location.
How Do You Care For Arctic Brome After Transplanting?
Staking
Offer support for the arctic brome if it appears to be leaning or unstable by staking the plant until it develops a robust root system.
Mulching
Apply a layer of mulch around the base of the arctic brome to help retain moisture and regulate soil temperature.
Monitoring
Observe the arctic brome for indications of transplant shock, such as wilting or discolored leaves, and address them as necessary.
Pruning
Remove any dead or damaged foliage to direct the arctic brome's energy towards root establishment.
Troubleshooting Common Issues with Arctic Brome Transplantation.
When is the optimal time to transplant arctic brome?
Relocate arctic brome during its ideal season, from late spring through early summer, for best outcomes.
How far apart should I space arctic brome when transplanting?
Space arctic brome approximately 8-16 inches (20-40 cm) apart to ensure proper development and air circulation.
Why is my arctic brome wilting after transplanting?
Wilting may be due to shock. Ensure adequate watering, initially avoid direct sun, and shield from strong winds.
Should I fertilize arctic brome immediately after transplanting?
Fertilizing right after transplanting is not recommended. Wait until arctic brome is established, about 4-6 weeks later.
How much should I water arctic brome post-transplant?
Water arctic brome generously to establish roots, then 1 inch (2.5 cm) weekly, adjusting for rainfall and soil type.
What soil conditions are best for transplanting arctic brome?
Well-draining soil rich in organic matter is ideal. Amend soil if needed before transplanting.
Can I transplant arctic brome on a hot, sunny day?
Transplanting on a cool, overcast day is preferable to minimize stress. If hot, do so in the early morning or evening.
How deep should the hole be for arctic brome transplant?
Dig a hole twice the diameter of the root ball and of the same depth to promote proper root establishment.
What are signs of transplant shock in arctic brome?
Signs include drooping or yellowing leaves, stunted growth, or leaf drop. Provide consistent care and avoid overwatering.
Can arctic brome be transplanted in the container-grown stage?
Yes, container-grown arctic brome can be transplanted. Carefully remove from the pot and gently separate roots if pot-bound.



