How to Transplant Fringed brome?
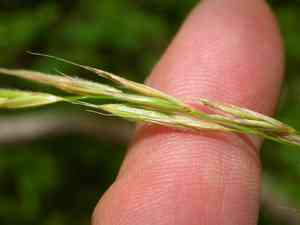
Fringed brome flourishes when relocated between the beginning and end of summer. This timeframe enables its root system to become established prior to the colder months. Select a site offering partial to complete sunlight and soil that drains effectively for peak development. Guarantee damp, but not saturated, initial conditions for rapid acclimation.
Necessary Preparations Before Relocating Fringed Brome?
Optimal Period for Relocating Fringed Brome?
Fringed brome, a perennial, flourishes when moved from early to late summer. This timeframe ensures ideal soil warmth and moisture, promoting robust root development. Transplanting then maximizes growth prior to winter dormancy. Correct timing guarantees improved survival rates, vigorous growth, and enhanced adaptability, making it the perfect season for fringed brome.
Recommended Spacing Between Fringed Brome Plants?
Position each fringed brome transplant approximately 1 foot (30 cm) apart to provide ample room for growth and expansion. This spacing will help minimize nutrient competition and optimize air circulation among plants.
Ideal Soil Mixture for Fringed Brome Relocation?
Prepare soil that drains well, incorporating organic compost. Ensure the soil is slightly acidic to neutral, with a pH between 6.0 and 7.0. A nitrogen-rich base fertilizer will aid fringed brome in establishing strong roots.
Preferred Location for Your Fringed Brome?
Select a site that receives full sun to partial shade. Fringed brome thrives with 6-8 hours of daily sunlight, so a spot with morning sun and afternoon shade would be perfect, especially in warmer climates.
Equipment to Prepare Before Transplanting Fringed Brome?
Gardening Gloves
To safeguard your hands while handling soil and plants.
Shovel or Spade
For excavating the plant from the ground or creating holes for relocation.
Trowel
For minor digging tasks and transplanting small plants.
Watering Can or Hose
To hydrate the plant before and after its relocation.
Root Pruning Shears
To trim any damaged roots during the transplanting process.
Wheelbarrow
To transport the plant if it is large or heavy.
Mulch
To cover the soil around the plant post-transplant, aiding moisture retention and weed suppression.
How to Extract Fringed Brome from the Soil?
How to Extract Fringed Brome from the Soil?
From Ground: First, moisten the soil around the fringed brome plant. Then, dig a wide trench around the plant using a shovel or spade, ensuring the root ball remains intact. Carefully work the spade beneath the root ball to lift the plant from its original spot.From Pot: Gently tap the pot's sides to loosen the soil and roots. With one hand supporting the plant's base, tilt the pot and slide the plant and its root ball out, taking care not to harm the roots.From Seedling Tray: Use a trowel or your fingers to carefully lift the seedlings from the tray. Ensure each seedling has a healthy clump of soil and intact roots. Handle seedlings by their leaves to avoid damaging stems or roots.
Step-by-Step Guide for Relocating Fringed Brome
Site Preparation
Prepare the new planting site by digging a hole twice as wide and as deep as the plant's root ball. This provides ample room for root expansion.
Soil Enhancement
Incorporate organic matter or compost into the hole if necessary to improve soil fertility and drainage.
Plant Positioning
Place the fringed brome plant in the hole, ensuring it sits at the same depth as it was in its previous location. Gently spread the roots if they are compacted.
Backfill and Secure
Fill the hole with soil, gently compacting it around the root ball to eliminate air pockets and stabilize the plant.
Watering
Thoroughly water the plant immediately after transplanting to settle the soil around the roots and initiate hydration.
Post-Transplant Care for Fringed Brome?
Watering
Maintain consistent moisture around the fringed brome's soil, avoiding saturation, for the initial weeks after transplanting to encourage strong root development.
Mulching
Apply a layer of mulch around the plant's base to help retain moisture and inhibit weed growth.
Monitoring
Regularly inspect the plant for signs of distress, such as wilting or yellowing leaves, and provide additional water or shade if needed.
Weeding
Keep the area surrounding the fringed brome free of weeds to reduce competition for nutrients and water.
Resolving Common Issues with Fringed Brome Transplantation.
When is the best time to transplant fringed brome?
Early summer to late summer is the ideal time for transplanting fringed brome.
How much space should be between each fringed brome plant?
Space each fringed brome plant about 1 foot (30 cm) apart for optimal growth.
What type of soil is best for transplanting fringed brome?
Fringed brome thrives in well-draining, fertile soil with a balanced pH.
How should I prepare the soil for fringed brome?
Loosen the soil and mix in organic compost for better nutrient content and drainage.
What's the right way to remove fringed brome without damaging roots?
Gently dig around fringed brome, lift it without pulling the stem to protect its roots.
How deep should the hole be for transplanting fringed brome?
The hole should be deep and wide enough to accommodate fringed brome's root system comfortably.
How often should I water fringed brome after transplanting?
Water fringed brome thoroughly after transplanting and keep the soil consistently moist but not waterlogged.
Should I mulch around fringed brome after transplanting?
Yes, apply a layer of mulch to help retain moisture and suppress weeds around fringed brome.
Can fringed brome be transplanted in full sun?
Fringed brome prefers partial to full sun, so choose a spot with adequate sunlight.
What should I do if fringed brome appears stressed after transplanting?
Ensure it gets enough water and shade it for a few days to reduce transplant shock.



