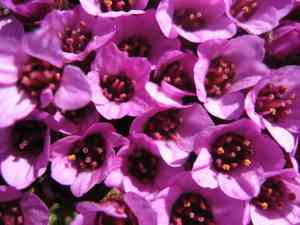
How to Transplant Coastal brookfoam?
For a flourishing coastal brookfoam, relocate it when growth recommences in early to mid-spring, or as dormancy begins from late autumn to early winter. Select a damp, shaded location and, if necessary, enrich the soil with organic material for optimal outcomes.
What Preparations are Needed Before Transplanting Coastal Brookfoam?
What is the Ideal Time for Transplanting Coastal Brookfoam?
The best period for moving coastal brookfoam is typically during the active growth phase of early to late spring or the dormant stage of late fall to early winter. Relocating coastal brookfoam at these times promotes strong root development without the stress of extreme temperatures, ensuring a smooth transition to its new spot. This timing aligns with coastal brookfoam's natural life cycle, encouraging vigorous growth and providing an excellent head start for upcoming seasons. A friendly reminder: transplant coastal brookfoam when the soil is workable and moist, not waterlogged or frozen, for optimal outcomes.
How Much Space Should You Leave Between Coastal Brookfoam Plants?
When getting ready to transplant your coastal brookfoam, imagine small areas of beauty spaced approximately 12-18 inches (30-46 cm) apart. This will provide each plant ample room to thrive without competing for nutrients and space.
What is the Best Soil Mix for Coastal Brookfoam Transplanting?
Before introducing coastal brookfoam to your garden, treat them to soil that drains well and is rich in organic material. A gentle application of a balanced, slow-release fertilizer will give your coastal brookfoam a comfortable start in its new home.
Where Should You Relocate Your Coastal Brookfoam?
Your coastal brookfoam loves locations that receive a soft morning sun and then a calming afternoon shade. Select a spot that gets partial sun, as too much direct sunlight can be a bit too harsh for it.
What Equipments Should You Prepare Before Transplantation Coastal Brookfoam?
Gardening Gloves
To safeguard your hands while handling soil and coastal brookfoam.
Shovel or Spade
For digging and lifting the plant without harming its root system.
Garden Fork
To loosen the soil around coastal brookfoam before removal and in the new location for better aeration.
Watering Can or Hose
To hydrate coastal brookfoam before and after transplanting to reduce transplant shock.
Measuring Tape
To ensure the new hole is the correct size for the root ball.
Wheelbarrow or Plant Dolly
For moving coastal brookfoam from its original spot to the new site, especially if it is large or heavy.
Pruning Shears
To trim off any damaged roots or foliage prior to transplanting.
How Do You Remove Coastal Brookfoam from the Soil?
How Do You Remove Coastal Brookfoam from the Soil?
From Ground: First, water coastal brookfoam to moisten the soil. Then, dig a wide trench around the plant using a shovel or spade, ensuring the root ball stays intact. Carefully work the spade beneath the root ball to lift coastal brookfoam from its initial position.From Pot: Water the soil in the pot to dampen it and facilitate easier removal of coastal brookfoam. Tilt the pot sideways and gently tap the sides to loosen the root ball. Grasp the base of the plant and carefully slide it out of the pot, taking care not to pull harshly on the stems or leaves.From Seedling Tray: Moisten the soil in the seedling tray. Use a garden fork or similar tool to gently lift the individual coastal brookfoam seedlings, being cautious not to harm their delicate roots.
Step-by-Step Guide for Transplanting Coastal Brookfoam
Preparation
Gather all necessary tools and water coastal brookfoam to ensure the soil is damp, which will make the root ball easier to extract.
Removal
Carefully take coastal brookfoam from its current spot without disturbing the roots. Use a shovel for ground removal, tip and tap for pots, and a fork for seedlings.
Root Inspection
Examine the root ball for any signs of damage or disease, and trim as needed with pruning shears.
Hole Digging
At the new site, dig a hole that is twice as wide and just as deep as the root ball. Use the measuring tape to verify dimensions.
Hole Preparation
Loosen the soil at the bottom of the hole with a garden fork to improve drainage and root penetration.
Plant Setting
Place coastal brookfoam in the center of the hole, ensuring it's at the same depth it was previously. The top of the root ball should be level with the ground surface.
Backfill
Gently refill the hole with soil, tamping down lightly to eliminate air pockets.
Watering
Water the coastal brookfoam thoroughly after planting to settle the soil and provide moisture for the roots.
Mulching
Apply a layer of mulch around coastal brookfoam, keeping it away from the base of the plant to prevent rot.
How Do You Care For Coastal Brookfoam After Transplanting?
Watering
Regularly water coastal brookfoam to keep the soil consistently moist without overwatering. Adjust frequency based on weather conditions.
Mulching
Maintain the mulch layer to preserve soil moisture and suppress weeds.
Monitoring
Keep an eye on coastal brookfoam for indications of stress or disease. Early detection simplifies management.
Pruning
Trim any dead or damaged growth to direct the plant's energy into establishing its roots and new growth.
Support
If coastal brookfoam shows signs of leaning or instability, use garden stakes or ties to provide temporary support until it is firmly established.
Troubleshooting Common Issues with Coastal Brookfoam Transplantation.
What's the best time to transplant coastal brookfoam?
Optimal transplanting time for coastal brookfoam is from early spring to late spring and late fall to early winter, when temperatures are mild.
How far apart should I space coastal brookfoam when transplanting?
Ensure each coastal brookfoam has ample room to thrive by spacing them 12-18 inches (30-45 cm) apart.
How deep should the planting hole be for coastal brookfoam?
Dig a hole as deep as the root ball and twice as wide to accommodate coastal brookfoam's growth.
Why are my transplanted coastal brookfoam's leaves wilting?
Wilting after transplant may indicate shock. Ensure sufficient water, but avoid overwatering, and provide temporary partial shade.
Can I transplant coastal brookfoam in the summer?
Transplanting coastal brookfoam in summer is not ideal due to heat stress. Aim for cooler transplant periods.
Should I fertilize coastal brookfoam right after transplanting?
Hold off on fertilizing. Allow coastal brookfoam to establish for a few weeks post-transplant before adding nutrients.
How much water does coastal brookfoam need after transplanting?
Keep the soil consistently moist for the initial few weeks, then adjust as coastal brookfoam establishes.
What kind of soil suits coastal brookfoam best for transplanting?
Transplant coastal brookfoam into well-draining soil, rich in organic matter, with a neutral to slightly acidic pH.
How do I prepare coastal brookfoam for transplant?
Water coastal brookfoam thoroughly a day before transplanting to ease the transition and reduce shock.
Can I divide coastal brookfoam during transplanting?
Yes, if mature enough, gently divide coastal brookfoam at the roots during transplanting to propagate.


