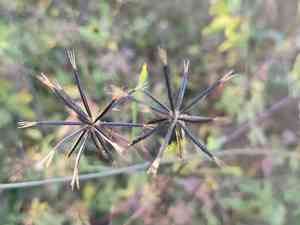
How to Transplant Spanish needles?
The optimal period for relocating spanish needles is in the revitalizing spring season, as the ground becomes active. Select a location that receives full sun to partial shade and features soil that drains effectively. Should it be required, modify the soil's dampness to accommodate spanish needles in its new environment.
Essential Preparations Before Relocating Spanish Needles?
Optimal Period for Moving Spanish Needles?
The best time to move spanish needles is after the last frost, typically in the pleasant warmth of late spring. This season sees the soil beginning to warm, creating an inviting environment for spanish needles roots to take hold. Transplanting spanish needles during this window gives the plant a head start on its growth cycle, allowing it sufficient time to strengthen before the peak heat of summer. When preparing the soil for spanish needles, ensure it's loose and fertile—perfect conditions for these resilient bloomers to flourish. By selecting this ideal transplanting period, you guarantee spanish needles the finest possible beginning, paving the way for a vibrant garden.
Required Spacing Between Spanish Needles Plants?
Relocating spanish needles demands adequate room. To ensure their well-being, aim for a separation of approximately 2-3 feet (60-90 cm). This distance will provide each plant ample space to grow without competition. Minor inaccuracies are acceptable; gardening is a continuous learning process!
Best Soil Blend for Spanish Needles Relocation?
Craft the ideal home for your spanish needles with soil that drains well! It's fine if your garden soil isn't perfect – simply incorporate some organic compost or aged manure as a foundational fertilizer. Experiment a bit to discover what suits your plants and garden best.
Where to Replant Your Spanish Needles?
Let's pinpoint the perfect spot for your spanish needles! These plants thrive in sunlight, so choose a garden location that receives abundant sun exposure. This will promote healthy growth and beautiful blooms. Remember, patience and observation are your greatest allies in gardening!
Equipment Needed Before Transplanting Spanish Needles?
Gardening Gloves
To safeguard your hands from soil and potential thorns while handling spanish needles.
Shovel or Spade
For excavating a hole in the ground where the plant will be moved.
Pruning Shears
To trim any damaged or dead sections of spanish needles during the transplanting process.
Garden Trowel
To dig smaller, more precise holes when transferring from a pot or seedling tray.
Watering Can
To supply the spanish needles plant with water immediately after relocation.
Garden Hose or Bucket
Useful for larger plants that require a greater volume of water right after transplanting.
How to Extract Spanish Needles from the Soil?
How to Extract Spanish Needles from the Soil?
From Ground: Hydrate the spanish needles plant to make the soil easier to manage. Carefully dig a wide circle around the plant using a shovel, ensuring the plant's root ball remains intact. As you dig, gently work the shovel beneath the root ball to lift the plant.From Pot: Water the spanish needles a few hours before you plan to move it. When ready, tilt the pot sideways while gently supporting the plant's base. Apply slight pressure to the pot to help the plant and its root ball slide out.From Seedling Tray: Water the tray thoroughly several hours prior to transplanting. To remove the spanish needles plant, gently hold it at the base and lift it, using a garden trowel for assistance. Ensure the base is supported to prevent damage to the root ball.
Step-by-Step Guide for Relocating Spanish Needles
Preparation
Prepare the garden bed by clearing any weeds and adding compost if necessary. Dig a hole twice the width and the same depth as the spanish needles's root ball.
Placement
Position the spanish needles in the hole, ensuring it sits at the same depth as it was in its original spot.
Backfill
Return soil to the hole, covering all roots, and gently firm the soil around the plant to keep it upright.
Watering
Water the spanish needles thoroughly, immediately after planting, to settle the soil around the roots and help the plant recover from the shock of being moved.
Post-Transplant Care for Spanish Needles?
Pruning
Remove any dead or damaged foliage after relocating spanish needles to allow it to direct energy towards new growth.
Watering
Keep the soil around spanish needles moist, but avoid overwatering. Gradually decrease the amount of water as the plant becomes established.
Mulching
Apply a layer of mulch around the base of spanish needles to help retain moisture and suppress weeds.
Monitoring
Observe spanish needles for a few weeks following its relocation. Look for any signs of stress such as wilting or discolored leaves.
Addressing Common Issues with Spanish Needles Relocation.
When is the best time to move spanish needles?
The ideal period to relocate spanish needles is during the S1-S2 season. This allows the plant to establish itself before harsh weather conditions.
What is the optimal distance between spanish needles plants when relocating?
Ensure you space spanish needles plants approximately 2-3 feet (60-90 cm) apart. This provides ample room for growth and air circulation.
I have a young spanish needles, can I move it?
Yes, young spanish needles can be relocated. However, ensure the plant is healthy and has developed a robust root system before moving.
How deep should I dig the hole when relocating spanish needles?
The hole should be twice as wide and as deep as the root ball. This enables the roots to spread and establish quickly.
What type of soil should I use for relocating spanish needles?
Relocate spanish needles into rich, well-drained soil. The soil should be loose and free of weeds or other competing plants.
How should I water spanish needles after relocating?
Water spanish needles thoroughly after relocating to settle the soil. Afterward, ensure it receives consistent moisture, but prevent waterlogging.
Should I add fertilizers or amendments when relocating spanish needles?
Amending your soil with organic matter can benefit spanish needles. However, excessive fertilizer can harm roots, so use sparingly and follow package directions.
Can I relocate spanish needles near other plants?
Yes, provided you maintain the optimal spacing of 2-3 feet (60-90 cm) between plants. This helps prevent overcrowding and disease.
My spanish needles wilted after relocation. What went wrong?
If spanish needles wilts after relocation, it may be experiencing transplant shock. Reduce sunlight, maintain adequate moisture, and allow it time to adapt.
What should I do if spanish needles starts turning yellow after relocating?
Yellowing leaves may indicate overwatering, nutrient deficiency, or disease. Adjust watering practices, add a slow-release fertilizer, and/or consult a gardening expert.


