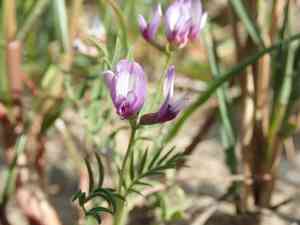
How to Transplant Alkali milkvetch?
Alkali milkvetch flourishes optimally when relocated during the initial to middle stages of spring, since the warming ground facilitates root development. Select a bright spot with soil that drains effectively to guarantee vigor and expansion. Provide sufficient distance between plants to prevent root rivalry.
Necessary Preparations Before Relocating Alkali Milkvetch?
Optimal Period for Relocating Alkali Milkvetch?
The best time to move alkali milkvetch is during early to mid-spring, as temperatures begin to rise and the ground becomes workable. Transplanting at this point allows the plant to develop a strong root system before the summer heat, promoting better establishment and resilience.
Recommended Spacing Between Alkali Milkvetch Plants?
Alkali milkvetch should be positioned 12-18 inches (30-45 cm) apart to provide ample room for growth and air circulation. This spacing helps prevent disease and encourages healthy development.
Ideal Soil Mixture for Alkali Milkvetch Relocation?
Alkali milkvetch thrives in soil that drains well, such as sandy or loamy types. Prior to transplanting, enrich the soil with a balanced, slow-release base fertilizer to support robust growth.
Preferred Location for Your Alkali Milkvetch?
Select a sunny location for relocating alkali milkvetch, as it flourishes in full sun. Ensure it receives at least 6 hours of direct sunlight daily to thrive.
Equipment Required Before Transplanting Alkali Milkvetch?
Gardening Gloves
To safeguard your hands while handling soil and the plant.
Spade or Shovel
For excavating the plant from its original spot and preparing the new planting hole.
Trowel
Useful for more precise digging tasks and managing soil around the root ball.
Watering Can or Hose
To hydrate the plant both before and after its relocation.
Pruning Shears
To trim any damaged or excessively long roots.
How to Extract Alkali Milkvetch from the Ground?
How to Extract Alkali Milkvetch from the Ground?
From Ground: First, moisten the soil around the alkali milkvetch plant by watering it. Next, dig a wide trench around the plant using a shovel or spade, ensuring the plant's root ball remains intact. Carefully work the spade beneath the root ball to lift the plant from its original position.From Pot: Water the alkali milkvetch plant thoroughly. Gently tap the pot's sides to loosen the soil and plant. Turn the pot sideways and carefully slide the plant out, supporting the root ball with your hand.From Seedling Tray: Water the alkali milkvetch seedlings. Use a trowel or your fingers to carefully lift each seedling, keeping as much of the root system intact as possible.
Step-by-Step Guide for Relocating Alkali Milkvetch
Prepare New Site
Select a spot with adequate sunlight and space for your alkali milkvetch plant to reach its full size. Ensure the soil is properly prepared for transplanting.
Digging Planting Hole
Excavate a hole in the new location that is slightly larger than the alkali milkvetch's root ball to provide ample room for root expansion.
Plant Placement
Position the alkali milkvetch plant into the hole, making sure the top of the root ball is level with or slightly above the ground. Backfill the hole with soil, gently compacting it around the root ball to remove air pockets.
Watering In
Thoroughly water the alkali milkvetch plant after transplanting to help settle the soil and aid the plant's adjustment to its new environment.
Add Mulch
Apply a layer of mulch around the base of the alkali milkvetch plant to help retain soil moisture and inhibit weed growth.
Post-Transplant Care for Alkali Milkvetch?
Watering
Maintain consistent moisture in the soil around the alkali milkvetch, avoiding sogginess, for the initial weeks after transplanting to encourage strong root development.
Monitoring
Regularly inspect the plant for any indications of stress or disease. Prompt action can prevent more severe issues.
Protection
Consider providing temporary shade or a windbreak if transplanting in hot or windy conditions to shield the plant during its acclimation period.
Pruning
Remove any damaged leaves or stems to reduce stress on the alkali milkvetch plant and stimulate healthy new growth.
Fertilizing
Allow a few weeks before applying any fertilizer, giving the plant time to recover from the move and develop new roots.
Addressing Common Issues with Alkali Milkvetch Transplantation.
When is the best time to transplant alkali milkvetch?
The optimal period for transplanting alkali milkvetch is early to mid-spring for superior outcomes.
What kind of soil is best for transplanting alkali milkvetch?
Utilize well-drained soil with a neutral to slightly alkaline pH for alkali milkvetch to flourish.
How much space should be between alkali milkvetch plants?
Ensure alkali milkvetch plants are spaced 12-18 inches (30-45 cm) apart for optimal growth.
What depth should I plant alkali milkvetch?
Plant alkali milkvetch at the same depth it was in its original containers or natural habitat.
How can I prevent transplant shock for alkali milkvetch?
Water alkali milkvetch thoroughly before and after transplanting, and minimize root disturbance.
How much water does alkali milkvetch require after transplanting?
Keep the soil consistently moist but not waterlogged, especially during the initial weeks post-transplant.
What if alkali milkvetchâs leaves turn yellow after transplanting?
Yellow leaves may signal overwatering or poor drainage; adjust irrigation practices accordingly.
How can I improve root establishment for alkali milkvetch?
Incorporate organic compost into the soil to enhance nutrient availability for alkali milkvetch's roots.
What is the ideal temperature range for transplanting alkali milkvetch?
Transplant alkali milkvetch when the soil temperature is between 55-75°F (13-24°C) for optimal results.
How can I protect alkali milkvetch from pests after transplanting?
Employ natural pest deterrents or physical barriers to safeguard alkali milkvetch from common pests like aphids and snails.


