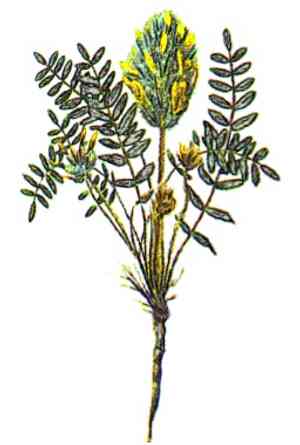
How to Transplant Widow's milkvetch?
Widow's milkvetch flourishes when relocated during the mild seasons of early to mid-spring or mid-autumn. For best development, select a bright spot with soil that drains effectively. Guarantee minimal disruption to the root system to aid widow's milkvetch in settling effortlessly into its new environment.
What Preparations are Needed Before Transplanting Widow's Milkvetch?
What is the Ideal Time for Transplanting Widow's Milkvetch?
Widow's milkvetch should ideally be moved in early to mid-spring or mid-fall. These periods provide mild temperatures and sufficient soil moisture, which are vital for root establishment. Relocating during these times enhances the plant's adaptation and development, ensuring strong health and resilience.
How Much Space Should You Leave Between Widow's Milkvetch Plants?
For widow's milkvetch, ensure a separation of 12-18 inches (30-45 cm) between each plant. This provides ample room for growth without competition for nutrients and sunlight.
What is the Best Soil Mix for Widow's Milkvetch Transplanting?
Prepare well-draining soil for widow's milkvetch, ideally a sandy-loam blend. Incorporating compost or a balanced base fertilizer can enrich the soil for improved growth.
Where Should You Relocate Your Widow's Milkvetch?
Place widow's milkvetch in a spot that receives full sunlight, at least 6-8 hours daily. This ensures they get the energy required for optimal development.
What Equipments Should You Prepare Before Transplantation Widow's Milkvetch?
Gardening Gloves
To safeguard your hands while handling soil and widow's milkvetch.
Shovel or Spade
To excavate holes and trenches for relocating widow's milkvetch.
Watering Can or Hose
To supply water during the relocation process.
Trowel
To carefully dig around and lift the widow's milkvetch from its initial spot.
Wheelbarrow or Bucket
To move widow's milkvetch from its old location to its new one.
Stakes and Twine
To support the plant if necessary during its adjustment period.
Mulch
To help maintain soil moisture after relocation.
How Do You Remove Widow's Milkvetch from the Soil?
How Do You Remove Widow's Milkvetch from the Soil?
From Ground: First, hydrate the widow's milkvetch to moisten the soil. Then, dig a wide trench around the plant using a shovel or spade, ensuring the plant's root ball stays intact. Carefully work the spade beneath the root ball to lift the plant from its original spot.From Pot: Gently water the widow's milkvetch to dampen the soil. Tilt the pot and tap its sides to loosen the soil. Hold the plant's base and carefully slide it out of the pot, keeping the root ball whole. If the plant resists, use a trowel to loosen the soil around the edges.From Seedling Tray: Lightly water the seedlings. Use a trowel or a small spatula to gently lift each seedling from the tray, ensuring to retain as much soil around the root ball as possible. Handle the seedlings by their leaves or roots, not their delicate stems.
Step-by-Step Guide for Transplanting Widow's Milkvetch
Preparation
Prepare the new site by digging a hole twice the width and equal depth of the widow's milkvetch's root ball.
Removal
Carefully extract the widow's milkvetch from its original location using the appropriate method described above.
Placement
Position the widow's milkvetch in the center of the hole and gently spread out its roots. Ensure the top of the root ball is level with the surrounding soil.
Backfilling
Fill the hole with soil, pressing gently but firmly around the root ball to eliminate air pockets.
Watering
Water the widow's milkvetch deeply after planting to help settle the soil and encourage root establishment.
Mulching
Apply a layer of mulch around the base of the widow's milkvetch, avoiding direct contact with the stem to prevent rot.
How Do You Care For Widow's Milkvetch After Transplanting?
Watering
Keep the soil around the widow's milkvetch consistently moist, but not waterlogged, for the initial weeks after transplanting to help establish strong roots.
Support
Use stakes and twine to provide support if the widow's milkvetch shows signs of leaning or instability.
Inspecting
Regularly check the widow's milkvetch for signs of stress such as wilting or yellowing leaves, and adjust care accordingly.
Weeding
Keep the area around the widow's milkvetch free from weeds to reduce competition for nutrients and water.
Monitoring
Observe the growth and health of the widow's milkvetch, adjusting care based on its response to the new environment.
Troubleshooting Common Issues with Widow's Milkvetch Transplantation.
When is the best time to transplant widow's milkvetch?
The best time for relocating widow's milkvetch is early spring, mid spring, or mid fall.
How much spacing should I give between plants?
Ensure 12-18 inches (30-45 cm) of space between each widow's milkvetch plant for optimal growth.
How do I prepare the soil for transplanting widow's milkvetch?
Loosen and enrich the soil with compost or organic matter to help widow's milkvetch thrive.
What precautions should I take when transplanting widow's milkvetch?
Handle the roots gently to avoid damage and water the plant immediately after transplanting.
How often should I water widow's milkvetch after transplanting?
Water widow's milkvetch regularly during the initial weeks to keep the soil consistently moist but not soggy.
What type of light does widow's milkvetch need after transplanting?
Plant widow's milkvetch in a location with full sunlight for at least 6 hours daily.
How can I avoid transplant shock in widow's milkvetch?
Acclimate widow's milkvetch to its new environment by gradually exposing it to outdoor conditions.
What should the temperature be during widow's milkvetch's transplantation?
Ideal temperatures for transplanting widow's milkvetch are between 50°F-70°F (10°C-21°C).
Can I mulch around widow's milkvetch after transplanting?
Yes, mulching helps retain moisture and control weeds; just keep it away from the stem.
What should I do if widow's milkvetch appears wilted after transplanting?
Ensure proper watering, reduce sun exposure temporarily, and avoid fertilizing until recovery.


