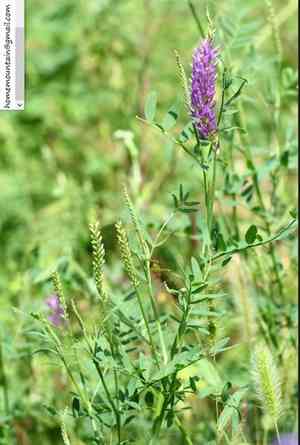
How to Transplant Laxmann's milkvetch?
Laxmann's milkvetch flourishes when relocated from the beginning to the end of spring, since mild temperatures aid in root development. Select areas with ample sunlight or partial shade and soil that drains effectively to guarantee a successful transfer. Steer clear of excessively damp sites to avert root decay.
Necessary Preparations Before Relocating Laxmann's Milkvetch?
Optimal Period for Relocating Laxmann's Milkvetch?
Laxmann's milkvetch, being a perennial, is best moved from the beginning to the end of spring. This timeframe ensures ideal soil temperature, moisture levels, and sunlight exposure, promoting strong root development and growth. Transplanting in spring allows laxmann's milkvetch a full growing season to acclimate, reducing stress and maximizing its health and vigor for subsequent years.
Required Spacing Between Laxmann's Milkvetch Plants?
When relocating laxmann's milkvetch, ensure each plant is positioned 18-24 inches (45-60 cm) apart. This spacing provides ample room for expansion, preventing overcrowding and encouraging robust development.
Ideal Soil Blend for Laxmann's Milkvetch Relocation?
For laxmann's milkvetch, prepare well-draining soil consisting of sand, loam, and organic matter. Prior to transplanting, enrich the soil with a phosphorus-rich base fertilizer to aid root growth. A balanced 10-10-10 (N-P-K) fertilizer is suitable.
Preferred Location for Moving Your Laxmann's Milkvetch?
Select a sunny spot for relocating laxmann's milkvetch. This plant flourishes best in full sun, so choose an area that receives at least 6 hours of direct sunlight daily. Avoid overly shaded locations, as they can impede its growth.
Equipment Needed Before Relocating Laxmann's Milkvetch?
Gardening Gloves
To safeguard your hands while handling soil and plants.
Shovel or Spade
For excavating around the plant and creating a new planting site.
Garden Trowel
For precise digging and careful handling of soil and plant root systems.
Wheelbarrow or Garden Cart
To facilitate easier movement of the plant and soil.
Pruning Shears
To trim any damaged or excessively long roots.
Watering Can or Hose
For hydrating the plant before and after its relocation.
Mulch
To assist in retaining soil moisture post-transplantation.
Stakes and Ties
To provide support for the plant if necessary, especially for taller varieties.
How to Extract Laxmann's Milkvetch from the Ground?
How to Extract Laxmann's Milkvetch from the Ground?
From Ground: First, hydrate the laxmann's milkvetch plant to moisten the soil. Next, excavate a wide trench around the plant using a shovel or spade, ensuring the plant's root ball remains intact. Carefully maneuver the spade beneath the root ball to lift the plant from its original position.From Pot: Water the laxmann's milkvetch plant thoroughly to simplify soil removal. Gently tilt the pot on its side and carefully slide the plant out, supporting the root ball with your hands.From Seedling Tray: Water the seedlings well before removal. Use a garden trowel to carefully lift each seedling from the tray, taking care to include as much of the root system as possible.
Detailed Instructions for Relocating Laxmann's Milkvetch
Site Preparation
Prepare the new planting area by loosening the soil and clearing any weeds or debris.
Digging the Hole
Excavate a hole in the new spot that is twice as wide and equally deep as the root ball of your laxmann's milkvetch plant.
Plant Placement
Position the laxmann's milkvetch plant in the hole, ensuring the top of the root ball is level with the surrounding soil. Backfill around the root ball with soil, gently pressing to eliminate air pockets.
Watering
Thoroughly water the plant to help the soil settle around the roots.
Staking
If needed, use stakes and ties to support the plant, ensuring it stays upright and stable as it establishes in its new location.
Mulching
Apply a layer of mulch around the plant's base to help retain moisture and suppress weeds.
Post-Relocation Care for Laxmann's Milkvetch?
Watering
Keep the soil around the laxmann's milkvetch consistently moist, but not waterlogged, for the initial weeks after transplanting to aid in strong root development.
Monitoring
Regularly inspect the plant for any indications of stress such as wilting or yellowing leaves and address any issues promptly.
Pruning
Remove any damaged or dead foliage to direct the plant's energy towards healthy growth.
Resolving Common Issues with Laxmann's Milkvetch Relocation.
When is the best time to relocate laxmann's milkvetch?
The optimal period to move laxmann's milkvetch is from early spring to late spring.
How should I prepare the soil for relocating laxmann's milkvetch?
Loosen the soil and incorporate compost for improved root establishment and nutrient availability.
What is the ideal spacing for planting laxmann's milkvetch?
Space your laxmann's milkvetch plants 18-24 inches (45-60 cm) apart to allow sufficient growth.
How deeply should I plant laxmann's milkvetch during relocation?
Plant laxmann's milkvetch at the same depth it was in its original container.
Should I water laxmann's milkvetch immediately after relocating?
Yes, thoroughly water laxmann's milkvetch right after transplanting to help it settle into the new soil.
How can I protect laxmann's milkvetch from transplant shock?
Water well after transplanting and avoid disturbing the roots to minimize transplant shock.
What type of fertilizer should I use for laxmann's milkvetch post-relocation?
Use a balanced, slow-release fertilizer to support laxmann's milkvetch's growth without stressing it.
Can I relocate laxmann's milkvetch in full sun?
Yes, laxmann's milkvetch thrives in full sun, so choose a sunny spot for transplanting.
What should I do if the leaves of laxmann's milkvetch turn yellow after relocating?
Ensure laxmann's milkvetch isn't overwatered and check for signs of root damage or nutrient deficiency.
How long does it take for laxmann's milkvetch to establish after relocating?
It typically takes a few weeks to a couple of months for laxmann's milkvetch to establish.


