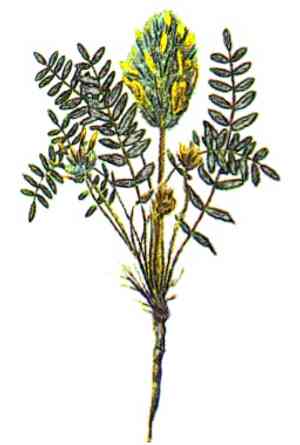
How to Transplant Russian milkvetch?
The optimal period for relocating russian milkvetch spans from the beginning to the end of spring, enabling the specimen to settle prior to the warmth of summer. Select a bright spot featuring soil that drains effectively to foster robust development. Refrain from moving the plant during severe climatic events.
Essential Preparations Before Relocating Russian Milkvetch
Optimal Period for Relocating Russian Milkvetch?
Russian milkvetch, a perennial, is best moved from early to late spring, when ground temperatures rise and frost risk lessens. This timing promotes strong root development, improves nutrient absorption, and minimizes transplant shock, laying a solid groundwork for healthy seasonal growth.
Recommended Spacing Between Russian Milkvetch Plants?
For optimal development, position your russian milkvetch plants approximately 18-24 inches (45-60 cm) apart. This provides ample room for them to expand and flourish without overcrowding.
Best Soil Blend for Russian Milkvetch Relocation?
Prepare well-draining soil with a neutral pH. Incorporate compost or a balanced fertilizer to enhance nutrient levels. This aids russian milkvetch in establishing robust roots.
Ideal New Location for Your Russian Milkvetch?
Select a sunny spot for your russian milkvetch; it thrives in full sun for at least 6-8 hours daily. This helps ensure vigorous and healthy development.
Equipment Needed Before Relocating Russian Milkvetch?
Gardening Gloves
To safeguard your hands while handling soil and the plant.
Spade or Shovel
For excavating the soil and creating a hole for relocation.
Watering Can
To hydrate the plant before and after its move.
Trowel
For more precise digging around the plant's root system.
Planting Stakes
To offer support to the plant if required.
Mulch
To maintain soil moisture post-relocation.
Garden Fork
To loosen the soil surrounding the plant's roots.
How to Extract Russian Milkvetch from the Ground?
How to Extract Russian Milkvetch from the Ground?
From Ground: Hydrate the russian milkvetch plant to moisten the soil. Dig a wide trench around the plant using a spade or shovel, ensuring the plant's root ball remains intact. Carefully slide the spade beneath the root ball and lift the plant from the ground.From Pot: Water the russian milkvetch plant to loosen the soil. Gently tap the pot's sides to separate the soil from its walls. Tilt the pot sideways and carefully slide the plant out while supporting its base. Handle the root ball gently to prevent damage.From Seedling Tray: Water the seedlings to loosen the soil. Use a trowel or your fingers to carefully lift each seedling from the tray, supporting its root system. Handle the seedlings with care to avoid root breakage.
Detailed Steps for Relocating Russian Milkvetch
Prepare the New Location
Choose a site with appropriate conditions for russian milkvetch. Dig a hole twice as wide and the same depth as the plant's root ball.
Improve the Soil
Incorporate compost or organic material into the hole to enhance soil fertility and ensure proper drainage.
Relocate the Plant
Position the russian milkvetch plant in the hole, ensuring it sits at the same depth as in its original spot. Backfill the hole with soil, gently compacting it around the root ball to remove air pockets.
Water Thoroughly
Water the russian milkvetch plant generously immediately after relocation to help settle the soil around its roots.
Apply Mulch Around the Plant
Spread a layer of mulch around the base of the russian milkvetch plant to retain moisture and reduce weed competition.
Stake if Necessary
If the plant is tall or top-heavy, use stakes to provide support and prevent it from falling over.
Post-Relocation Care for Russian Milkvetch
Watering
Keep the soil around the russian milkvetch consistently moist, but not waterlogged, for the initial weeks after relocation to aid in strong root establishment.
Monitoring
Regularly check for signs of distress such as wilting or yellowing leaves. Adjust watering and inspect for pests if these symptoms appear.
Weeding
Maintain the area around the russian milkvetch free from weeds, as they can compete with your plant for nutrients and water.
Fertilizing
After a few weeks, once the plant is established, you can begin light fertilization to encourage growth.
Resolving Common Issues with Russian Milkvetch Relocation.
When is the optimal time to relocate russian milkvetch?
Relocate russian milkvetch from early spring to late spring for best growth and establishment.
How deep should I plant russian milkvetch?
Plant russian milkvetch at the same depth it was growing in its initial location to prevent root stress.
What is the ideal spacing between relocated russian milkvetch plants?
Space each russian milkvetch plant 18-24 inches (45-60 cm) apart to ensure sufficient room for growth.
How should I prepare the soil for relocating russian milkvetch?
Enrich the soil with organic matter and ensure good drainage to help russian milkvetch flourish.
How do I prevent root damage when relocating russian milkvetch?
Gently dig around and lift the plant, preserving as much of the root ball as possible.
How much water does russian milkvetch require after relocation?
Water russian milkvetch thoroughly after relocation, then keep the soil consistently moist but not saturated.
Should I prune russian milkvetch after relocation?
Lightly trim damaged or oversized roots and any broken stems to reduce stress on russian milkvetch.
What should I do if russian milkvetch shows signs of transplant shock?
Provide additional care, such as more frequent watering and temporary shade, until russian milkvetch recovers.
How do I safeguard newly relocated russian milkvetch from pests?
Monitor russian milkvetch regularly and use natural pest deterrents or barriers to prevent infestation.
How can I ensure successful establishment of russian milkvetch after relocation?
Mulch around russian milkvetch to retain moisture, suppress weeds, and moderate soil temperature for better establishment.


