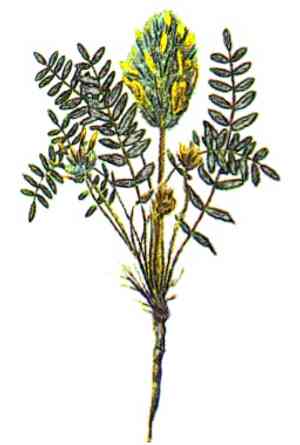
How to Propagate Russian milkvetch?
Originating from the steppes of Eurasia, russian milkvetch flourishes in adequately drained ground under direct sunlight. For propagation, gently abrade the seeds to enhance their sprouting success and plant them just below the soil's top layer. Keep the soil consistently damp, yet prevent it from becoming saturated. Ensuring ample airflow will help prevent fungal infections. It's worth noting that newly harvested seeds exhibit superior germination compared to aged ones. Since russian milkvetch is a nitrogen-fixing leguminous plant, very little additional nutrient enrichment is necessary.
Optimal Period for Russian Milkvetch Propagation
Propagation Method
Seeding
Propagation Period
Spring
Tools Utilized in Russian Milkvetch Propagation
Seed Trays
Seed trays offer a controlled setting for germinating russian milkvetch seeds. They aid in organizing seeds and ensuring sufficient moisture and warmth.
Potting Mix
A well-draining potting mix is crucial for sowing russian milkvetch seeds. It ensures excess water drains, preventing rot while maintaining necessary moisture for germination.
Misting Spray Bottle
A misting spray bottle evenly applies water to seed trays without disturbing seeds. This tool helps maintain consistent moisture levels, vital for russian milkvetch germination.
Humidity Dome
Humidity domes retain moisture and create a warm environment, speeding up russian milkvetch germination. Maintaining proper humidity boosts germination success.
Heat Mat
A heat mat beneath seed trays provides bottom warmth, promoting quicker and more uniform russian milkvetch germination. This is especially useful in cooler climates.
Seed Dibber
A seed dibber helps create small, consistent holes for placing seeds at the correct depth in trays. Proper seed placement is key for optimal russian milkvetch growth.
Labels and Markers
Labels and markers are essential for tracking different batches and varieties of russian milkvetch being propagated. They help gardeners monitor progress and maintain organization in seed trays.
Grow Lights
If natural light is insufficient or inconsistent, grow lights provide the necessary light spectrum for russian milkvetch seedlings to grow strong and healthy. Proper lighting is vital for photosynthesis and healthy seedling development.
Sterilized Tools
Using sterilized tools, such as pruners or knives, ensures russian milkvetch seeds and seedlings are not exposed to disease-causing pathogens. Sterilization is crucial for maintaining plant health.
How to Propagate Russian Milkvetch
Propagation Difficulty
Simple
Caring for Your Newly Propagated Russian Milkvetch
Caring for Your Newly Propagated Russian Milkvetch
After propagating russian milkvetch, provide consistent watering to keep the soil slightly damp, especially during dry spells. Fertilize lightly with a balanced, low-nitrogen fertilizer to encourage healthy growth. Apply mulch around the plant bases to conserve moisture and suppress weeds. Monitor for pests and diseases, and take appropriate action if necessary. With proper care, russian milkvetch will establish and flourish in your garden.
Common Errors to Avoid When Propagating Russian Milkvetch
Overwatering
Excessive moisture can lead to root rot and fungal infections. Russian milkvetch prefers well-drained soil; too much water can suffocate roots.
Poor Soil Quality
Using overly rich or heavy soil can hinder proper root development. Russian milkvetch thrives in well-drained, sandy or gritty soil.
Improper Light Conditions
Planting in too much shade can result in weak growth. Russian milkvetch requires full sunlight for healthy development.
Incorrect Seed Handling
Failure to stratify or scarify seeds can lead to low germination rates. Russian milkvetch seeds often need specific treatments to break dormancy.
Neglecting Pest Control
Ignoring pests can cause significant damage. Aphids, spider mites, and other pests are common and require management.
Tips for Propagating Russian Milkvetch
Use Well-Drained Soil
Select a sandy or gritty potting mix to mimic russian milkvetch's natural habitat and prevent waterlogging.
Stratify Seeds
Replicate natural winter conditions by cold stratifying seeds for several weeks to enhance germination rates.
Scarify Seeds
Lightly nick the seed coat with a file or sandpaper to allow moisture penetration and encourage sprouting.
Full Sun Exposure
Russian milkvetch needs at least 6 hours of direct sunlight daily. Place in a sunny spot for optimal growth.
Regular Monitoring
Inspect plants frequently for pests and diseases. Early detection and treatment can prevent severe infestations.
Watering Technique
Water the soil thoroughly but infrequently. Ensure the top inch of soil dries out between waterings to prevent root rot.


