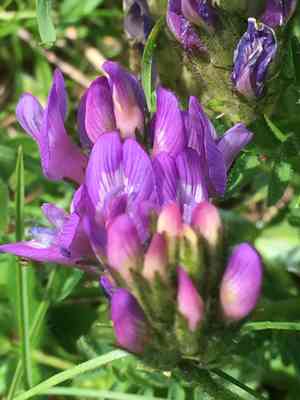
How to Transplant Purple milk-vetch?
The ideal period for transplanting purple milk-vetch spans from the onset of early spring through the longer days of late spring, facilitating robust root development. Position purple milk-vetch in soil that drains effectively and receives ample sunlight. Should it be required, enrich the soil with organic material to enhance its vigor.
What Preparations are Necessary Before Relocating Purple Milk-vetch?
What is the Optimal Period for Moving Purple Milk-vetch?
The perfect time for relocating purple milk-vetch is when winter's chill gives way to warmth, typically from early March to late May. Moving them during this window leverages the peak growing season, providing purple milk-vetch with the ideal balance of cool roots and warming soil, promoting root establishment and growth before summer's heat intensifies.
How Much Space Should Be Allotted Between Purple Milk-vetch Plants?
When relocating your purple milk-vetch, aim to provide each plant with approximately 6-12 inches (15-30 cm) of clearance. This spacing ensures they have sufficient soil nutrients and adequate air circulation.
What is the Best Soil Blend for Purple Milk-vetch Relocation?
For purple milk-vetch, prepare an area with soil that drains well and is rich in organic matter. Before transplanting, incorporate a balanced, slow-release fertilizer to give your purple milk-vetch an excellent start!
Where Should You Replant Your Purple Milk-vetch?
Select a location where your purple milk-vetch can receive full sunlight for the majority of the day. These plants thrive in sun, so aim for a spot that gets at least 6 hours of direct sunlight daily.
What Equipment Should You Prepare Before Transplanting Purple Milk-vetch?
Gardening Gloves
To safeguard your hands while handling soil and plants.
Spade or Shovel
For excavating the plant and the new planting site.
Garden Fork
To loosen the soil around the roots and aid in soil aeration.
Hand Trowel
Useful for smaller relocation tasks or precise adjustments.
Watering Can or Hose
To hydrate the plant before and after its move.
Pruning Shears
To trim any damaged roots or shoots.
Wheelbarrow
To transport the plant and soil if necessary.
Organic Mulch
To help maintain soil moisture after relocation.
How Do You Extract Purple Milk-vetch from the Soil?
How Do You Extract Purple Milk-vetch from the Soil?
From Ground: Start by watering the purple milk-vetch plant to soften the soil. Using a spade or shovel, dig a wide circle around the plant to prevent damage to the root ball. Insert the spade beneath the root ball and gently lift the plant from the ground.From Pot: Water the purple milk-vetch thoroughly, then turn the pot on its side and gently tap the bottom to dislodge the plant. Support the plant's base with your hand as you carefully slide it out, ensuring the root ball remains as intact as possible.From Seedling Tray: Water the seedlings prior to transplanting. Use a hand trowel to carefully lift each purple milk-vetch seedling, making sure to include the surrounding soil to protect the root system.
Step-by-Step Guide for Relocating Purple Milk-vetch
Prepare the Plant
Water the purple milk-vetch thoroughly before starting the relocation to minimize shock and help the root ball stay intact.
Dig the New Hole
Make the new hole twice as wide as the root ball and the same depth, loosening the soil at the bottom with a garden fork.
Root Pruning
Use pruning shears to snip off any damaged or excessively long roots, promoting healthier growth.
Placing the Plant
Carefully position the purple milk-vetch in the prepared hole, ensuring it's at the same level it was previously growing.
Backfill the Hole
Gently backfill the hole with soil, firming it around the roots to eliminate air pockets.
Water Immediately
Water the purple milk-vetch well to settle the soil and provide essential hydration for the roots.
How Do You Care For Purple Milk-vetch After Relocation?
Watering
Ensure the soil around the purple milk-vetch stays consistently moist to encourage new root development.
Mulching
Apply a layer of organic mulch around the base to help retain moisture and regulate soil temperature.
Pruning
Trim away any damaged or withered foliage to redirect the purple milk-vetch's energy into establishing new roots.
Monitoring
Keep a close watch on the plant's health, looking for signs of stress or disease, and intervene as needed.
Troubleshooting Common Issues with Purple Milk-vetch Relocation.
What's the ideal time for relocating purple milk-vetch?
Relocate purple milk-vetch during the prime period of early to late spring when growth is just commencing.
How far apart should I space purple milk-vetch when relocating?
Allow purple milk-vetch ample room to thrive by spacing them 6-12 inches (15-30 cm) apart.
Why is my purple milk-vetch wilting after relocation?
Wilting may indicate stress. Ensure the soil is moist and the plant is shielded from intense midday sun.
Should I fertilize purple milk-vetch right after relocating?
Wait a few weeks before fertilizing to allow purple milk-vetch to settle into its new environment.
How much should I water purple milk-vetch post-relocation?
Water generously immediately after relocating, then adjust to moderate watering as the plant acclimates.
Why are the leaves of my purple milk-vetch turning yellow?
Yellowing leaves can signal overwatering or inadequate drainage. Inspect and improve soil conditions.
Is it acceptable to relocate purple milk-vetch during summer or fall?
For best results, relocate during early to late spring, avoiding extreme temperatures.
Can purple milk-vetch tolerate relocation in cold soil?
Relocating purple milk-vetch into cold soil risks shock; wait until the soil warms slightly in spring.
How deep should I plant purple milk-vetch in its new spot?
Plant purple milk-vetch at the same depth as it was in its previous location for optimal outcomes.
What should I do if purple milk-vetch shows signs of relocation shock?
Keep the soil moist, provide shade, and refrain from fertilizing until signs of recovery are apparent.


