How to Transplant Aster diplostephioides?
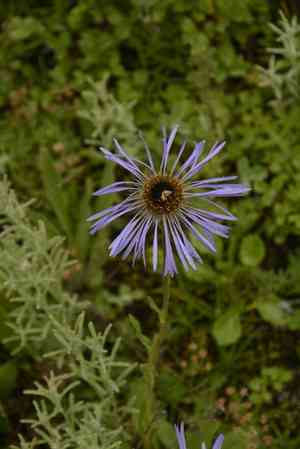
The optimal period for relocating aster diplostephioides is at the commencement of the cultivation cycle, when temperatures are moderate and the ground is pliable. Select a location that receives full sun or partial shade, featuring soil that drains effectively, to guarantee successful rooting.
What Preparations are Needed Before Transplanting Aster Diplostephioides?
What is the Ideal Time for Transplanting Aster Diplostephioides?
Aster diplostephioides should ideally be moved in early to mid-spring for best growth. Moving them then uses the plant's natural cycle, letting roots set before summer heat. This timing boosts root growth and improves the plant's strength and flowering, ensuring a healthy, vibrant perennial garden.
How Much Space Should You Leave Between Aster Diplostephioides Plants?
When relocating aster diplostephioides, ensure each plant is spaced 18-24 inches (45-60 cm) apart. This provides ample room for development and promotes good air circulation, lowering disease risk.
What is the Best Soil Mix for Aster Diplostephioides Transplanting?
Prepare well-draining soil enriched with compost or organic matter for aster diplostephioides. The soil pH should be slightly acidic to neutral. Incorporate a balanced base fertilizer, such as 10-10-10, to support robust growth.
Where Should You Relocate Your Aster Diplostephioides?
Aster diplostephioides thrives best in full sun, so select a garden spot that gets at least 6-8 hours of sunlight daily. This will ensure vibrant blooms and strong plant health.
What Equipments Should You Prepare Before Transplantation Aster Diplostephioides?
Gardening Gloves
To shield your hands while handling soil and plants.
Hand Trowel
For digging and loosening earth around the plant's roots.
Shovel
To excavate the new planting site for the plant.
Watering Can or Hose
To hydrate the plant before and after its relocation.
Garden Fork
For aerating the soil around the plant if it's being removed from the ground.
How Do You Remove Aster Diplostephioides from the Soil?
How Do You Remove Aster Diplostephioides from the Soil?
From Ground: First, moisten the aster diplostephioides plant's soil. Then, dig a wide trench around the plant with a shovel or spade, keeping the root ball intact. Carefully work the spade beneath the root ball to lift the plant from its original spot.From Pot: Water the plant thoroughly and allow drainage. Gently tilt the pot and tap its sides to loosen the soil. Slide the plant out, supporting the base carefully. Avoid pulling the plant to prevent root damage.From Seedling Tray: Water seedlings before removal. Use a hand trowel or fingers to gently lift seedlings from the tray, holding them by the leaves, not the stem, to prevent harm.
Step-by-Step Guide for Transplanting Aster Diplostephioides
Prep the New Site
Dig a hole twice as wide and as deep as the aster diplostephioides root ball. This provides ample room for roots to spread and grow.
Remove the Plant
Using the method suitable for the plant's initial location, carefully extract the plant, ensuring the root ball remains intact.
Inspect the Roots
Examine the roots of aster diplostephioides for any signs of disease or damage. Trim off any dead or compromised roots with sanitized scissors.
Planting
Position the aster diplostephioides in the center of the hole. The top of the root ball should be level with the ground. Backfill the hole with soil, gently firming it around the roots.
Watering
Thoroughly water the plant after planting. This helps settle the soil around the roots and eliminates air pockets.
How Do You Care For Aster Diplostephioides After Transplanting?
Watering
Keep the soil around aster diplostephioides consistently moist, but not waterlogged, for the initial weeks post-transplant to aid in strong root establishment.
Mulching
Apply a layer of mulch around the base of aster diplostephioides to help retain moisture and deter weeds.
Monitoring
Regularly check the plant for signs of stress like wilting or yellowing leaves, and adjust care as needed.
Support
Depending on the size and type of aster diplostephioides, consider providing a stake or other support to help the plant stay upright and stable as it settles into its new spot.
Troubleshooting Common Issues with Aster Diplostephioides Transplantation.
When is the best time to transplant aster diplostephioides?
Early to mid-spring is ideal for moving aster diplostephioides for optimal growth and development.
How far apart should I space aster diplostephioides plants?
Space aster diplostephioides plants 18-24 inches (45-60 cm) apart to allow for proper growth.
How should I prepare the soil for transplanting aster diplostephioides?
Ensure soil is well-drained and enriched with compost for healthy root development of aster diplostephioides.
What kind of weather conditions are best for transplanting aster diplostephioides?
Move aster diplostephioides on a cloudy day or during cooler temperatures to reduce transplant shock.
How deep should I plant aster diplostephioides seedlings?
Plant aster diplostephioides seedlings at the same depth they were growing in their original containers.
Should I water aster diplostephioides immediately after transplanting?
Yes, water aster diplostephioides thoroughly right after transplanting to help them settle into the new soil.
How can I reduce transplant shock for aster diplostephioides?
Water thoroughly and provide partial shade for the first few days to reduce transplant shock for aster diplostephioides.
Can I use mulch around aster diplostephioides after transplanting?
Yes, apply mulch around aster diplostephioides to retain moisture and suppress weeds, keeping it away from stems.
Do I need to fertilize aster diplostephioides after transplanting?
Fertilize a few weeks after moving aster diplostephioides to avoid burning their roots initially.
How long does it take for aster diplostephioides to establish after transplanting?
It usually takes a few weeks for aster diplostephioides to establish and show new growth after transplanting.



