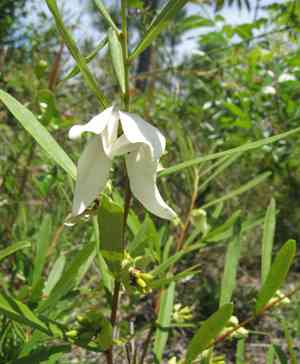
How to Transplant Slimleaf pawpaw?
As the soil warms and moisture levels rise, slimleaf pawpaw flourishes when relocated between early and mid-spring. Select a site that receives full sun or partial shade and features soil with good drainage. Proper attention guarantees a seamless adjustment for this enduring plant.
What Preparations are Needed Before Transplanting Slimleaf Pawpaw?
What is the Ideal Time for Transplanting Slimleaf Pawpaw?
The best period for relocating slimleaf pawpaw is from early to mid-spring when the ground is warming yet moisture levels remain high. Moving it during this time allows slimleaf pawpaw to establish roots prior to the intense summer heat. Advantages include reduced shock from transplanting and improved growth and survival rates.
How Much Space Should You Leave Between Slimleaf Pawpaw Plants?
When relocating slimleaf pawpaw, position each plant 8-12 feet (2.4-3.7 meters) apart to provide ample room for development. This generous spacing promotes proper air circulation and healthy growth.
What is the Best Soil Mix for Slimleaf Pawpaw Transplanting?
Prepare the soil by ensuring it drains well and is slightly acidic to neutral (pH 5.5-7.0). Incorporate a base fertilizer rich in organic matter to nourish slimleaf pawpaw's roots. Compost or aged manure works wonders!
Where Should You Relocate Your Slimleaf Pawpaw?
Select a sunny spot for slimleaf pawpaw to flourish. It requires full sun to partial shade, so aim for at least 6 hours of direct sunlight daily. This aids in robust growth and fruit production.
What Equipments Should You Prepare Before Transplantation Slimleaf Pawpaw?
Gardening Gloves
To safeguard your hands while handling soil and the plant.
Shovel or Spade
To excavate around the plant and create a new planting hole.
Hand Trowel
For more precise digging and soil adjustments.
Watering Can or Hose
To hydrate the plant before and after its relocation.
Buckets or Containers
To move the plant if transporting it a greater distance.
Mulch
To help maintain soil moisture and regulate temperature at the new location.
How Do You Remove Slimleaf Pawpaw from the Soil?
How Do You Remove Slimleaf Pawpaw from the Soil?
From Ground: First, water the slimleaf pawpaw plant to moisten the soil. Then, dig a wide trench around the plant using a shovel or spade, ensuring the plant's root ball stays intact. Carefully work the spade beneath the root ball to lift the plant from its original spot.From Pot: Gently tap the pot's sides to loosen the soil. Tilt the pot and slowly slide the slimleaf pawpaw plant out, holding it by the stem's base. Be careful not to harm the roots.From Seedling Tray: Water the seedlings thoroughly a few hours before transplanting. Use a hand trowel to gently lift each slimleaf pawpaw plant from the tray, supporting its root ball with your hand.
Step-by-Step Guide for Transplanting Slimleaf Pawpaw
Site Preparation
Prepare the new site by loosening the soil and digging a hole that is twice as wide and the same depth as the slimleaf pawpaw plant's root ball.
Root Prep
If the roots are tightly wound or pot-bound, gently separate them to encourage spreading in the new location.
Planting
Place the slimleaf pawpaw plant in the hole, ensuring it is at the same depth as it was in its previous spot. Backfill the hole with soil, taking care to eliminate air pockets.
Watering
Immediately water the newly planted slimleaf pawpaw thoroughly to settle the soil around its roots.
Mulching
Apply a layer of mulch around the plant's base, but not touching the stem, to help retain moisture.
How Do You Care For Slimleaf Pawpaw After Transplanting?
Watering
Keep the soil around the slimleaf pawpaw consistently moist, but not waterlogged, for the initial weeks post-transplant to aid in strong root establishment.
Protection
Shield the slimleaf pawpaw plant from harsh weather conditions by providing temporary shade or windbreaks if necessary.
Monitoring
Regularly inspect the plant for signs of stress, such as wilting or yellowing leaves, and adjust care as needed.
Weeding
Keep the area surrounding the slimleaf pawpaw plant free of weeds to reduce competition for nutrients and water.
Troubleshooting Common Issues with Slimleaf Pawpaw Transplantation.
When is the best time to transplant slimleaf pawpaw?
The optimal period to transplant slimleaf pawpaw is from early to mid-spring.
How far apart should I space slimleaf pawpaw plants?
For ideal growth, space slimleaf pawpaw plants 8-12 feet (2.4-3.7 meters) apart.
What soil conditions are ideal for transplanting slimleaf pawpaw?
Slimleaf pawpaw thrives in well-draining, slightly acidic to neutral soil.
How deep should the hole be for slimleaf pawpaw transplanting?
The hole should be twice as wide and match the root ball's depth.
How should I prepare slimleaf pawpaw before transplanting?
Water the plant thoroughly the day before relocation to facilitate root movement.
What watering schedule should I follow after transplanting slimleaf pawpaw?
Water slimleaf pawpaw deeply once a week, ensuring consistent soil moisture without over-saturation.
How can I protect slimleaf pawpaw from transplant shock?
Use mulch around the base and avoid direct sunlight immediately after transplanting.
Should I use fertilizer when transplanting slimleaf pawpaw?
Refrain from using fertilizer immediately; wait at least 2-3 weeks post-transplant.
What signs indicate transplanting issues in slimleaf pawpaw?
Wilting leaves, stunted growth, or yellowing may signal transplant problems in slimleaf pawpaw.
Can I transplant slimleaf pawpaw in full sun?
Slimleaf pawpaw prefers partial shade; transplanting in full sun might cause stress.


