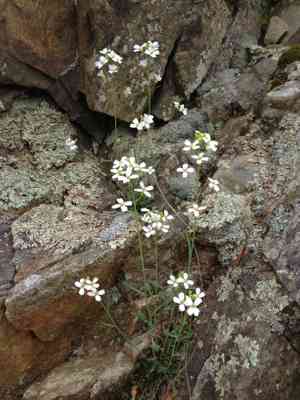
How to Transplant Lyreleaf rockcress?
For Arabis lyrata, the optimal transplanting window occurs from the beginning to the end of spring, utilizing the temperate climate for root development. Select a location with good drainage and abundant sunshine, and gradually introduce it to external environments if it was previously kept indoors in a container.
What Preparations are Needed Before Transplanting Lyreleaf Rockcress?
What is the Ideal Time for Transplanting Lyreleaf Rockcress?
The optimal period for relocating lyreleaf rockcress spans from the start of spring to the beginning of summer. Moving lyreleaf rockcress during this fertile window allows it to establish roots firmly before winter, utilizing the prime growth conditions of spring rains and longer days, building resilience for future seasonal cycles. This timing ensures lyreleaf rockcress has ample opportunity to adapt to its new spot, under gentle sunlight, guaranteeing a strong start for these resilient plants.
How Much Space Should You Leave Between Lyreleaf Rockcress Plants?
Hello, gardening enthusiast! Before settling your lyreleaf rockcress into their new home, ensure they have sufficient room. Position them approximately 6-12 inches apart (15-30 cm), enabling them to expand their root systems and thrive.
What is the Best Soil Mix for Lyreleaf Rockcress Transplanting?
Prepare for some gardening fun! Lyreleaf rockcress prefers soil that drains well and has some vitality. Incorporate compost or a balanced slow-release fertilizer to create an inviting bed for your green companions.
Where Should You Relocate Your Lyreleaf Rockcress?
Sunlight is lyreleaf rockcress's favorite companion! Locate a bright area where the sun frequently shines. Aim for a spot that receives full to partial sunlight â the perfect sunny to partly shaded sanctuary for your lyreleaf rockcress.
What Equipments Should You Prepare Before Transplantation Lyreleaf Rockcress?
Gardening Gloves
To safeguard your hands while handling soil and plants.
Shovel or Spade
For excavating the plant and the new planting site.
Watering Can or Hose
To hydrate the lyreleaf rockcress before and after its relocation.
Pruners or Scissors
To trim any dead or overgrown roots and foliage.
Garden Fork
To loosen the soil and assist in extracting the root ball.
Wheelbarrow or Garden Cart
For moving the lyreleaf rockcress and soil if needed.
Compost
To enrich the transplanting hole with organic matter for better root establishment.
How Do You Remove Lyreleaf Rockcress from the Soil?
How Do You Remove Lyreleaf Rockcress from the Soil?
From Ground: Start by watering the lyreleaf rockcress to make the soil easier to manage. Use a shovel or spade to dig a wide circle around the plant, being careful to keep the root ball intact. Gently pry beneath the root ball to lift the lyreleaf rockcress from its original spot.From Pot: Water the soil in the container to ensure the root ball is moist. Invert the pot and gently tap the bottom or sides to dislodge the plant. Hold the base of the lyreleaf rockcress and carefully slide it out, making sure the root ball remains whole.From Seedling Tray: Moisten the soil in the tray to prevent root damage. Use a spoon or a small gardening tool to carefully lift each lyreleaf rockcress seedling from its compartment, ensuring minimal disturbance to the roots.
Step-by-Step Guide for Transplanting Lyreleaf Rockcress
Preparation
Gather your tools, such as gardening gloves, a shovel, a watering can, pruners, a garden fork, and a wheelbarrow. Ensure you have compost ready to enrich the planting hole.
Removing lyreleaf rockcress
Depending on its origin, use the appropriate method to remove the lyreleaf rockcress from the ground, pot, or seedling tray, keeping the root ball intact.
Prepare New Location
Dig a hole in the ground that is twice as wide and as deep as the lyreleaf rockcress's root ball. Amend the bottom of the hole with some compost to promote optimal root growth.
Plant Placement
Position the lyreleaf rockcress in the center of the hole. The top of the root ball should be level with the soil surface to ensure proper growth.
Refilling Hole
Gently backfill the hole with the excavated soil, mixing in more compost as you go. Firm the soil around the lyreleaf rockcress to eliminate air pockets without compacting it excessively.
Watering
After planting, thoroughly water the lyreleaf rockcress to settle the soil and provide moisture to the roots. This will also help integrate the plant with the surrounding soil.
Support Setup
If your lyreleaf rockcress requires support for growth, install stakes or trellises at this time to provide immediate assistance as the plant adjusts to its new location.
How Do You Care For Lyreleaf Rockcress After Transplanting?
Watering Schedule
Establish a routine to water the lyreleaf rockcress regularly, allowing the top inch of soil to dry out between waterings, encouraging deep root development.
Monitoring Growth
Observe the lyreleaf rockcress over the subsequent weeks, looking for signs of new growth which indicates successful transplanting, and adjust care as needed.
Adjusting Support
As the lyreleaf rockcress grows, ensure to adjust stakes, ties, or trellises to accommodate increased size and weight without causing damage to the plant.
Troubleshooting Common Issues with Lyreleaf Rockcress Transplantation.
Why is my lyreleaf rockcress wilting after transplant?
Wilting may occur if roots are damaged during transplanting. Handle roots gently and water immediately after planting to aid recovery.
What's the ideal time to transplant lyreleaf rockcress?
The best period is between early to late spring when temperatures are moderate. This helps the plant settle before extreme weather.
How much space does lyreleaf rockcress need when transplanting?
Allow 6-12 inches (15-30 cm) between plants. This spacing provides room for growth and reduces competition for nutrients and light.
Can I transplant lyreleaf rockcress during the summer?
Transplanting lyreleaf rockcress in summer exposes it to heat stress. Adhere to the cooler, favorable climate of early to late spring.
How deep should I plant lyreleaf rockcress when transplanting?
The transplant hole should be as deep as the root ball but twice as wide. This promotes proper root spread and anchorage.
Should I water lyreleaf rockcress immediately after transplanting?
Yes, watering helps settle the soil around the roots, reduces air pockets, and provides essential hydration for recovery after the move.
Why are the leaves of lyreleaf rockcress turning yellow post-transplant?
Yellow leaves could indicate transplant shock or watering issues. Ensure proper watering, but avoid over-watering, and allow it time to adjust.
How do I prepare lyreleaf rockcress for a successful transplant?
Water the plant thoroughly a day before transplanting to hydrate it. Also, prepare the new location with well-draining soil and partial sun.
What type of soil suits lyreleaf rockcress best for transplanting?
A well-draining sandy loam or loamy soil with a neutral to slightly alkaline pH is ideal for lyreleaf rockcress to thrive post-transplant.
Can lyreleaf rockcress be transplanted in clay soil?
Clay soil can be challenging for lyreleaf rockcress due to poor drainage. Amend heavy clay with organic matter to improve texture and drainage.


