How to Transplant Crested anoda?
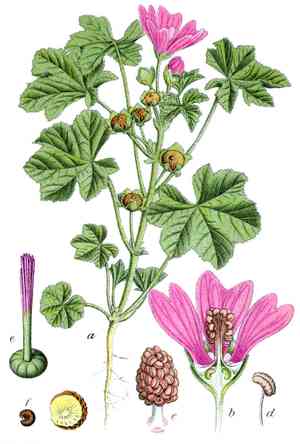
Relocate crested anoda during the period spanning late spring to early summer, facilitating a smooth adjustment. Select a bright spot featuring soil that drains effectively. Exercise caution with delicate roots during manipulation to preserve their strength.
What Preparations are Needed Before Transplanting Crested Anoda?
What is the Ideal Time for Transplanting Crested Anoda?
Choose the pleasant period from post-frost spring through the initial hints of summer for transplanting crested anoda. This timeframe allows crested anoda to get established prior to the intense summer heat. Introducing crested anoda into your garden during this phase utilizes its natural growth cycle, promoting better adaptation and root growth. Embrace this season to provide crested anoda with the optimal start it needs for a flourishing presence in your green space.
How Much Space Should You Leave Between Crested Anoda Plants?
For your crested anoda, it's best to provide ample room for development. Position them approximately 12-18 inches (30-46 cm) apart. This ensures they have sufficient space to grow healthily and robustly without competing for resources.
What is the Best Soil Mix for Crested Anoda Transplanting?
Your crested anoda will flourish in soil that drains well and is abundant in organic material. Before transplanting, mix in compost or a balanced, slow-release fertilizer to give your crested anoda an excellent start in its new home.
Where Should You Relocate Your Crested Anoda?
Select a sunny spot for your crested anoda as they thrive in bright conditions! Aim for a location that receives at least 6 hours of direct sunlight daily to ensure your plant's vigor and vibrant blooms.
What Equipments Should You Prepare Before Transplantation Crested Anoda?
Gardening Gloves
To safeguard your hands while handling soil and plants.
Shovel or Spade
For excavating the crested anoda plant and preparing the new planting site.
Hand Trowel
Useful for precise digging and managing smaller plants or young sprouts.
Watering Can or Hose
For hydrating the crested anoda plant before and after its relocation.
Pruning Shears
For trimming any damaged roots or foliage prior to transplanting.
Wheelbarrow or Garden Cart
To move the crested anoda plant and soil, especially if they are large or heavy.
Garden Fork
To loosen the soil around the crested anoda plant's roots, facilitating a smoother extraction.
Plant Supports/Stakes
If the crested anoda exhibits a tall growth habit, supports might be necessary post-transplant.
How Do You Remove Crested Anoda from the Soil?
How Do You Remove Crested Anoda from the Soil?
From Ground: First, hydrate the crested anoda plant to moisten the soil, which simplifies the removal process. Use a shovel or spade to dig a wide circle around the plant, gently prying beneath the root ball to lift the plant while preserving its root system as much as possible.From Pot: Begin by thoroughly watering the crested anoda to ensure the soil is damp. Turn the pot on its side and gently tap it to dislodge the plant. You can squeeze plastic pots or run a hand trowel along the inner edge to help free the crested anoda. Carefully pull the plant out by its base, supporting the root ball.From Seedling Tray: Gently push up from the bottom of the cell to loosen the seedling. Hold the crested anoda by its leaves (not the delicate stem) and carefully extract it from the cell, ensuring the root ball remains intact.
Step-by-Step Guide for Transplanting Crested Anoda
Preparation
Gather all your tools and confirm the new planting location is ready. Water the crested anoda plant thoroughly before commencing the removal.
Removal
Using the appropriate technique based on whether your crested anoda is in the ground, in a container, or in a seedling tray, carefully extract the plant while safeguarding its roots.
New Hole
Excavate a hole in the prepared site that is twice the width of the root ball and of the same depth. Loosen the surrounding soil using a garden fork.
Placement
Position the crested anoda in the center of the new hole. Verify that the plant sits at the same level it occupied in its original spot; adjust the depth if needed.
Filling In
Backfill the hole with soil, gently firming it around the roots of the crested anoda to eliminate air pockets.
Watering In
Water the crested anoda thoroughly after planting to settle the soil and provide moisture for the roots.
Support
If necessary, add plant supports or stakes now to help your crested anoda maintain its best form and withstand environmental elements.
How Do You Care For Crested Anoda After Transplanting?
Initial Watering
Water the crested anoda generously after transplanting, ensuring the root zone is completely saturated.
Monitoring
Check the crested anoda regularly for signs of stress, such as wilting or discolored leaves, and address any issues promptly.
Pruning
Trim away any damaged or broken foliage to help the crested anoda direct its energy towards establishing new roots and growth.
Stabilization
Ensure that any supports or stakes are secure to protect the crested anoda as it adjusts to its new environment.
Continued Care
Maintain a routine of checking for pests and diseases to identify any problems early on.
Troubleshooting Common Issues with Crested Anoda Transplantation.
When is the best time to transplant crested anoda?
Optimal transplant time is when the weather is mild, typically from late spring to early summer.
How much space should I leave between crested anoda plants?
Position crested anoda plants at least 12-18 inches (30-45 cm) apart to ensure adequate growth space.
How deep should the transplant hole for crested anoda be?
Dig a hole slightly bigger than the root ball to comfortably accommodate crested anoda's roots.
Why are my crested anoda plants wilting after transplanting?
Wilting may be due to transplant shock. Ensure proper watering and avoid direct sun for a few days.
Should I water crested anoda immediately after transplanting?
Yes, water crested anoda thoroughly post-transplant to help roots settle and recover from the shock.
Can I use fertilizer when transplanting crested anoda?
Wait several weeks before adding fertilizer to allow crested anoda to establish itself in the new location.
How can I tell if crested anoda is experiencing transplant shock?
Signs of shock include drooping leaves, browning, and halted growth. Provide water and shade to recover.
What soil type is best for transplanting crested anoda?
Use well-draining soil, rich in organic matter to provide nutrients and support for crested anoda.
How do I handle crested anoda's roots during transplanting?
Gently loosen the root ball before planting crested anoda to encourage root expansion.
Could cold temperatures affect crested anoda after transplant?
Avoid transplanting crested anoda in cold conditions; wait for a stable, mild climate to promote smooth transition.



