How to Transplant Henderson's angelica?
The optimal period for transplanting henderson's angelica spans the rejuvenating season, from the initial thaw of early spring until the mild temperatures of late spring. Select a location with good drainage that receives either abundant sunlight or some dappled shade. Providing henderson's angelica with sufficient space to thrive is essential for its root system's expansion.
What Preparations are Needed Before Transplanting Henderson's Angelica?
What is the Ideal Time for Transplanting Henderson's Angelica?
The optimal period to move henderson's angelica to a new location spans from the onset of early spring through the close of late spring. This timeframe offers henderson's angelica a mild environment, promoting robust root growth before the intense heat of summer. Relocating henderson's angelica during this window facilitates a smooth transition, as soil conditions are typically moist yet warming, creating an excellent foundation for development. This timing also aligns with henderson's angelica's natural growth cycle, ensuring strong establishment in its new spot, ready to thrive throughout the seasons.
How Much Space Should You Leave Between Henderson's Angelica Plants?
When preparing to rehouse henderson's angelica, ensure a spacing of approximately 18-24 inches (45-60 cm) between each plant. This provides ample room for individual plants to expand and develop vigorously!
What is the Best Soil Mix for Henderson's Angelica Transplanting?
For henderson's angelica, aim for soil that drains well and is rich in organic material. Boost their initial growth by incorporating a balanced, slow-release fertilizer. Your plants will appreciate this nourishing start!
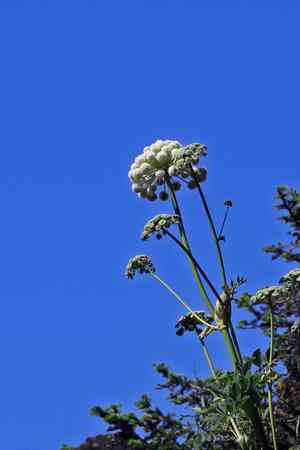
Where Should You Relocate Your Henderson's Angelica?
Select a site where henderson's angelica will receive partial sunlight. Too much shade will hinder their growth, but the correct amount of sun will be highly beneficial. Choose a bright yet protected area to ensure their prosperity!
What Equipments Should You Prepare Before Transplantation Henderson's Angelica?
Gardening Gloves
To safeguard your hands while handling soil and henderson's angelica.
Shovel or Spade
For excavating the plant without damaging its root ball.
Garden Fork
To loosen the soil surrounding the plant if it's being extracted from the ground.
Watering Can or Hose
To hydrate the plant prior to removal and following transplantation.
Pruning Shears
To trim any compromised roots or foliage as required.
Wheelbarrow or Garden Cart
For moving the plant from one spot to another without causing harm.
Trowel
For digging holes at the transplant site and for more precise soil work.
How Do You Remove Henderson's Angelica from the Soil?
How Do You Remove Henderson's Angelica from the Soil?
From Ground: Thoroughly water the henderson's angelica to make the soil easier to manage. Then, use a garden fork to loosen the soil around the plant. Carefully slide a shovel beneath the root ball, taking care not to sever the roots. Gently work your way under the plant, lifting it with the root mass as intact as possible.From Pot: Invert the pot onto its side and gently tap to loosen the soil. Spread your fingers around the base of the henderson's angelica, flip the pot, and carefully slide the plant out while supporting its root ball. If the plant is root-bound, gently untangle the roots.From Seedling Tray: Water the tray to ensure the soil is moist, which will aid in removal. Use a trowel or your hand to scoop the seedling out by pushing up from the bottom of the cell, ensuring you extract as much of the root system as possible.
Step-by-Step Guide for Transplanting Henderson's Angelica
Plant Preparation
Examine the henderson's angelica for any indications of disease or pests and remove any affected portions with pruning shears. This ensures that only healthy material is transplanted.
Digging the Hole
Using your trowel, excavate a hole in the ground slightly larger than the root ball of your henderson's angelica. This additional space will allow the roots to expand and access fresh soil.
Transplanting
Position the root ball of henderson's angelica in the center of the hole. Carefully spread out the roots if they are matted or circling. The base of the plant should be level with the surrounding ground to prevent water accumulation.
Soil Back-fill
Gently refill the hole with soil. Firm the soil around the root ball with your hands to eliminate any air pockets and to ensure that henderson's angelica is stable in its new location.
Watering
Provide henderson's angelica with a thorough watering to settle the soil around the roots and to help alleviate transplant shock. Water slowly to ensure deep soil penetration and to adequately moisten the roots.
Stabilization
If henderson's angelica is tall or top-heavy, stake it to provide support until the roots are sufficiently established to support the plant independently. Ensure that any ties are not too tight to avoid damaging the stem.
How Do You Care For Henderson's Angelica After Transplanting?
Monitoring
Observe henderson's angelica for signs of stress, such as wilting or yellowing leaves, which may indicate transplant shock or a need for more frequent watering.
Mulching
Apply a layer of organic mulch around the base of henderson's angelica to help retain soil moisture, regulate soil temperature, and reduce weed competition.
Subsequent Watering
Maintain consistent moisture for henderson's angelica, especially during the initial weeks, gradually reducing frequency as the plant establishes. Water deeply to encourage downward root growth.
Troubleshooting Common Issues with Henderson's Angelica Transplantation.
What's the prime season for transplanting henderson's angelica?
The optimal period is from early to late spring, when temperatures promote root establishment.
How far apart should henderson's angelica be transplanted?
Space them 18-24 inches (46-61 cm) apart for ideal growth and air circulation.
Can henderson's angelica be transplanted in summer or fall?
Transplanting in summer or fall is not recommended; springtime offers better root development and plant health.
What soil conditions favor henderson's angelica transplantation?
Select well-draining soil enriched with organic matter to support healthy root growth post-transplant.
How deep should the hole be for henderson's angelica's transplant?
Dig a hole twice as wide and the same depth as the root ball to prevent overcrowding.
How do I water henderson's angelica after transplanting?
Water thoroughly after transplanting to settle the soil and provide moisture to the roots, avoiding waterlogging.
Should I prune henderson's angelica during transplanting?
Light pruning of damaged or dead parts helps henderson's angelica focus its energy on root establishment.
How can I tell if henderson's angelica is stressed after transplanting?
Stress indicators include wilting leaves, discoloration, and stunted growth, suggesting the need for care adjustments.
Why is my henderson's angelica not thriving after transplant?
Insufficient watering, poor soil conditions, or transplanting at the wrong time can impact henderson's angelica's health.
Can I fertilize henderson's angelica right after transplanting?
Wait a few weeks before fertilizing to prevent root burn and allow acclimatization to new conditions.


