How to Transplant Brewer's angelica?
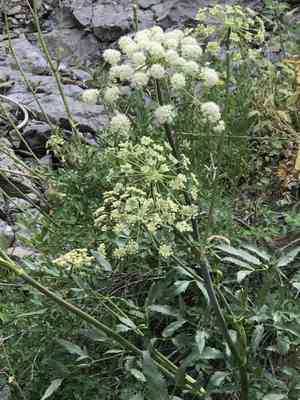
Brewer's angelica flourishes most effectively when relocated from the beginning to the end of spring, as it acclimates favorably to moderate temperatures. Select a bright, adequately drained spot to guarantee peak development. Steer clear of overly wet zones to avert root decay.
Necessary Preparations Before Moving Brewer's Angelica
Optimal Period for Relocating Brewer's Angelica
Brewer's angelica, a perennial, should be moved between early and late spring. This timeframe promotes ideal root development and growth due to favorable ground temperatures and moisture. Transplanting then enhances its resilience and supports robust growth throughout the season, maximizing its health.
Required Spacing Between Brewer's Angelica Plants
When relocating brewer's angelica, ensure a 24-36 inch (60-90 cm) gap between them. This guarantees each plant has ample room to develop and flourish without crowding.
Best Soil Mixture for Brewer's Angelica Relocation
Prepare well-draining soil enriched with organic material or compost for brewer's angelica. Adding a balanced base fertilizer, such as 10-10-10 (N-P-K), provides essential nutrients.
Ideal New Location for Your Brewer's Angelica
Choose a sunny or partially shaded spot for moving brewer's angelica. Aim for an area receiving at least 6 hours of sunlight daily to help it thrive.
Equipment Needed Before Transplanting Brewer's Angelica
Gardening Gloves
To safeguard your hands while handling soil and the plant.
Shovel or Spade
For digging holes and trenches during removal and planting.
Hand Trowel
Used for more precise digging and moving earth.
Watering Can or Hose
To hydrate the plant and soil before and after relocation.
Pruners
For trimming any damaged or dead plant parts.
Bucket or Container
To temporarily hold the plant if necessary.
How to Extract Brewer's Angelica from the Ground
How to Extract Brewer's Angelica from the Ground
From Ground: First, moisten the brewer's angelica plant's soil. Then, dig a wide trench around the plant with a shovel or spade, keeping the root ball intact. Carefully work the spade beneath the root ball to lift the plant from its original spot.From Pot: Start by gently tapping the pot's sides to loosen the soil. Carefully turn the pot sideways and gently slide the brewer's angelica plant out, supporting its root ball. Be careful not to harm the roots.From Seedling Tray: Water the seedlings in the tray to lessen transplant shock and carefully loosen the soil around each seedling with a hand trowel. Gently lift each brewer's angelica plant by its leaves, not the stem, to prevent damage.
Detailed Steps for Transplanting Brewer's Angelica
Prepare the New Site
Ensure the new planting area is ready and has suitable conditions. Dig a hole twice the width and slightly deeper than the brewer's angelica plant's root ball.
Remove the Plant
Follow the instructions for carefully extracting brewer's angelica from its initial location.
Planting
Place the brewer's angelica plant in the prepared hole, ensuring it sits at the same depth as it was originally. Fill the hole with soil, gently pressing it down around the plant to eliminate air pockets.
Watering
Thoroughly water the brewer's angelica plant immediately after planting to settle the soil and aid root establishment.
Mulching
Apply a layer of mulch around the base of the brewer's angelica plant to retain moisture and deter weeds, keeping the mulch away from direct stem contact.
Post-Transplant Care for Brewer's Angelica
Watering
Keep the soil around the brewer's angelica consistently damp, but not waterlogged, for the initial weeks after transplanting to help establish strong roots.
Monitoring
Regularly inspect the plant for signs of distress, such as wilting foliage or discoloration. Adjust watering and care as needed.
Support
If necessary, provide support like a stake to help the brewer's angelica plant remain upright, especially if it is tall or in a windy area.
Resolving Common Issues with Brewer's Angelica Transplantation
When is the best time to transplant brewer's angelica?
Move brewer's angelica from early to late spring for optimal growth and establishment.
What spacing should I maintain for brewer's angelica?
Plant brewer's angelica 24-36 inches (60-90 cm) apart to ensure sufficient space for growth.
How do I prepare the soil for transplanting brewer's angelica?
Loosen soil to a depth of 10 inches (25 cm) and amend with compost for better drainage.
How should I handle brewer's angelica roots during transplant?
Handle roots gently, keeping the root ball intact to minimize transplant shock.
What is the optimal soil pH for brewer's angelica?
Aim for a soil pH of 6.0 to 7.0 for best results when transplanting brewer's angelica.
How much water does brewer's angelica need post-transplant?
Water brewer's angelica deeply right after transplanting and maintain consistent moisture, especially in the first weeks.
Do I need to fertilize brewer's angelica when transplanting?
Incorporate a balanced, slow-release fertilizer into the soil during planting for steady nutrient supply.
What are the best light conditions for brewer's angelica?
Brewer's angelica thrives in full sun to partial shade, ensuring at least 6 hours of sunlight daily.
How do I prevent disease during transplanting brewer's angelica?
Ensure proper spacing and good air circulation, and avoid overhead watering to reduce disease risk.
Should I prune brewer's angelica when transplanting?
Lightly trim any damaged or overly long roots but avoid significant pruning to reduce stress.



