How to Transplant Rio grande ragweed?
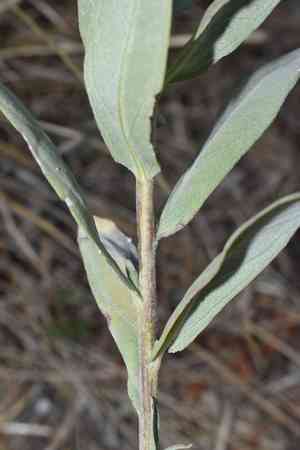
Relocate rio grande ragweed during the revitalizing phase of early to mid-spring to achieve peak development. This species flourishes in bright, adequately drained environments. Select a protected area to safeguard nascent plants. Bear in mind, careful manipulation guarantees successful adaptation.
What Preparations are Needed Before Transplanting Rio Grande Ragweed?
What is the Ideal Time for Transplanting Rio Grande Ragweed?
The best time to move rio grande ragweed is in early to mid-spring, when the ground is warming up but still damp. Relocating during this season promotes quick root establishment and lessens stress from intense heat. This timing boosts vitality and guarantees a strong growing period.
How Much Space Should You Leave Between Rio Grande Ragweed Plants?
When relocating rio grande ragweed, position the plants approximately 18-24 inches (45-60 cm) apart. This provides each plant ample room to develop and ensures good air circulation, lowering the risk of disease.
What is the Best Soil Mix for Rio Grande Ragweed Transplanting?
For rio grande ragweed, prepare well-draining soil enriched with compost or aged manure. A sandy or loamy soil type is perfect. You can also incorporate a balanced base fertilizer (like 10-10-10) to give the plants a strong start.
Where Should You Relocate Your Rio Grande Ragweed?
Select a spot that receives full sunlight for transplanting rio grande ragweed. This plant flourishes with at least 6-8 hours of direct sun daily, which will help it grow robust and healthy.
What Equipments Should You Prepare Before Transplantation Rio Grande Ragweed?
Gardening Gloves
To safeguard your hands while handling soil and plants.
Garden Trowel
For digging precise, small holes and loosening the soil around plant roots.
Shovel or Spade
For larger excavation tasks such as removing plants from the ground or creating sizable transplanting holes.
Watering Can or Hose
To hydrate the plant before extraction and after relocation.
Pruners
To trim any damaged roots or foliage.
Burlap or Plastic Sheet
To wrap the root ball if you are extracting the plant from the ground and moving it.
How Do You Remove Rio Grande Ragweed from the Soil?
How Do You Remove Rio Grande Ragweed from the Soil?
From Ground: First, water the rio grande ragweed plant to moisten the soil. Then, excavate a wide trench around the plant using a shovel or spade, ensuring the plant's root ball remains intact. Carefully work the spade beneath the root ball to lift the plant from its original spot.From Pot: Water the rio grande ragweed plant thoroughly the day before you plan to relocate it. Gently tap around the pot to loosen the root ball. Turn the pot sideways and slowly slide the plant out, supporting the main stems as you do so.From Seedling Tray: Water the seedlings to make the soil easier to manage. Use a garden trowel or your fingers to gently loosen the soil around each seedling. Carefully lift each seedling by its leaves, avoiding the delicate stems, ensuring a small amount of soil remains attached to the roots.
Step-by-Step Guide for Transplanting Rio Grande Ragweed
Plant Preparation
Water the rio grande ragweed plant a few hours prior to transplanting to minimize transplant shock and make the soil easier to work with.
Digging the Hole
Excavate a hole in the new location that is twice as wide and just as deep as the root ball of the rio grande ragweed plant.
Plant Placement
Position the rio grande ragweed plant in the hole, ensuring it sits at the same depth as it was previously growing. Backfill the hole with soil, pressing gently around the base of the plant to eliminate air pockets.
Watering
Water the rio grande ragweed plant thoroughly after transplanting to help settle the soil around the roots.
How Do You Care For Rio Grande Ragweed After Transplanting?
Watering
Keep the soil around the rio grande ragweed consistently moist, but not waterlogged, for the initial weeks after transplanting to aid in establishing strong roots.
Mulching
Apply a layer of mulch around the base of the rio grande ragweed plant to retain moisture and suppress weeds.
Monitoring
Keep a close watch on the rio grande ragweed's health, looking for signs of transplant shock such as wilting or yellowing leaves, and take appropriate actions as needed.
Support
If your rio grande ragweed is a taller plant, consider staking it to provide support while it establishes itself in the new location.
Troubleshooting Common Issues with Rio Grande Ragweed Transplantation.
When is the best time to transplant rio grande ragweed?
The optimal period to transplant rio grande ragweed is early to mid-spring for peak growth.
What is the recommended spacing for transplanted rio grande ragweed plants?
Space rio grande ragweed plants 18-24 inches (45-60 cm) apart to ensure proper development and air circulation.
How should I prepare the soil for rio grande ragweed transplanting?
Loosen the soil to a depth of 10 inches (25 cm) and incorporate compost for nutrients.
Should I water rio grande ragweed immediately after transplanting?
Yes, thoroughly water rio grande ragweed right after transplanting to help the roots settle into the soil.
How do I handle root damage during rio grande ragweed transplanting?
Trim any damaged roots and ensure the root ball is moist before transplanting rio grande ragweed.
What type of climate is best for transplanting rio grande ragweed?
Rio grande ragweed thrives best in climates with moderate temperatures during early to mid-spring.
How deep should rio grande ragweed be planted?
Plant rio grande ragweed at the same depth it was growing in its previous container or location.
Why are my transplanted rio grande ragweed wilting?
Wilting may indicate transplant shock; ensure consistent watering and partial shade initially.
Can I transplant rio grande ragweed in full sun?
Yes, rio grande ragweed can be transplanted in full sun, but initial partial shade can help with acclimation.
What should I do if the leaves of rio grande ragweed turn yellow after transplanting?
Yellowing leaves could indicate nutrient deficiency; consider adding a balanced fertilizer to the soil.



