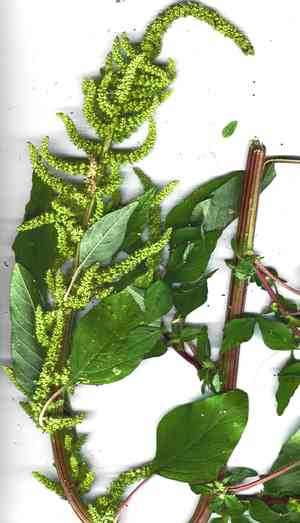
How to Transplant Spleen amaranth?
Spleen amaranth flourishes when relocated from early to mid-spring because of the temperate climate. Select a brightly lit area with soil that drains effectively to foster robust development. Verify that the chosen site is safe from frost hazards to safeguard the nascent vegetation.
Necessary Preparations Before Moving Spleen Amaranth
Optimal Period for Relocating Spleen Amaranth?
Spleen amaranth is best moved from the beginning to the end of spring, as warmer temperatures encourage strong root growth. Relocating during this time ensures spleen amaranth benefits from ideal growing conditions, boosting both yield and vigor. Stable weather helps minimize transplant shock, allowing for a smoother transition for the plant.
Required Spacing Between Spleen Amaranth Plants?
When relocating spleen amaranth, ensure each plant is positioned approximately 6-12 inches (15-30 cm) apart. This provides ample room for growth without excessive crowding.
Best Soil Mixture for Spleen Amaranth Relocation?
For spleen amaranth, prepare well-draining soil with a foundational fertilizer rich in organic matter. A blend of compost and loamy soil will supply the essential nutrients for healthy development.
Where to Replant Your Spleen Amaranth?
Select a sunny spot for relocating spleen amaranth, ideally where it can receive at least 6 hours of direct sunlight daily. This will ensure the plant thrives and develops robustly.
Equipment to Prepare Before Transplanting Spleen Amaranth?
Gardening Gloves
To safeguard your hands while handling soil and plants.
Hand Trowel
For excavating the plant from its original spot and creating a hole at the new planting site.
Watering Can or Garden Hose
To maintain soil moisture during and after the relocation process.
Shovel or Spade
To dig a larger trench if the plant is situated in the ground.
Pruning Shears
To trim any damaged roots or foliage prior to transplanting.
Compost or Organic Matter
To enrich the soil at the new planting location.
How to Extract Spleen Amaranth from the Soil?
How to Extract Spleen Amaranth from the Soil?
From Ground: First, hydrate the spleen amaranth plant to moisten the soil. Then, excavate a wide trench around the plant using a shovel or spade, ensuring the plant's root ball remains intact. Carefully work the spade beneath the root ball to lift the plant from its initial position.From Pot: Gently water the spleen amaranth plant to loosen the soil. Turn the container on its side and tap the bottom to dislodge the plant. Hold the plant's base gently and carefully slide it out, ensuring the root ball stays intact.From Seedling Tray: Water the seedlings to make the soil easier to manage. Using a hand trowel or your fingers, gently scoop out the spleen amaranth seedling by its base, supporting the root ball and surrounding soil. Be careful not to harm the delicate roots.
Step-by-Step Guide for Relocating Spleen Amaranth
Prepare New Site
Dig a hole at the new location that is twice as wide and equally deep as the spleen amaranth plant's root ball. Incorporate some compost or organic matter into the hole to enrich the soil.
Relocate the Plant
Position the spleen amaranth plant into the new hole, ensuring the top of the root ball is level with the surrounding soil. Backfill the hole with soil and gently firm it down to eliminate any air pockets.
Water Thoroughly
After placing the plant in its new spot, water it extensively to help the soil settle around the roots. Ensure the water reaches the root zone.
Mulch
Apply a layer of mulch around the base of the spleen amaranth plant to help retain moisture and regulate soil temperature. Make sure to keep the mulch a few inches away from the stem to prevent rot.
Post-Transplant Care for Spleen Amaranth
Watering
Maintain consistent moisture in the soil around the spleen amaranth, avoiding sogginess, for the initial weeks after transplanting to aid in root establishment.
Monitoring
Inspect your spleen amaranth plant daily for the first week to confirm it is adapting well. Look for indications of transplant shock such as wilting or yellowing leaves.
Pruning
Remove any damaged or dead foliage to encourage new growth and reduce stress on the plant as it settles into its new location.
Addressing Common Issues with Spleen Amaranth Relocation.
When is the best time to move spleen amaranth?
Relocate spleen amaranth between early and late spring for optimal growth and survival rates.
How much space should I leave between spleen amaranth seedlings?
Space spleen amaranth seedlings 6-12 inches (15-30 cm) apart for healthy development and sufficient air circulation.
Why are my spleen amaranth seedlings wilting after transplanting?
Wilting may be due to transplant shock; ensure adequate watering and initial shading.
How should the soil be prepared before relocating spleen amaranth?
Prepare soil by enriching it with compost and ensuring good drainage to support spleen amaranth's root development.
What to do if spleen amaranth is not growing after transplanting?
Check soil moisture levels, ensure proper sunlight exposure, and avoid over-fertilizing to encourage growth.
How to protect spleen amaranth from pests post-transplant?
Utilize natural repellents like neem oil and regularly inspect for early signs of pests.
Can I transplant spleen amaranth in direct sunlight?
Gradually acclimate spleen amaranth to full sunlight to prevent sunburn; partial shade is beneficial initially.
What kind of watering schedule should spleen amaranth have after transplanting?
Water spleen amaranth regularly, keeping the soil consistently moist but not waterlogged to help establish roots.
What temperature is ideal for transplanting spleen amaranth?
Ideal transplanting temperatures are between 65-75°F (18-24°C) to minimize stress on spleen amaranth.
How to mitigate transplant shock in spleen amaranth?
Lessen shock by watering thoroughly before and after transplanting and providing temporary shading.


