How to Transplant Golden leather fern?
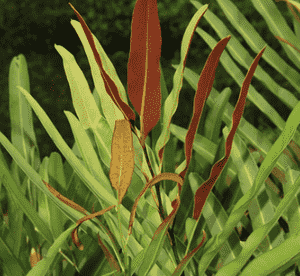
The optimal period for relocating golden leather fern spans from the close of spring to the middle of summer, providing a perfect combination of warmer earth and moderate temperatures for root development. Select a location featuring damp, adequately draining substrate. Careful manipulation is crucial when shifting golden leather fern to prevent root trauma.
What Preparations are Needed Before Transplanting Golden Leather Fern?
What is the Ideal Time for Transplanting Golden Leather Fern?
The optimal period for relocating golden leather fern is the transition from late spring to early summer. This timing ensures the soil is warm, encouraging superior root establishment and development. Moving golden leather fern during this season leverages the extended daylight hours, which aid in recovery and growth, laying a strong foundation for the plant's future resilience and vigor.
How Much Space Should You Leave Between Golden Leather Fern Plants?
When moving golden leather fern, remember it appreciates ample room. Ideally, allow 4-6 feet (1.2-1.8 meters) between each specimen. This provides sufficient space for each to grow and spread out healthily. Taking the time to measure your area is beneficial!
What is the Best Soil Mix for Golden Leather Fern Transplanting?
For golden leather fern, select a rich, well-draining soil for optimal outcomes. Incorporating a slow-release, organic-based fertilizer into the soil prior to planting can supply additional nutrients. Filling the hole with a good blend of original soil and compost will create a fertile base for your plant.
Where Should You Relocate Your Golden Leather Fern?
When choosing a location for golden leather fern, consider sun exposure. It thrives in partial to full sunlight, so a spot with morning sun and afternoon shade is excellent! Adequate sunlight during the early part of the day helps foster robust growth.
What Equipments Should You Prepare Before Transplantation Golden Leather Fern?
Gardening Gloves
To safeguard your hands from any abrasive plant matter and to keep them clean.
Shovel or Spade
These tools are necessary to carefully extract the golden leather fern from its original spot and excavate the appropriately sized hole in the new area.
Wheelbarrow or Bucket
A sturdy carrier to transport your golden leather fern from its initial location to the new one, minimizing harm to the root system.
Mulch
After moving your golden leather fern, mulch helps maintain soil moisture and regulate temperature.
Watering can or Hose
Crucial for supplying your golden leather fern with the necessary water after the relocation.
How Do You Remove Golden Leather Fern from the Soil?
How Do You Remove Golden Leather Fern from the Soil?
From Ground: First, water the golden leather fern plant thoroughly to soften the soil. Then, dig a wide trench around the plant using a shovel or spade, ensuring the plant's root ball remains intact. Carefully slide the spade beneath the root ball and gently lift the plant from its original position.From Pot: Hydrate the golden leather fern in its container before beginning the transplant. Tilt the pot sideways, then support the main stem with one hand and use the other to gently pull the pot away. If the plant is stuck, tap the pot's sides a few times.From Seedling Tray: For young golden leather fern plants, handle them by their leaves to reduce potential damage. Use a spoon or a gardening trowel to scoop seedlings from their tray, making sure to include the roots.
Step-by-Step Guide for Transplanting Golden Leather Fern
Preparation
Clear the transplanting area of all debris, rocks, and weeds. Dig a hole deep and wide enough to accommodate your golden leather fern's root system. The hole should be as deep as the root ball and twice its width.
Placement
Position golden leather fern in the hole, ensuring the top of the root ball is level with the soil surface. Adjust the soil beneath the root ball until the correct height is achieved.
Filling
Backfill around the root ball with the excavated soil. Gently pat down to eliminate any air pockets without compacting the soil around the roots.
Watering
After planting, water golden leather fern thoroughly and apply mulch around the plant, keeping it away from the stem to prevent rot.
Monitoring
Observe your golden leather fern for any indications of transplant shock, which might appear as wilting leaves or a lack of new growth.
How Do You Care For Golden Leather Fern After Transplanting?
Watering
Unlike many houseplants, golden leather fern loves moisture, so keep the soil hydrated. Ensure the top inch of soil doesn't dry out, but avoid waterlogged conditions that could lead to root rot.
Foliage Care
Clean the leaves of golden leather fern by using a damp cloth to wipe away any dust and pests, promoting better light absorption.
Pruning
Trim your golden leather fern plant periodically to encourage denser growth and to remove any dead or dying fronds.
Repotting
Consider repotting once your golden leather fern has outgrown its current container. Remember, always select a pot that's slightly larger than the root ball.
Troubleshooting Common Issues with Golden Leather Fern Transplantation.
What is the best time of the year to transplant golden leather fern?
The ideal time for transplanting golden leather fern is between late summer and early autumn (S3-S5). This is when the plant's growth slows, reducing transplant shock.
What spacing should I maintain between golden leather fern plants while transplanting?
Maintain a minimum distance of 4 feet to 6 feet (1.2 - 1.8 meters). This provides each golden leather fern ample room to thrive, lessening competition for nutrients and water.
How important is the soil type for golden leather fern transplanting?
Golden leather fern prefers well-draining soil. Although it can adapt to various soil types, it is sensitive to waterlogging. Ensure the new planting site drains effectively to prevent root rot.
What is the ideal depth to plant golden leather fern while transplanting?
Plant golden leather fern at the same depth it was in its previous pot. Planting too deep can suffocate the plant, and too shallow can make it prone to drying out.
Can I prune golden leather fern before transplanting?
Yes, a light pruning before transplanting can help golden leather fern manage stress more effectively. Focus on removing any diseased or damaged parts to encourage healthier growth post-transplant.
How much should I water golden leather fern after transplanting?
Water golden leather fern thoroughly immediately after transplanting, then keep the soil consistently moist. Avoid overwatering as this can lead to root rot. Gradually decrease watering as the plant establishes.
How quickly can I expect golden leather fern to establish after transplanting?
If transplanted in the correct season and well-cared for, golden leather fern can begin showing signs of new growth within a few weeks. However, full establishment can take several months.
What signs indicate a successful golden leather fern transplant?
The emergence of new healthy fronds indicates a successful transplantation. Also, the plant being firm in the ground and resuming growth are good indicators of a successful transition.
Should I fertilize golden leather fern after transplanting?
To aid recovery from transplant stress, it's advisable to add a slow-release, balanced fertilizer to the planting hole. Avoid high-nitrogen content, which can promote leaf growth over root development.
What should I do if golden leather fern looks wilted after transplanting?
Firstly, do not panic; golden leather fern may initially wilt due to shock. Maintain moisture levels and provide partial shade. If wilting persists for an extended period, consult with a local nursery or extension service.



