How to Transplant Cedar wattle?
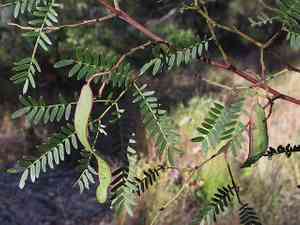
For cedar wattle, the ideal period for relocation spans from the revitalizing phase of early spring to the vigorous growth spurt of late spring. Select a bright location featuring soil that drains effectively. Careful manipulation is crucial to avert root trauma during the move.
What Preparations are Needed Before Transplanting Cedar Wattle?
What is the Ideal Time for Transplanting Cedar Wattle?
The optimal period to move cedar wattle is from early spring until the start of summer. During this timeframe, mild temperatures and increasing daylight promote root development, establishing an excellent foundation for growth. Transplanting cedar wattle now leverages the season's gentle conditions, giving it a strong start in its new location. This action gently guides cedar wattle towards a flourishing future.
How Much Space Should You Leave Between Cedar Wattle Plants?
Allow your cedar wattles ample room to flourish! Spacing them 3-6 meters (10-20 feet) apart will be effective. This enables their roots to spread out and supports healthy development. Just like us, they require their own personal space!
What is the Best Soil Mix for Cedar Wattle Transplanting?
For your cedar wattle, you'll want soil that drains effectively and is abundant in organic material. Incorporate some compost or a balanced slow-release fertilizer to give them a robust beginning. Consider it a nutrient-rich breakfast for your plants!
Where Should You Relocate Your Cedar Wattle?
Your cedar wattle thrives in sunlight! Choose a sunny spot that gets at least 6 hours of direct sun daily. Imagine a day at the beach - that's what your cedar wattle desires. The correct location means a happy, sun-loving cedar wattle.
What Equipments Should You Prepare Before Transplantation Cedar Wattle?
Gardening Gloves
To safeguard your hands while handling soil and the plant.
Shovel or Spade
For excavating the plant and preparing the new planting site.
Pruning Shears
To trim any damaged or excessively long roots.
Wheelbarrow or Garden Cart
To move the plant from its original spot to the new location.
Watering Can or Hose
For hydrating the plant before and after the transplanting process.
Mulch
To help maintain soil moisture and regulate temperature around the new planting area.
Stakes and Ties
For offering support to the plant if needed.
How Do You Remove Cedar Wattle from the Soil?
How Do You Remove Cedar Wattle from the Soil?
From Ground: Hydrate the cedar wattle to moisten the soil, making excavation easier. Use a shovel or spade to dig a wide circle around the plant, going deep enough to include as much of the root ball as possible. Slide the shovel beneath the root ball and gently lift the plant from the ground.From Pot: Tilt the pot sideways and gently tap the bottom to loosen the cedar wattle. If necessary, slide a knife along the inner edge of the pot to help free the root ball. Gently pull the plant from the pot, being careful to support the root ball.From Seedling Tray: Water the seedlings to make the soil damp. Use a spoon or a small tool to lift the individual cedar wattle plants from the tray, ensuring you bring along a good amount of soil attached to the roots to avoid stress.
Step-by-Step Guide for Transplanting Cedar Wattle
Plant Preparation
Lightly water the cedar wattle before beginning the transplant, to lessen transplant shock and keep the root ball intact.
Hole Preparation
Dig a hole in the ground that is twice as wide and just as deep as the cedar wattle's root ball to provide ample space for roots to expand.
Placing the Plant
Gently position the cedar wattle in the center of the hole, ensuring it sits at the same level it grew previously, neither deeper nor higher.
Refill the Hole
Carefully backfill the hole with soil, gently firming it down around the cedar wattle's roots to eliminate air pockets.
Watering
Water the cedar wattle thoroughly after planting to settle the soil around the roots and help alleviate transplant shock.
Mulching
Apply a layer of mulch around the base of the cedar wattle to conserve moisture and suppress weeds.
How Do You Care For Cedar Wattle After Transplanting?
Stabilization
Use stakes and ties to secure the cedar wattle if it is tall or top-heavy, to prevent wind damage.
Monitoring
Observe the plant for signs of distress, such as wilting or discoloration, which could indicate a need for more or less water or potential diseases.
Pruning
Trim off any damaged or dead branches to help the cedar wattle focus its energy on new growth and root establishment.
Support
During high wind conditions or if you notice the cedar wattle leaning, provide additional support with garden stakes.
Troubleshooting Common Issues with Cedar Wattle Transplantation.
What's the best time to transplant cedar wattle?
Transplant cedar wattle during the ideal period of early to late spring, which allows for optimal root establishment.
How far apart should I space cedar wattle when transplanting?
Generously, position cedar wattle 3-6 meters (about 10-20 feet) apart to give them plenty of growth room.
Why are the leaves of my transplanted cedar wattle turning yellow?
Yellow leaves often result from over or under-watering. Ensure consistent moisture, but donât waterlog the soil.
How deeply should I plant cedar wattle's root ball?
Plant the root ball of cedar wattle so its surface is level with the surrounding soil, avoiding deeper planting.
Should I prune cedar wattle when transplanting?
Light pruning can be beneficial; trim any damaged or excessively long roots to encourage healthy growth.
What type of soil is best for transplanting cedar wattle?
Utilize well-draining soil rich in organic matter to provide cedar wattle with a nurturing environment.
How much sun exposure does cedar wattle need after transplanting?
Ensure cedar wattle receives full sun to partial shade for vigorous growth post-transplant.
Can cedar wattle be transplanted in a container?
Certainly, just make sure the container allows room for growth and has proper drainage holes.
How do I prepare the site before transplanting cedar wattle?
Clear the site of weeds, dig a hole that's twice the width of the root ball, and incorporate some compost.
What to do if cedar wattle shows transplant shock symptoms?
Keep soil consistently moist and provide shade from harsh afternoon rays until recovery signs are evident.



