How to Transplant Mulga?
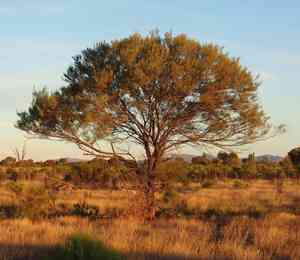
For mulga, the ideal period for relocation is during the colder months, from the beginning to the end of winter, which facilitates robust root development. Select a bright, adequately drained site. Steer clear of overly moist spots to avert root decay, promoting more vigorous growth after transplantation.
Essential Preparations Before Relocating Mulga
Optimal Period for Mulga Relocation
The best time to move mulga is from the start to the end of winter. During this period, the plant is dormant, which reduces the stress of relocation and promotes root development. Transplanting in these cooler months helps mulga adapt efficiently to its new spot, leading to vigorous growth in subsequent seasons.
Required Spacing Between Mulga Plants
When moving mulga, ensure each plant is positioned 3-4 meters (10-13 feet) apart. This provides ample room for growth and prevents competition for resources.
Ideal Soil Mixture for Mulga Relocation
For mulga, select soil that drains well, with a sandy or loamy consistency. Prepare the ground by incorporating a slow-release, balanced fertilizer to supply necessary nutrients.
Choosing the New Location for Your Mulga
Mulga prefers sunny conditions but can endure some partial shade. Confirm the new site receives at least 6 hours of direct sunlight daily for best development.
Tools Required Before Transplanting Mulga
Gardening Gloves
To safeguard your hands while handling soil and the plant.
Shovel or Spade
For digging and extracting the plant from its original spot.
Trowel
Useful for digging and moving smaller plants or young sprouts.
Watering Can or Hose
To thoroughly hydrate the plant before and after its move.
Wheelbarrow
To transport the plant, including its root ball, to the new site.
Pruners
To trim any damaged roots or branches during the relocation process.
Mulch
To cover the soil around the plant's base after it has been moved.
Method for Extracting Mulga from the Ground
Method for Extracting Mulga from the Ground
From Ground: First, moisten the mulga plant to dampen the soil. Next, dig a wide trench around the plant using a shovel or spade, ensuring the plant's root ball stays intact. Carefully work the spade beneath the root ball to lift the plant from its initial position.From Pot: Water the mulga plant to ensure the soil is moist. Gently turn the pot on its side and lightly tap the bottom to loosen the plant. Hold the plant's base and carefully slide it out of the pot, taking care not to harm the roots.From Seedling Tray: Water the seedlings to moisten the soil. Use a trowel or small garden fork to gently lift the seedling from the tray, keeping as much soil around the roots as possible.
Step-by-Step Guide for Relocating Mulga
Prepare the New Location
Dig a hole at the new site that is twice as wide and as deep as the mulga plant's root ball. This allows the roots ample space to spread and establish themselves.
Improve the Soil
If necessary, mix organic compost into the excavated soil to enhance its fertility and drainage, ensuring a favorable growing environment for the mulga.
Position the Plant
Place the mulga plant in the hole, making sure it sits at the same depth as it did in its previous spot. Fill around the root ball with the amended soil, gently tamping it down to remove air pockets.
Water Thoroughly
After planting, water the mulga generously to help settle the soil around the roots and provide essential moisture for the plant to recover from the move.
Apply Mulch
Spread a 2-3 inch layer of mulch around the base of the mulga, but not touching the stem, to help retain moisture, suppress weeds, and stabilize soil temperature.
Post-Transplant Care for Mulga
Watering
Keep the soil around the mulga consistently moist, but not waterlogged, for the initial weeks after transplanting to aid in strong root development.
Monitoring
Observe the plant for any indications of stress, such as wilting or yellowing leaves, and address issues promptly, like adjusting watering or providing temporary shade.
Pruning
Trim any damaged or dead branches to encourage new growth and prevent disease.
Support
If the mulga is a young sapling or in a windy area, consider providing stakes to support the plant until its roots are well established.
Resolving Common Mulga Transplant Issues
When is the best time to transplant mulga?
The optimal period for relocating mulga is from early to late winter for best outcomes.
How should I space mulga when transplanting?
Ensure you position mulga 3-4 meters (10-13 feet) apart for healthy development.
What is the ideal soil type for mulga?
Mulga thrives best in well-draining sandy or loamy soils.
How should I prepare the planting site for mulga?
Clear weeds, loosen the soil, and incorporate compost to ready the site for mulga.
What depth should I plant mulga?
Plant mulga at the same depth it was growing previously to minimize stress.
How can I reduce transplant shock for mulga?
Water thoroughly before and after moving mulga, and keep roots moist during the process.
What should I do if mulga shows signs of wilting?
Ensure mulga receives adequate water and check for proper root establishment if wilting occurs.
How much water does mulga need after transplanting?
Water mulga deeply once a week, ensuring the soil remains moist but not saturated.
Should I prune mulga during transplanting?
Avoid extensive pruning during relocation; only trim damaged or dead branches.
How can I support mulga after transplanting?
Use stakes if necessary to support mulga, especially in areas with strong winds.



