Boost Growth: How and When to Repot Your Glory of texas Plant
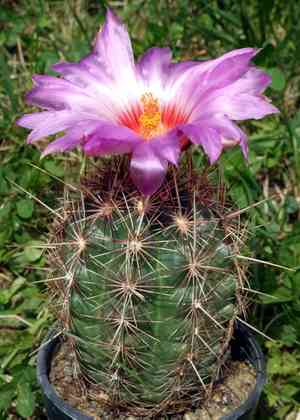
1
For best development, Glory of Texas should ideally be transplanted in spring or fall.
2
When repotting, choose a container approximately 5â7 cm (2â3 inches) wider than its current one.
3
To avoid root decay, utilize a cactus-specific, well-aerated potting medium.
Why Replant Your Thelocactus bicolor?
Understanding the growth pattern of Thelocactus bicolor
Transplanting your Thelocactus bicolor, also known as Glory of Texas, is vital for its continued prosperity. This cactus, native to Texas and Northeastern Mexico, exhibits a slow to moderate growth rate and typically outgrows its container every 2-3 years. Recognizing this growth pattern helps you anticipate when the plant will require more room to accommodate its expanding root system, which is crucial for its overall health and development. Repotting during its active growth phases in spring or autumn allows the Glory of Texas to establish itself more successfully in its new surroundings.
Identifying indicators that suggest it's time for a new pot
It's important to look for specific signs that indicate your Thelocactus bicolor needs to be repotted. A clear sign is when roots start emerging from the drainage holes, signifying they've filled the current container and require more space. If you observe a significant slowdown in growth or the plant appears top-heavy and unstable, these can also be indicators. Furthermore, if the soil dries out exceptionally quickly after watering, it might suggest the plant is root-bound and needs fresher, more spacious soil.
Selecting the Appropriate Container and Substrate for Thelocactus bicolor
Choosing the optimal pot size and material
Selecting the correct container is essential for successfully replanting your Thelocactus bicolor. Ideally, choose a pot that is approximately 5â7 cm (2â3 inches) larger in diameter than its current one. This additional space allows the roots to spread comfortably. Clay or terracotta pots are highly recommended due to their porous nature, which facilitates better aeration and drainage, both critical for cacti. Ensure the pot has sufficient drainage holes at the bottom to prevent water from pooling and causing root decay.
Crafting the ideal soil mixture
The substrate used for repotting is equally important. A well-draining cactus blend is perfect for Thelocactus bicolor. You can either purchase a pre-made cactus soil from a garden center or create your own by combining regular potting soil with sand, perlite, or pumice in a 3:1:1 ratio. This combination ensures the soil remains loose and drains efficiently, mimicking the natural arid environment where Thelocactus bicolor thrives. Proper soil composition helps prevent root rot and encourages healthy development.
Detailed Instructions for Replanting Thelocactus bicolor
Preparing your work area and supplies
Before you start, it's important to prepare your workspace and gather the necessary items. You will need a new pot that meets the specified criteria, fresh cactus soil mix, gloves to protect your hands from the cactus spines, and tools like a small trowel. Lay down newspapers or a plastic sheet to catch any spilled soil, and ensure you have a clean, open area to work in.
Carefully extracting the plant from its current container
Removing the Thelocactus bicolor from its current pot must be done with care to avoid damaging roots or injuring yourself. First, turn the pot on its side and gently tap the edges to loosen the soil. Hold the base of the plant (wearing gloves) and slowly pull it out. If it resists, use a small trowel to help ease the root ball out.
Examining and pruning the root system if necessary
Once removed from the pot, inspect the root system. Healthy roots should appear white and firm. If you observe any black, mushy, or decaying roots, trim them off using a sterilized pair of scissors. This helps prevent the spread of any potential diseases. Allow the trimmed roots to dry out and form a callus for about a day to prevent infections when you repot.
Placing Thelocactus bicolor in the new pot and adding substrate
Position the Thelocactus bicolor in the center of the new pot. Gradually add the fresh cactus soil mix around the roots, ensuring all gaps are filled. Lightly press down the soil to secure the plant but avoid compacting it too tightly, as this can impede root growth. The top of the root ball should be slightly below the pot's rim to prevent water from overflowing during irrigation.
Appropriate watering and post-replanting care
After potting your Thelocactus bicolor, give it a light watering to settle the soil. However, be careful not to overwater. Ensuring the soil is moist but not soggy helps the roots recover from any stress incurred during the repotting process. Place the repotted plant in a location with ample indirect sunlight and avoid full, harsh sun initially. Resume regular watering after 1-2 weeks when the plant shows signs of adapting to its new environment.
Frequent Errors to Avoid During Repotting
Excessive watering immediately after transplanting
A common error many make is over-watering the Thelocactus bicolor immediately after repotting. Since the roots might have been disturbed, they require time to recover. Water sparingly at first to prevent waterlogging, which can lead to root rot.
Utilizing a container without adequate drainage
Using a pot without proper drainage is another common mistake. To maintain the health of Thelocactus bicolor, it's crucial that the pot has sufficient drainage holes. This prevents water from accumulating at the bottom, which can cause root rot and severely impact plant health.



