Boost Growth: How and When to Repot Your Shield aralia Plant
1
The best times for repotting are during Spring and Winter.
2
Select a container that is roughly 2.5-5 cm (1-2 in) wider than its current pot.
3
Employ a potting mix that drains effectively to avoid root decay.
The Importance of Repotting Your Shield Aralia
Understanding its growth and root structure
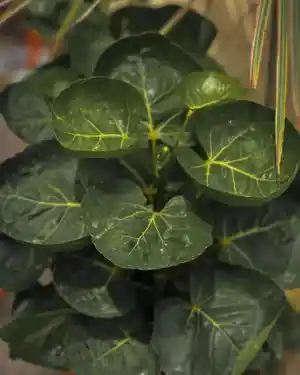
The Shield aralia (Polyscias scutellaria) is a hardy, evergreen shrub prized for its dense foliage and intricate growth. A key feature of this plant is its complex root system. Over time, these roots can become root-bound, meaning they've filled their container and lack room to expand. This restriction can hinder the plant's development and compromise its overall health. Repotting offers new soil and space for root expansion, ensuring your plant stays robust and vibrant.
Indicators your Shield aralia requires a new container
Several signs suggest your Shield aralia might need repotting. Firstly, if roots are emerging from drainage holes or circling the pot's base, it's a clear indicator. Additionally, if the plant's growth has significantly slowed or the soil dries out much faster than usual, these could point to roots needing more room. Yellowing leaves can also be a symptom, potentially indicating overcrowded roots are struggling to absorb nutrients effectively.
Selecting the Appropriate Pot and Soil for Your Shield Aralia
Choosing the optimal pot size and material
When choosing a pot for your Shield aralia, size and material are vital. Ideally, select a pot approximately 2.5-5 centimeters (1-2 inches) larger in diameter than its current one. This size provides ample space for root development without overwhelming the plant. Terracotta pots are excellent due to their porous nature, which allows for better air circulation and moisture regulation. However, any pot with sufficient drainage holes will work.
The ideal soil mix for Shield aralia vitality and growth
The secret to a thriving Shield aralia is well-draining soil. A suitable mix includes standard potting soil blended with perlite or sand to enhance aeration and prevent waterlogging. This composition ensures roots aren't sitting in soggy soil, which can lead to root rotâa common problem for many houseplants. You can also incorporate a small amount of peat moss to retain adequate moisture while still allowing good drainage.
Successful Repotting Steps for Your Shield Aralia
Preparation: What to do before you begin
Prior to repotting, gather all necessary items: a new pot, fresh potting mix, gloves, and a small trowel. Water the plant the day before to facilitate its removal from the current pot. Ensure your workspace is clean and spacious to avoid any mess.
Detailed repotting procedure
Gently remove the Shield aralia from its existing pot, holding the plant's base while lightly tapping the pot's sides.Inspect the root ball. If roots are tightly intertwined, carefully loosen them with your fingers. Trim any dead or damaged roots using sterilized shears.Fill the new pot with a layer of fresh soil. Position the plant in the center, ensuring the root ball sits slightly below the rim.Fill around the root ball with soil, pressing gently to remove air pockets. Water the plant thoroughly to help the soil settle.
Post-Repotting Care: Ensuring a Smooth Adjustment
Immediate care after repotting
Immediately after repotting, water your Shield aralia generously. Place it in a spot with indirect light and maintain a consistent temperature. Avoid fertilizing the plant for at least a month, as the roots need time to adapt without the added stress of nutrient-rich soil.
Long-term care advice for a flourishing Shield aralia
For ongoing care, ensure your Shield aralia receives bright, indirect light and water it when the top 5 centimeters (2 inches) of soil feel dry. Regularly check for pests and prune any dead or yellowing leaves. Fertilize during the active growing season (spring and summer) with a balanced, water-soluble fertilizer to encourage lush growth.


