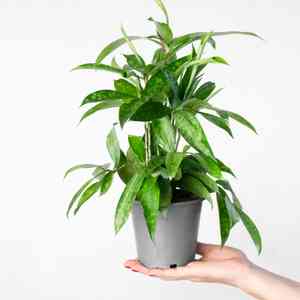
Boost Growth: How and When to Repot Your Gold dust dracaena Plant
1
The best times to transfer your Gold dust dracaena to a new container are during Spring or Winter.
2
Confirm the fresh pot offers sufficient drainage to avoid root decay.
3
Employing a soil blend that drains effectively is vital for your Gold dust dracaena's well-being.
Why Replant Your Gold Dust Dracaena?
Understanding when and why transplanting is crucial for plant vitality and development.
Replanting your Gold dust dracaena not only restores vital nutrients but also provides the root system with more room to expand. Like any indoor plant, Gold dust dracaena can outgrow its container, leading to hindered growth and poor health if not addressed. Furthermore, transplanting helps mitigate the accumulation of salts and minerals that can build up in the soil over time due to consistent watering and fertilizing.
Indicators suggesting it's time to rehouse your Gold dust dracaena.
Several clear indicators can signal when it's time to rehouse your Gold dust dracaena. If you observe roots emerging from the drainage holes, it signifies they've exhausted their space. Additionally, if the plant is top-heavy or water flows directly through the pot without absorption, these are signs that transplanting is necessary. Another clue is if the soil starts to degrade and compact, hindering drainage and aeration.
Selecting the Appropriate Container and Substrate for Gold Dust Dracaena
Choosing the correct pot size and material to foster healthy root growth.
When selecting a new container for your Gold dust dracaena, it's important to pick one that is only one or two sizes larger than the current pot. This allows the roots to grow without becoming excessively large. Ensure the pot has adequate drainage holes to prevent waterlogging. Materials such as terracotta, ceramic, or plastic are suitable, but note that terracotta pots are porous and can dry out more quickly, requiring more frequent irrigation.
The optimal soil mixture for Gold dust dracaena to ensure peak growth and drainage.
A well-draining potting mix is essential for the Gold dust dracaena. You should utilize a blend specifically formulated for houseplants, which often contains peat moss, perlite, and vermiculite. These components help retain moisture while also providing excellent drainage and aeration. Avoid garden soil, as it can be too dense and may hold excessive moisture, leading to root rot.
Step-by-Step Guide to Replanting Gold Dust Dracaena
Preparing your work area and gathering necessary implements.
Before you begin the replanting process, it's important to prepare your workspace. Cover your working surface with newspaper, a tarp, or an old sheet to catch any spilled soil. Gather all essential tools, including your new pot, fresh potting mix, a trowel, gloves, and a watering can. Having everything readily available will make the process smoother.
Steps to carefully extract your plant from its previous container.
To remove your Gold dust dracaena from its current pot, gently tilt the pot on its side and support the plant's base. If the plant is stuck, you can tap the sides of the pot or carefully run a knife around the inner edge to loosen the roots. Be gentle to avoid damaging the root system. Once loosened, carefully lift the plant out, striving to keep the root ball intact.
How to prepare the new container and position the plant.
Place a layer of fresh potting mix at the bottom of the new pot. Position the plant in the center, ensuring that the top of the root ball is approximately 2-3 cm (1 inch) below the pot's rim. This space allows for easy watering. Fill in around the roots with additional soil, gently firming it as you go to eliminate air pockets. Ensure the plant stands upright and is at the same depth it was in the old pot.
Final steps: adding soil, watering, and post-transplant care.
Once the plant is positioned, add more soil to completely cover the roots. Water the plant thoroughly until water exits the drainage holes. This helps to settle the soil and remove any remaining air pockets. After watering, place your Gold dust dracaena in a location with appropriate light conditions, initially away from direct sunlight to reduce transplant shock. Continue with your regular care routine, but monitor for any signs of stress or overwatering.
Caring for Gold Dust Dracaena After Replanting
Essential care advice for the initial weeks following transplanting.
After replanting, your Gold dust dracaena will require some time to adapt to its new environment. Keep the soil slightly moist but not saturated, and avoid fertilizing for about a month to allow the roots time to establish. Provide indirect sunlight, as direct sunlight can stress the plant. Monitor the plant for any signs of transplant shock, such as wilting or yellowing foliage.
Identifying and resolving common issues post-transplant.
Common issues after replanting can include root rot, leaf drop, or yellowing leaves. Root rot is often caused by overwatering or inadequate drainage. Ensure excess water can easily escape through drainage holes and adjust your watering schedule accordingly. If you notice leaf drop or yellowing, it may be due to the plant adjusting to its new surroundings. Ensure it's not receiving too much or too little light and maintain a stable temperature.


