How to Prune Florida pellitory?
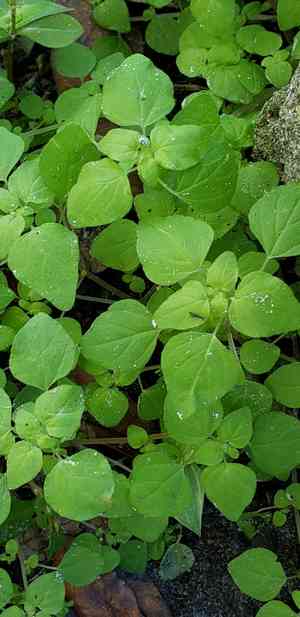
Florida pellitory, known for its erect stature and diminutive, verdant blossoms, thrives with trimming in the initial part of spring or the latter portion of winter. This period facilitates the elimination of deceased or compromised woody material, fostering vigorous new development. Trimming efforts should concentrate on reducing dense branches to improve air movement and light exposure. Consistently detaching faded blooms can also contribute to a neater look. Appropriate pruning can boost the plant's well-being, resulting in more energetic growth and enhanced resilience against pests and ailments.
Advantages of Trimming Florida Pellitory
Advantages of Trimming Florida Pellitory
Trimming florida pellitory promotes robust development and helps maintain its desired form. This enhances the plant's overall vitality and improves its visual appeal. Consistent trimming can also deter illness by improving air circulation within the foliage.
Optimal Period for Trimming Florida Pellitory
Optimal Period for Trimming Florida Pellitory
Early spring and late winter are considered the best times for trimming florida pellitory because the plant is still dormant or just starting its growth cycle. Trimming during these periods minimizes stress and helps reduce the risk of disease. Additionally, this timing encourages vigorous growth and prepares the plant to produce healthy foliage and flowers in the upcoming growing season.
Necessary Tools for Trimming Florida Pellitory
Hand Pruners
Perfect for trimming the delicate stems and leaves of florida pellitory. Hand pruners offer accurate cuts and help prevent plant damage.
Pruning Shears
Useful for slightly thicker stems of florida pellitory, providing clean cuts that encourage healthy growth.
Gloves
Essential for protection when handling florida pellitory, as its foliage can cause skin irritation in some individuals.
How to Trim Florida Pellitory
Inspection
Carefully examine florida pellitory to identify diseased and withered leaves. Look for discoloration, spots, or signs of decay.
Tools preparation
Prepare pruning shears or scissors that are clean and sharp. Disinfect the tools using rubbing alcohol to prevent the spread of disease.
Diseased leaves removal
Use the disinfected pruning shears to cut off the diseased leaves. Make clean cuts close to the base, avoiding tearing the plant tissue.
Withered leaves removal
Trim the withered leaves in a similar manner by making neat cuts at their base. Ensure you do not damage the healthy parts of florida pellitory.
Disposal
Properly dispose of the removed leaves by discarding them in a sealed bag. Do not compost diseased plant material to prevent potential contamination.
Common Trimming Errors with Florida Pellitory
Over-trimming
Removing too much foliage at once can stress florida pellitory, leading to stunted growth or even plant death.
Improper Tools
Using dull or dirty trimming tools can damage the plant tissue and increase the risk of disease.
Incorrect Technique
Making improper cuts, such as cutting too close to the main stem or leaving stubs, can harm the plant's health.
Ignoring Plant Health
Trimming a diseased or infested plant can inadvertently spread the problem throughout the plant or to others nearby.
General Trimming Advice for Florida Pellitory
Sanitize Tools
Ensure trimming tools are sharp and clean to make precise cuts and minimize disease transmission.
Strategic Trimming
Focus on removing dead, diseased, or damaged branches first to promote overall plant health.
Angle Cuts
Make your cuts at a 45-degree angle above a bud facing outward to encourage new growth in the desired direction.
Monitor Growth
Regularly check the plant's growth and trim lightly along the way rather than waiting for a significant trim.



