How to Propagate Florida pellitory?
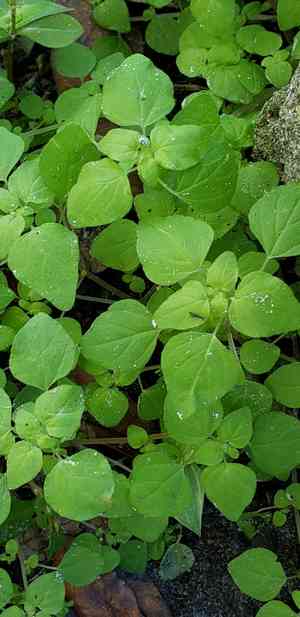
Parietaria floridana is a non-woody plant indigenous to areas experiencing a warm environment. The most effective method for multiplying florida pellitory involves planting seeds in permeable soil abundant in organic material. Confirm that the cultivation site is either shaded or receives filtered sunlight. Provide consistent watering, yet prevent the soil from becoming saturated. Sprouting generally happens rapidly, ensuring the plant's successful establishment. After the young plants are rooted, they demand little attention, facilitating simple growth.
When Is the Optimal Time to Propagate Florida Pellitory?
Propagation Type
Sowing
Propagation Season
Spring
What Equipment Is Used in Florida Pellitory Propagation?
Seed Tray
A seed tray is crucial for germinating florida pellitory seeds. It provides a controlled setting for sprouting, offering suitable space, drainage, and air circulation. Using a seed tray aids in closely observing germination rates.
Fine Seed-Starting Mix
A fine seed-starting mix is vital for ensuring the correct soil texture, moisture retention, and aeration for florida pellitory's seeds. This blend supports the delicate roots of seedlings and encourages robust development.
Humidity Dome
A humidity dome assists in maintaining ideal moisture levels for florida pellitory during its germination phase. It traps humidity, creating a miniature greenhouse effect that promotes quicker and more uniform sprouting.
Spray Bottle
A spray bottle is useful for gently irrigating florida pellitory without disturbing the seeds or young seedlings. It ensures the soil stays moist without becoming saturated, which is critical for preventing seed rot.
Labeling Sticks
Labeling sticks are important for tracking the various stages of florida pellitory propagation. They help in recording dates and specific conditions, which is beneficial for monitoring progress and making necessary adjustments.
Heat Mat
A heat mat ensures that florida pellitory's seeds receive consistent warmth, which is essential for accelerating germination. It provides the bottom heat that can enhance sprouting rates, especially in cooler environments.
Transplanting Tool
A transplanting tool or dibber is advantageous when moving florida pellitory's seedlings from the seed tray to individual pots or garden beds. It helps in minimizing root disturbance and damage during transplantation.
Grow Lights
Grow lights are crucial, particularly if natural sunlight is insufficient. They provide the necessary light spectrum for photosynthesis, ensuring that florida pellitory's seedlings grow strong and healthy until they are ready for outdoor planting.
How to Propagate Florida Pellitory?
Propagation Type
Simple
How to Care for Your Newly Propagated Florida Pellitory?
How to Care for Your Newly Propagated Florida Pellitory?
Once florida pellitory seedlings are established, move them to a larger container or directly into the garden. Ensure they have well-draining soil and are placed in a partially shaded area. Water them regularly, allowing the soil to dry slightly between waterings to prevent root rot. Mulch around the base of the plants to retain moisture and suppress weeds. Monitor for pests and diseases and address any issues promptly. Prune the plants periodically to encourage healthy growth and prevent them from becoming too leggy.
Common Errors to Avoid When Propagating Florida Pellitory
Overwatering
Excess moisture can lead to root rot and fungal diseases, which hinder successful propagation.
Insufficient Light
Not providing enough light can cause weak growth and poor development of new plants.
Using Improper Soil
Heavy or water-retentive soils can stifle root growth and impede drainage, affecting the plant's health.
Neglecting Humidity
Failing to maintain adequate humidity may result in desiccation of cuttings, reducing the chances of successful rooting.
Ignoring Pest Control
Not managing pests can lead to infestations that damage young plants and complicate propagation efforts.
Tips For Propagating Florida Pellitory
Moderate Watering
Water sparingly and ensure proper drainage to avoid waterlogging and promote healthy root development.
Bright, Indirect Light
Provide ample light without direct sun exposure to encourage strong and healthy growth.
Well-Draining Soil
Use a soil mix that is light and well-draining but can retain some moisture to support root establishment.
Maintain Humidity
Utilize a humidity dome or mist regularly to keep the air around the cuttings moist and prevent desiccation.
Regular Pest Monitoring
Inspect plants frequently for pests and take preventative measures to ensure a healthy propagation environment.



