How to Prune Bristlecup sandmat?
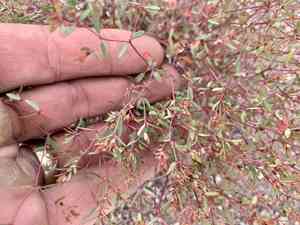
Recognized for its unique spiky look, bristlecup sandmat flourishes with consistent trimming. Essential methods involve eliminating deceased or injured stalks and molding the plant to foster vigorous development. The ideal period for pruning is in early spring, coinciding with its natural growth phase. Trimming back stimulates thicker leaves and enhanced blooming. Always use sanitized, keen implements to avert illness. Regular pruning aids in sustaining a controlled dimension and encourages strong well-being.
What Are the Benefits of Pruning Bristlecup Sandmat?
What Are the Benefits of Pruning Bristlecup Sandmat?
Bristlecup sandmat thrives with trimming, which encourages strong development and keeps its form, preventing it from becoming unruly. Trimming also aids in managing pests and illnesses, improving the plant's general health and look.
What Is the Best Time for Pruning Bristlecup Sandmat?
What Is the Best Time for Pruning Bristlecup Sandmat?
Trimming bristlecup sandmat in early spring is considered ideal because this is just before the plant enters its active growth phase. Pruning at this time allows the plant to recover quickly and promotes vigorous new growth. Additionally, it ensures that the plant is not stressed during its flowering or fruiting periods, which can impact its overall health and yield.
What Tools Do I Need to Prune Bristlecup Sandmat?
Bypass Pruners
Bypass pruners deliver a clean cut, crucial for minimizing harm to the plant tissues of bristlecup sandmat. They are perfect for trimming and minor upkeep.
Precision Pruners
These pruners are excellent for detailed tasks and minor shaping of bristlecup sandmat, allowing for accurate cuts on small stems and branches.
Hand Shears
Hand shears are suitable for cutting back small growth and maintaining the overall shape of bristlecup sandmat. They offer more control for selective trimming.
How to Prune Bristlecup Sandmat
Inspection
Thoroughly examine bristlecup sandmat to identify diseased foliage, withered leaves, dead branches, and infected branches. Mark these sections for removal.
Sterilization
Sanitize pruning tools with a diluted bleach solution or rubbing alcohol to prevent the spread of pathogens.
Diseased Leaves Removal
Carefully cut off any diseased leaves, ensuring to make cuts where the leaf meets the stem to avoid damaging healthy tissue.
Withered Leaves Removal
Trim back any withered leaves by cutting them at the base, close to the main stem or branch, to promote new growth.
Dead and Diseased Branches Removal
Remove dead branches and any branches showing signs of disease. Make clean cuts just above a healthy node or at the branch's point of origin to facilitate proper healing and new growth.
Common Pruning Mistakes with Bristlecup Sandmat
Over-pruning
Removing too much foliage or cutting back too severely, which can stress the plant and inhibit growth.
Incorrect tools
Using dull or inappropriate tools that can crush the stems and introduce diseases or infections.
Improper cuts
Making jagged or uneven cuts that do not heal properly, leaving the plant vulnerable to pests and diseases.
Ignoring health signs
Pruning without checking the plant for signs of stress, disease, or pest infestations can exacerbate existing issues.
Lack of hygiene
Failing to clean pruning tools between cuts or after use, leading to disease transmission between plants.
Common Pruning Tips for Bristlecup Sandmat
Use sharp, clean tools
Always use sharp and sterilized pruning shears to make clean cuts and reduce the risk of disease.
Make precise cuts
Cut just above a node to encourage new growth and ensure the plant heals properly.
Remove dead or damaged parts
Focus on removing any dead or damaged stems and leaves to prevent disease spread and encourage healthy new growth.
Thin out crowded areas
Selectively remove stems that are overcrowding others to improve air circulation and light penetration.
Stay consistent
Regularly inspect bristlecup sandmat and prune as needed to prevent overgrowth and maintain its shape.



