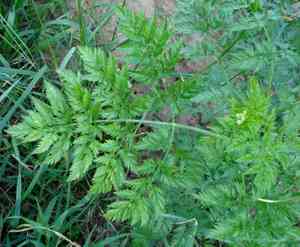
How to Prune Turnip-root chervil?
Turnip-root chervil, a robust biennial root crop, thrives optimally with limited trimming, primarily to eliminate faded blossoms and stimulate leaf production. Conduct pruning in the spring or early summer to strengthen root formation for the subsequent season's yield. Remove any frail or compromised stalks to sustain the plant's robustness. Trimming not only sculpts the plant but also improves air movement and lowers the likelihood of illness. Make accurate cuts above emerging leaf nodes to foster vigorous regeneration.
Advantages of Trimming Turnip-root Chervil
Advantages of Trimming Turnip-root Chervil
Trimming turnip-root chervil encourages robust development and maintains an appealing form, potentially leading to a more abundant harvest of its edible root. It aids in channeling the plant's energy towards developing a strong, healthy framework.
Optimal Period for Trimming Turnip-root Chervil
Optimal Period for Trimming Turnip-root Chervil
Trimming turnip-root chervil in early spring, as the plant emerges from dormancy, promotes vigorous growth and allows gardeners to remove any dead or damaged foliage from winter. In early summer, light trimming ensures the plant retains its desired shape and size without impeding flower or seed production. Pruning during the plant's active growth phase helps turnip-root chervil recover swiftly and direct energy into producing new growth, rather than sustaining unnecessary leaves.
Necessary Tools for Trimming Turnip-root Chervil
By-pass Hand Pruners
Perfect for making clean, precise cuts on turnip-root chervil's thinner stems during thinning or harvesting. Their scissor-like design prevents crushing plant tissue, promoting better healing and growth.
Garden Scissors
Turnip-root chervil may require trimming of its delicate foliage or the removal of dead leaves. Garden scissors are ideal for detailed work on the plant's softer parts.
Lopping Shears
When turnip-root chervil has matured and developed thicker stems, lopping shears provide the necessary leverage to cut through them with their long handles, perfect for reaching into dense foliage without harming the plant.
Hand Saw
For the oldest and thickest stems of turnip-root chervil, a small, sharp hand saw can efficiently remove them without causing undue stress to the plant or the gardener.
Pruning Saw
If turnip-root chervil has developed very thick stems, a pruning saw might be essential. Its teeth are designed to cut on the pull stroke for cleaner and more efficient cuts.
How to Trim Turnip-root Chervil
Sanitize tools
Before beginning to trim turnip-root chervil, sterilize pruning shears or scissors to prevent disease spread. Use a solution of one part bleach to nine parts water or rubbing alcohol to clean the blades.
Remove diseased leaves
Carefully inspect turnip-root chervil for diseased leaves, which may appear discolored, spotted, or have unusual markings. Using the sterilized shears, snip off these leaves at their base, avoiding contact with healthy plant parts.
Eliminate withered leaves
Identify withered leaves on turnip-root chervil that are dry or brown. Clip these leaves at their base as well, ensuring clean cuts to facilitate quick healing and prevent unnecessary stress to the plant.
Prune diseased stems
Examine turnip-root chervil for stems showing signs of disease, such as discoloration, softness, or mold growth. Cut the diseased stems back to healthy tissue, ensuring the cut is just above a leaf node or bud to encourage new growth.
Cleanup
After trimming turnip-root chervil, gather and dispose of the diseased material away from the garden to prevent the spread of any pathogens. Clean the tools again as in step 1 to ensure they are ready for their next use.
Common Trimming Errors with Turnip-root Chervil
Excessive trimming
Removing too much foliage from turnip-root chervil can weaken the plant and reduce its vigor. It's a common mistake to believe more cutting will lead to better growth, but over-pruning can have the opposite effect.
Cutting too close
Trimming too close to the main stem or root bulb can damage turnip-root chervil's growth points. This may hinder the plant's development and potentially introduce disease.
Uneven cuts
Making uneven or jagged cuts can create wounds that are more susceptible to disease and may not heal properly, which can harm turnip-root chervil. Clean, precise cuts are crucial for the plant's health.
Ignoring dead or diseased limbs
Failing to remove dead or diseased growth can impede healthy growth, as turnip-root chervil will continue to expend energy on these parts rather than fostering new, healthy development.
General Trimming Advice for Turnip-root Chervil
Sharp tools
Always use clean, sharp tools when trimming turnip-root chervil to ensure clean cuts that will heal quickly and reduce the risk of disease.
Selective thinning
When trimming turnip-root chervil, selectively thin out overcrowded areas to improve air circulation and light penetration. This promotes a healthier plant structure and vitality.
Respecting growth pattern
Understanding and respecting the natural growth habit of turnip-root chervil is vital. Make cuts that maintain the plant's natural shape and support its growth tendencies.
Sanitation
After trimming turnip-root chervil, remove all pruned material from the area to prevent the spread of any diseases or pests that might be present on the discarded foliage.


