How to Prune Milky bellflower?
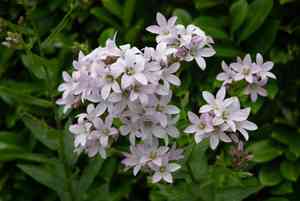
Distinguished by its tall stalks and groupings of star-like blossoms, milky bellflower flourishes with appropriate trimming to preserve its form and stimulate flowering. The ideal periods for pruning are following the initial bloom in early summer and once the flowering period ends in late summer. Removing spent flowers encourages a subsequent bloom and boosts general vitality. Deadheading is advantageous for visual appeal and fosters more robust development. This customized method guarantees a lively exhibition of flowers and a sturdy, dense framework.
What Are the Benefits of Pruning Milky Bellflower?
What Are the Benefits of Pruning Milky Bellflower?
Trimming milky bellflower encourages robust development and maintains its desired form. This results in a dense, bushy structure, enhancing both its visual appeal and general well-being.
What Is the Best Time for Pruning Milky Bellflower?
What Is the Best Time for Pruning Milky Bellflower?
Trimming milky bellflower in spring and summer aligns with its active growth phase, allowing the plant to recover quickly from pruning stress and fostering healthier development. Spring pruning aids in shaping the plant and removing any dead or damaged stems, preparing it for new growth. Summer pruning, especially after the initial bloom, prompts milky bellflower to produce a second flush of flowers, preserving its aesthetic value and vigor throughout the growing season.
What Tools Do I Need to Prune Milky Bellflower?
Bypass Pruners
Perfect for making clean cuts on milky bellflower's softer, green stems without crushing them. They operate like scissors, with two blades passing each other for a precise cut.
Snips
Ideal for deadheading milky bellflower, allowing for accuracy when removing faded flowers to encourage more blooming.
Pruning Shears
Useful for shaping milky bellflower by trimming back excessive growth and maintaining a desired structure. Pruning shears are sturdier than snips, making them suitable for cutting through slightly thicker stems that milky bellflower may develop.
Gloves
Essential for protecting hands from scratches and dirt while trimming milky bellflower.
Garden Scissors
These can be used for general upkeep, including the removal of dead or diseased foliage from milky bellflower to maintain plant health and appearance.
How to Prune Milky Bellflower
Identify
Examine milky bellflower thoroughly to locate diseased leaves, diseased stems, and withered leaves. This initial identification is vital for targeted trimming.
Sanitation
Using sterilized pruning shears, begin by carefully removing all diseased leaves from milky bellflower. Ensuring tools are clean will prevent the spread of disease to healthy parts of the plant.
Trim leaves
Continue by cutting off all withered leaves. Make clean cuts at the base of each leaf to promote healthier growth and aesthetic appeal.
Trim stems
Next, remove any diseased stems. Cut these stems back to the base or to a main stem that shows no signs of disease, ensuring not to leave stubs which could invite pests.
Cleanup
After pruning, thoroughly clean up all removed plant material from around milky bellflower. Dispose of diseased matter properly to prevent any potential reinfection.
Common Pruning Mistakes with Milky Bellflower
Over-pruning
A common error is removing too much growth, which can stress milky bellflower, leading to reduced blooming and vigor. It's crucial not to cut more than one-third of the plant at a time.
Improper timing
Although detailed seasonal timing has been excluded, pruning at incorrect times in general can hinder milky bellflower's natural growth and flowering cycles, impacting overall health.
Neglecting deadheads
Failing to regularly remove faded flowers from milky bellflower can prevent the plant from directing its energy towards new growth and bloom production.
Inadequate tool care
Using dull or unclean pruning tools can damage milky bellflower's stems, leading to frayed cuts that poorly heal and may introduce disease.
Common Pruning Tips for Milky Bellflower
Clean cuts
Make sure to use sharp, clean shears to make precise cuts on milky bellflower. This helps prevent damage and disease, and promotes quicker healing.
Deadheading
Regularly remove spent blooms from milky bellflower to encourage reblooming and prevent the plant from diverting energy into seed production.
Selective thinning
Thin out crowded areas to improve air circulation and light penetration throughout milky bellflower, which helps reduce the risk of disease and promotes stronger, healthier growth.
Post-bloom pruning
After the main bloom period, lightly prune milky bellflower to shape the plant and encourage a second wave of flowers later in the season.
Health checks
During pruning, it's beneficial to inspect milky bellflower for signs of disease or pest infestations. Cutting away any affected areas can help maintain the overall health of the plant.


