Milky bellflower (Campanula lactiflora)
Also known as: Milky Bellflower
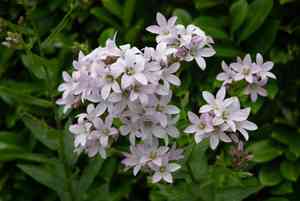
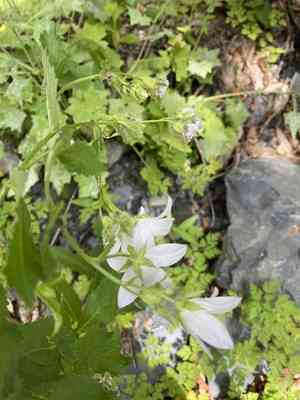
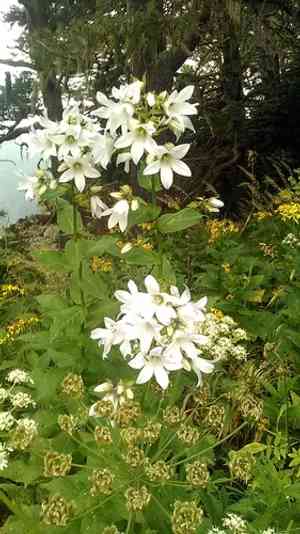
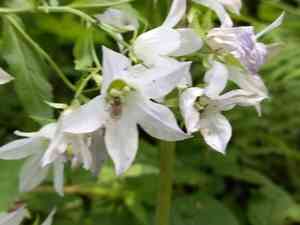
The milky bellflower, commonly found in European garden beds, is scientifically named *Campanula lactiflora*. The name "lactiflora" translates from Latin to "milk-white flowers." Interestingly, its blossoms can vary in color, appearing in shades from white to light purple.
In This Article
Attributes of Milky bellflower
Lifespan
Perennial
Plant Type
Herb
Plant Height
80 cm
Spread
60 cm
Leaf Color
Green
Flower Size
2 to 4 centimeters
Flower Color
White Purple Blue Pink
Images of Milky bellflower

Quickly Identify Milky bellflower
1
Campanula lactiflora can be identified by its tall growth, up to 1.5 meters, clusters of soft, star-shaped flowers in shades of blue, white, or pale pink, and its milky sap when stems are broken.
Scientific Classification of Milky bellflower
Phylum
Vascular plants
Class
Dicotyledons
Order
Asterales
Family
Bellflower
Genus
Bellflowers
Species
Milky bellflower
Planting and Growing of Milky bellflower
Care Difficulty
Easy
Watering Schedule
Every 8 days
Sunlight Requirements
Partial sun
Sunshine Duration
6-10 hours
Ideal Temperature
60-75℉
Soil Type
Potting Mix, Peat Mix
Soil pH
6.5-7.5
Fertilizer Type
Balanced
Pruning Season
Spring, Summer
Pruning Area
Branches, Leaves
Pruning Frequency
2 times a year
Repotting Season
Spring
Pot Type
Plastic, Ceramic
 How to Water Milky bellflower?
Campanula lactiflora, also known as the 'milky bellflower', requires a watering amount that ensures the soil is moist but not waterlogged. Typically, around 500 ml per watering session is adequate. This amount should allow water to seep about 2-3 inches into the soil, ensuring the roots receive the necessary moisture.
What are the symptoms of an underwatered Milky bellflower?
›
What should I do if my Milky bellflower is not getting enough water?
›
What are the symptoms of an overwatered Milky bellflower?
›
How to save an overwatered Milky bellflower?
›
 What Are the Sunlight Requirements for Milky bellflower?
Preferring partial sun, Campanula lactiflora thrives in environments with 4 to 6 hours of sunlight. Ideal lighting promotes vibrant floral displays and healthy growth patterns.
What is the ideal lighting solution for Campanula lactiflora?
›
What measures can be taken to ensure Campanula lactiflora receives ideal light?
›
What benefits does Campanula lactiflora gain from ideal lighting conditions?
›
 What Is the Ideal Temperature Range for Milky bellflower?
Campanula lactiflora thrives best in temperatures ranging from 60°F to 75°F. This range ensures optimal metabolic activities, leading to better growth, vibrant blooms, and healthy foliage. Maintaining this temperature range is crucial in mimicking its native environment, thus encouraging its full potential.
 What Soil is Best for Milky bellflower?
Campanula lactiflora thrives in well-drained soil to prevent root rot. Good drainage ensures that the roots receive adequate oxygen, crucial for healthy growth and blooming. While well-drained, the soil should retain some moisture, which supports the plant during dry spells. Consistent moisture levels are key for continuous flowering and robust health. The plant benefits from soil enriched with organic matter or compost, providing essential nutrients. This results in vigorous growth and enhanced bloom size and color.
 How to Fertilize Milky bellflower?
Campanula lactiflora typically benefits from a balanced fertilizer, such as a 10-10-10 NPK. For liquid fertilizers, dilute it to half the recommended strength to avoid overwhelming the plant. Solid fertilizers can be applied as per the package instructions but should not exceed the recommended dosage to maintain soil health and prevent nutrient burn.
 How to Prune Milky bellflower?
Begin by removing any dead or damaged stems from the previous winter. Cut back the plant to about half its height to encourage strong new growth. This will prevent the plant from becoming unruly and promote fuller blooming come summer. After the primary flush of flowers in early summer, deadhead by removing spent blooms just above the nearest set of leaves. This encourages Campanula lactiflora to redirect its energy into producing more blooms rather than seed production.
More About Pruning Techniques→
 How to Propagate Milky bellflower plant?
1
Choose healthy and vigorous plants as the source of your cuttings or division. This ensures that the plant material is disease-free and more likely to thrive after propagation.
2
Prepare a well-draining potting mix, ideally composed of peat and perlite. This ensures adequate aeration and moisture retention for the developing roots of new plants.
3
Cut 4-6 inch segments from non-flowering shoots, dip in rooting hormone, and place about halfway into the prepared soil. Keep them in a warm, humid environment until roots establish.
 How to Repot Milky bellflower plant?
1
It's time to repot your Campanula lactiflora when you notice roots coming out from the drainage holes, the plant appears root-bound, or growth has stagnated despite adequate care. Another sign is if water takes too long to drain, indicating compacted soil.
2
Select a pot that is 1-2 inches larger in diameter than the current one to allow for growth. Ensure it has good drainage holes to prevent waterlogging. A pot that's too large can lead to overwatering issues, so size it appropriately for optimal balance.
3
Use a well-draining loamy soil that retains some moisture but prevents root rot. A good mix improves aeration, encouraging healthy root development. Adding perlite or small bark can enhance drainage, creating a thriving environment for your plant.
Learn More About Milky bellflower Diseases
Anthracnose
Bacterial Leaf Spot
Bacterial Soft Rot
Bacterial Wilt
Black Spot
Chemical Injury
Crown Gall
Damping-off
Downy Mildew
Drought Stress
Fusarium Wilt
Gray Mold
Leaf Curl
Leaf Spot
Mosaic
Nutrient Deficiency
Nutrient Toxicity
Powdery Mildew
Root Rot
Root-knot Nematode
Rusts
Sooty Mold
Spider Mites
Temperature Stress
Thrips Damage
White Mold


