How to Prune New zealand bur?
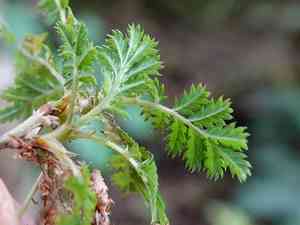
A sprawling shrub, New Zealand bur is recognized for its compact, bur-laden fruits and thick leaves. Trim New Zealand bur during late winter or early spring to eliminate deceased or compromised branches and encourage robust development. Reduce congested stems to enhance air movement and sculpt the plant to preserve its structure. Adhering to the suggested pruning schedule aids in disease prevention and guarantees strong growth throughout the cultivation period.
What Are the Benefits of Pruning New Zealand Bur?
What Are the Benefits of Pruning New Zealand Bur?
New zealand bur pruning promotes vigorous development, maintains form, enhances blooms, improves aesthetics, and boosts resistance to pests and illnesses. Regular trimming fosters healthier, denser foliage, and a more appealing look.
What Is the Best Time for Pruning New Zealand Bur?
What Is the Best Time for Pruning New Zealand Bur?
Trimming new zealand bur in late winter or early spring is optimal due to its growth cycle. This timing occurs before new growth starts, reducing plant stress and minimizing disease risk. Additionally, pruning in these seasons allows new zealand bur to recover quickly and encourages robust growth and flowering in the upcoming period.
What Tools Do I Need to Prune New Zealand Bur?
Hand Pruners
Hand pruners are crucial for making clean cuts on smaller stems and branches. They are perfect for new zealand bur due to their accuracy and ease of use.
Pruning Shears
Pruning shears are slightly larger than hand pruners and can cut through thicker stems and small branches. Their ergonomic design helps reduce hand fatigue, making them suitable for more extensive trimming tasks.
Garden Scissors
Garden scissors are useful for trimming soft stems, deadheading flowers, and light pruning. They allow detailed work and contribute to the overall tidiness of new zealand bur.
Lopping Shears
Lopping shears have long handles that provide extra leverage for cutting through thicker branches that hand pruners or garden scissors can't handle. They are useful for shaping new zealand bur if larger branches need trimming.
Gloves
A sturdy pair of gardening gloves protects your hands from thorns, sharp branches, and other potential injuries while pruning new zealand bur.
How to Prune New Zealand Bur
Inspection
Carefully examine new zealand bur for any signs of disease or wilting leaves. Focus specifically on identifying leaves that are discolored, withered, or show signs of infection.
Clean tools
Before starting, ensure your trimming tools are clean and sharp to avoid spreading disease. Disinfect tools with a solution of one part bleach to ten parts water.
Remove diseased
Using sterilized pruning shears, carefully cut away any diseased leaves at the base where they connect to the main stem or branch. Be sure to dispose of these leaves properly to prevent the spread of disease.
Remove withered
Next, trim off any withered or dead leaves by snipping them at the point of attachment. This will help improve air circulation around new zealand bur and encourage healthy growth.
Disposal
Collect all pruned material and discard it safely, away from the plant to reduce the risk of reinfection. Consider composting only if material is disease-free.
Common Pruning Mistakes with New Zealand Bur
Improper Technique
One of the most common mistakes is using improper pruning techniques, such as hacking at the plant or making jagged cuts. This can lead to slow healing and increased vulnerability to diseases.
Over-pruning
Another frequent error is over-pruning. Removing too much foliage at once can stress the plant, inhibiting its growth and diminish flowering.
Under-pruning
Conversely, not pruning enough can lead to a leggy, unkempt appearance and reduced air circulation around the plant, making it more susceptible to pests and diseases.
Using Dirty Tools
Using dirty or dull pruning tools can spread disease between plants or cause ragged cuts that heal poorly.
Common Pruning Tips for New Zealand Bur
Use Clean, Sharp Tools
Always use clean, sharp pruning tools to make clean cuts that heal quickly and reduce the risk of disease transmission.
Make Precise Cuts
Aim to make clean, precise cuts just above a bud or branch node to encourage new growth and maintain the plant's natural shape.
Thin Out Dense Growth
Regularly thin out dense areas of the plant to improve air circulation and light penetration, which can help prevent disease and encourage healthier growth.
Remove Dead or Diseased Wood
Promptly remove any dead, damaged, or diseased wood to prevent the spread of pests and diseases and keep the plant looking its best.
Moderate Pruning
Practice moderate pruning by removing no more than one-third of the plantâs overall foliage at a time to avoid stressing the plant.