How to Propagate New zealand bur?
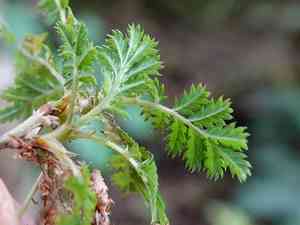
A low-lying herbaceous species, new zealand bur, originates from New Zealand. Reproduce new zealand bur by planting seeds directly into adequately draining soil, keeping them damp until sprouting. Refrain from relocating the plants due to their delicate root systems. The preferred soil type is sandy loam enriched with organic matter. Consistently remove rival weeds to facilitate development. This uncomplicated method guarantees robust establishment and vigorous growth for new zealand bur.
Optimal Period for New Zealand Bur Propagation
Propagation Method
Sowing
Propagation Season
Spring
Tools Utilized in New Zealand Bur Propagation
Seed Tray
A seed tray is vital for sowing new zealand bur seeds, offering a controlled setting for germination. Its uniform compartments ensure young seedlings have ample space to grow without competition, fostering healthier development.
Seedling Heat Mat
A seedling heat mat helps maintain a consistent soil temperature, which is critical for new zealand bur germination. This ensures seeds receive the necessary warmth to sprout successfully, especially in cooler climates.
Fine-Grade Vermiculite
Fine-grade vermiculite is used to lightly cover new zealand bur seeds after sowing. It retains moisture while allowing air circulation, promoting ideal germination conditions without soil compaction.
Propagation Dome
A propagation dome placed over the seed tray creates a mini-greenhouse effect, maintaining high humidity and a stable temperature around new zealand bur seeds. This is crucial for preventing seeds from drying out and ensuring successful germination.
Spray Bottle
A spray bottle is essential for gently misting the soil and new zealand bur seedlings. This method prevents soil disturbance and ensures seeds remain moist without becoming waterlogged.
Label Stakes
Label stakes are important for tracking the various stages of new zealand bur propagation. Proper labeling helps monitor progress and maintain organized propagation records.
Precision Seeder
A precision seeder allows for accurate and even distribution of new zealand bur seeds in the tray. This prevents overcrowding and ensures each seed has sufficient space to grow, leading to stronger seedlings.
How to Propagate New Zealand Bur?
Propagation Type
Easy
Caring for Your Newly Propagated New Zealand Bur
Caring for Your Newly Propagated New Zealand Bur?
Post-transplant, ensure new zealand bur receives sufficient water, particularly during dry periods, to establish its root system. Apply mulch around the plant's base to retain moisture and suppress weeds. Regularly inspect for pests and diseases, addressing any issues promptly. Prune damaged or dead foliage to encourage healthy new growth. With consistent care, new zealand bur will flourish and become a robust plant.
Common Errors to Avoid When Propagating New Zealand Bur
Overwatering
Excessive moisture can lead to root rot and fungal infections, impeding the plant's ability to establish healthy roots.
Insufficient Light
Failure to provide adequate light can result in weak, elongated seedlings that struggle to thrive.
Poor Soil Quality
Using nutrient-deficient or poorly aerated soil can hinder root development and overall plant health.
Neglecting Pest Control
Ignoring pest management can allow infestations to harm young plants, severely impacting growth.
Tips For Propagating New Zealand Bur
Moderate Watering
Water plants only when the top layer of soil feels dry to the touch. Ensure good drainage to prevent waterlogging.
Provide Adequate Light
Place plants in a well-lit area where they can receive indirect sunlight, which is crucial for strong growth.
Use Quality Soil
Opt for well-draining soil rich in organic matter to support healthy root development and overall vitality.
Maintain Hygiene
Regularly check for pests and diseases, promptly removing any affected plant parts to prevent spread.