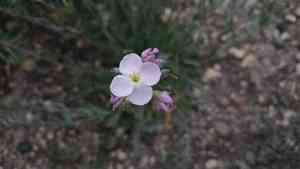
How to Propagate Gregg's keelpod?
Gregg's keelpod flourishes through seed propagation. To achieve peak development, choose a potting blend that drains effectively and sustain steady hydration without saturating the soil. Plant the seeds superficially since they need illumination to sprout. Make sure they are sufficiently separated to prevent excessive density, which could impede their progress. Supplying a consistent setting with temperate conditions will foster vigorous growth.
What Is the Best Time To Propagate Gregg's Keelpod?
Propagation Type
Sowing
Propagation Season
Spring
What Tools Are Used in Gregg's Keelpod Propagation?
Seeds Trays
Seed trays are vital for the initial planting phase of gregg's keelpod. They offer a contained space, aiding in individual seedling management and preventing overcrowding. This method boosts successful germination by maintaining ideal soil moisture and temperature.
Fine Vermiculite
Fine vermiculite is suggested as a soil amendment for sowing gregg's keelpod's seeds. This material helps retain moisture and provides soil aeration, crucial for delicate seedling roots. Vermiculite promotes healthy root growth and reduces soil compaction, improving germination rates.
Misting Bottle
A misting bottle is essential for gently watering gregg's keelpod seeds without dislodging or burying them. Consistent, gentle misting keeps the soil suitably moist, vital for seed germination. This method also prevents damage to developing roots and shoots by controlled water delivery.
Grow Lights
For indoor propagation of gregg's keelpod, grow lights are beneficial, especially if natural light is insufficient. Grow lights provide the necessary light spectrum for photosynthesis, leading to healthier, sturdier seedlings. Controlled light exposure also prevents premature dormancy.
Heat Mat
A heat mat is particularly useful for maintaining consistent soil temperature, critical for gregg's keelpod's seed germination. By providing gentle warmth, the heat mat encourages faster, more uniform germination. This tool is essential in cooler climates or seasons when ambient temperatures might hinder seedling development.
How to Propagate Gregg's Keelpod?
Propagation Type
Easy
How to Care for Your Newly Propagated Gregg's Keelpod?
How to Care for Your Newly Propagated Gregg's Keelpod?
After propagation, gregg's keelpod needs minimal care. Water regularly during dry spells until fully established. They prefer sunny spots but can handle partial shade. Once established, gregg's keelpod is fairly drought-tolerant but benefits from occasional watering during very dry periods. No specific feeding is required, but a light balanced fertilizer in spring can be helpful. Regular pest and disease monitoring is advised as gregg's keelpod may attract certain insects or suffer from common plant ailments.
Common Mistakes to Avoid When Propagating Gregg's Keelpod
Overwatering
Excessive watering can cause root rot in gregg's keelpod, hindering the root development needed for successful propagation.
Deep Planting
Planting gregg's keelpod cuttings or seeds too deeply can impede germination and prevent roots from accessing necessary oxygen.
Ignoring Pest Control
Neglecting pest management can lead to infestations that severely harm the young shoots and roots of gregg's keelpod.
Using Poor Soil
Utilizing non-draining or nutrient-deficient soil can obstruct the proper growth and root development of gregg's keelpod.
Tips For Propagating Gregg's Keelpod
Soil Selection
Choose well-draining, fertile soil to encourage robust root growth and prevent diseases.
Water Management
Ensure moderate watering to maintain adequate soil moisture for gregg's keelpod without creating waterlogged conditions.
Pest Monitoring
Regularly check gregg's keelpod for signs of pests and diseases to take prompt action, safeguarding the healthy growth of new plants.
Proper Depth
Plant seeds or place cuttings of gregg's keelpod at a shallow depth to ensure sufficient light and air exposure, enhancing germination and root establishment.


