How to Propagate Seaside twintip?
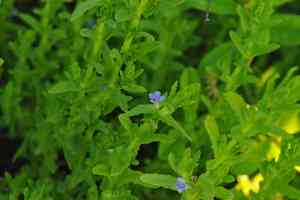
Seaside twintip can be reproduced by planting seeds directly into soil that drains effectively. It is crucial to sustain steady hydration without saturating the growing medium, as seaside twintip flourishes in damp environments. Guarantee ample airflow to avert fungal diseases. Sprouting typically happens within several weeks, and young plants should be observed for insects. This technique supports the plant's inherent developmental patterns, resulting in more robust establishment.
When Is the Optimal Period to Propagate Seaside Twintip?
Propagation Method
Seeding
Propagation Season
Spring
What Equipment Is Utilized in Seaside Twintip Propagation?
Seed Tray
A seed tray is crucial for initiating seaside twintip seeds. It enables consistent seed placement and a regulated environment, fostering ideal germination conditions.
Potting Soil Mix
A well-draining, premium potting soil blend is essential for the initial development of seaside twintip seedlings. It supplies vital nutrients and proper air circulation.
Misting Bottle
A misting bottle aids in managing moisture levels, ensuring the delicate seaside twintip seeds stay damp without becoming waterlogged.
Heat Mat
A heat mat delivers consistent warmth from below, which can boost germination rates for seaside twintip, especially in cooler climates or indoor settings.
Humidity Dome
A humidity dome maintains elevated humidity levels, critical for the successful germination of seaside twintip by preventing the seeds from drying out.
Seedling Labels
Labeling tools help track seaside twintip seeds and their germination progress, preventing confusion and ensuring appropriate care.
Tweezers
Tweezers assist in handling small seaside twintip seeds with precision, preventing damage and ensuring accurate sowing.
How to Propagate Seaside Twintip?
Propagation Type
Simple
How to Nurture Your Newly Propagated Seaside Twintip?
How to Nurture Your Newly Propagated Seaside Twintip?
Once seedlings are established with several true leaf sets, transfer them to larger containers or directly into the garden. Seaside twintip prefers sandy, well-draining soil and full to partial sun. Ensure regular watering, especially during dry periods, but avoid overwatering. Mulch around plant bases to retain soil moisture and suppress weeds. Regularly check for pests and diseases, and prune dead or damaged foliage to maintain healthy growth.
Common Errors to Avoid When Propagating Seaside Twintip
Overwatering
Excessive moisture can lead to root rot as seaside twintip prefers well-drained soil. This fungal infection can cause root decay, ultimately killing the plant.
Using Heavy Soil
Dense or clay-rich soil retains too much moisture and lacks proper aeration, impeding root development and increasing susceptibility to root diseases.
Insufficient Light
Providing too little light can result in weak, elongated growth. Seaside twintip thrives in bright light, and inadequate exposure can hinder its overall health and vigor.
Improper Cutting Techniques
Taking cuttings that are too short or without at least one node can decrease the chances of successful rooting, leading to propagation failure.
Neglecting Humidity
Low humidity conditions can cause the cuttings to dry out before they root. High humidity is essential for keeping the cuttings healthy during the rooting process.
Advice For Propagating Seaside Twintip
Well-Draining Soil
Utilize a light, well-draining soil mix to prevent waterlogging and encourage healthy root growth for seaside twintip.
Adequate Light
Position cuttings in an area with bright, indirect light to support robust growth and development.
Proper Cuttings
Select healthy cuttings with at least one node and a few leaves. Ensure cuttings are approximately 4-6 inches long for optimal rooting.
Humidity Control
Maintain a humid environment by covering cuttings with a plastic dome or placing them in a humidity tray to prevent them from drying out.
Avoid Waterlogging
Water the cuttings sparingly and only when the topsoil feels dry to avoid root rot and fungal issues.



