How to Propagate Water ragwort?
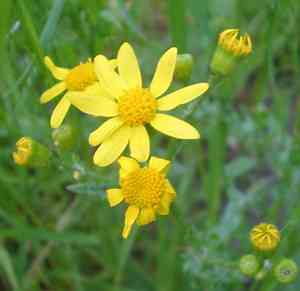
Senecio jacobaea flourishes in damp environments, favoring humid ground. Effective propagation involves planting seeds in fertile, well-draining organic substrate. Make sure seeds are planted superficially and keep the soil consistently moist for best sprouting. Relocate young plants once they are robust enough to withstand the process. Implement pest control strategies as this plant is susceptible to insects. Sufficient light exposure will enhance vigorous development.
Optimal Time for Water Ragwort Propagation
Propagation Method
Seeding
Propagation Period
Spring
Tools for Water Ragwort Propagation
Seed Trays or Flats
Shallow containers made for starting seeds. They offer a controlled setting for uniform seed germination. For water ragwort, these trays are crucial for high germination rates.
Seed Compost
A specialized growing mix providing good drainage, balanced nutrients, and a fine texture suitable for tiny seeds. Using this compost helps water ragwort seeds get the best start for healthy growth.
Humidity Domes
Clear plastic covers that fit over seed trays to maintain high humidity and consistent moisture. For water ragwort, maintaining humidity is vital to prevent soil drying during initial stages.
Heat Mat
A device placed under seed trays to provide steady bottom heat, accelerating germination. Given water ragwort's temperature sensitivity, a heat mat can shorten germination time and boost success.
Misting Bottle
A simple spray bottle used to keep the soil surface moist without overwatering. It's perfect for water ragwort, as gentle misting ensures seeds aren't disturbed but stay consistently moist.
Labels and Markers
Used for tagging seed trays with planting dates and species info. This helps track water ragwort and ensures proper care and timing during propagation.
Scalpel or Sharp Knife
For precise cutting and thinning of seedlings once they've sprouted. This tool ensures water ragwort seedlings aren't overcrowded and can grow with ample space and resources.
Light Source (Grow Lights)
Full-spectrum grow lights that mimic natural sunlight and support healthy seedling development, especially where natural light is insufficient. For water ragwort, adequate light prevents leggy growth.
Fertilizer (Diluted)
A weak, balanced fertilizer to feed seedlings after they've developed a few true leaves. This ensures water ragwort gets necessary nutrients for robust growth without burning young plants.
How to Propagate Water Ragwort?
Propagation Type
Simple
Caring for Newly Propagated Water Ragwort
Caring for Newly Propagated Water Ragwort
Once seedlings are established with several true leaves, they can be moved to individual pots or directly into the garden. Ensure water ragwort is placed in partial to full sunlight, and the soil stays consistently moist. Regularly check for pests and diseases, and provide ample space for growth, as water ragwort can become quite large. Mulching around the plant base helps retain soil moisture and suppress weeds.
Common Mistakes to Avoid When Propagating Water Ragwort
Overwatering
Excessive moisture can lead to root rot, hindering the plant's ability to absorb nutrients and ultimately causing its demise.
Inadequate Rooting Medium
Using a poor-quality or unsuitable rooting medium can impede proper root development, leading to weak or failed propagation.
Insufficient Light
Lack of adequate light can hinder photosynthesis, crucial for new growth, resulting in stunted or weak plants.
Incorrect Cutting Technique
Improper cutting can damage the plant and reduce its ability to form roots, leading to unsuccessful propagation.
Neglecting Humidity
Failing to maintain appropriate humidity levels can cause cuttings to dry out, preventing root formation.
Ignoring Pest and Disease Control
Not monitoring for pests and diseases can lead to infestations or infections that severely damage the plant.
Tips For Propagating Water Ragwort
Proper Watering
Ensure the soil is moist but well-drained to prevent root rot. Water sparingly until roots establish.
Quality Rooting Medium
Use a high-quality, sterile rooting medium like a mix of peat and perlite to encourage healthy root growth.
Adequate Lighting
Provide bright, indirect light to support strong and healthy growth without causing damage to the cuttings.
Correct Cutting Technique
Make clean, angled cuts just below a node, using sterilized tools to minimize disease risk.
Maintain Humidity
Cover cuttings with a plastic dome or bag to keep humidity levels high, aiding in root development.
Monitor for Pests and Diseases
Regularly check for and address any signs of pests or disease to prevent damage to the cuttings.



