How to Propagate Azure Blue Sage?
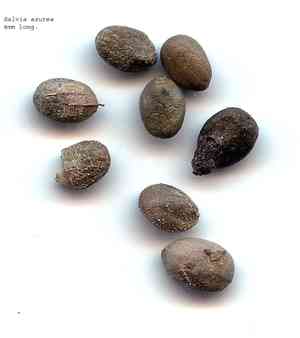
Azure Blue Sage is a robust perennial that flourishes in adequately drained soil and ample sunlight. Reproduction is generally effective through cuttings, harvested from fresh shoots in the initial part of summer. Sever a stem measuring 4-6 inches, making sure at least one leaf node is included. Submerge the severed tip in rooting compound to accelerate root formation. Insert cuttings into a blend of perlite and peat moss, maintaining damp but not waterlogged soil conditions to prevent decay. Root systems typically emerge within 4-6 weeks, at which point the nascent Azure Blue Sage can be relocated.
Optimal Period for Azure Blue Sage Propagation
Propagation Method
Cutting
Propagation Period
Spring,Summer
Tools for Azure Blue Sage Propagation
Sharp Pruning Shears
These are vital for making clean, precise cuts on azure Blue Sage, minimizing harm to the parent plant and boosting rooting success. The shears must be sharp to ensure a clean cut, which helps prevent infection and stress to the cutting.
Rooting Hormone Powder or Gel
This product aids root development in azure Blue Sage cuttings by stimulating growth at the cut site. Applying a rooting hormone to the freshly cut end before planting can significantly increase successful propagation.
Sterilized Potting Mix
A well-draining, sterile potting mix offers an ideal environment for azure Blue Sage cuttings to root. The mix should be free from pathogens and pests, ensuring healthy root development and minimizing soil-borne diseases.
Propagation Trays with Humidity Domes
These trays help maintain consistent humidity and temperature around azure Blue Sage cuttings, crucial for rooting success. The humidity dome helps keep moisture levels constant, vital for cuttings before they develop their own root systems.
Heat Mat
Providing bottom heat can significantly improve the rooting success rate of azure Blue Sage cuttings, especially in cooler climates or seasons. A heat mat under the propagation trays ensures consistent soil temperature, promoting faster root growth.
How to Propagate Azure Blue Sage?
Propagation Type
Easy
Caring for Newly Propagated Azure Blue Sage
Caring for Newly Propagated Azure Blue Sage
Once azure Blue Sage has successfully rooted, gradually acclimate the young plant to less humid conditions by removing the plastic cover for longer periods daily. After full acclimation, transplant azure Blue Sage into a larger pot or directly into the garden, ensuring a location with full sun to partial shade. Water regularly, but allow the soil to dry between waterings to prevent root rot. Pinch back tips to encourage bushier growth and prune in late winter or early spring to maintain shape and promote healthy new growth.
Common Mistakes to Avoid When Propagating Azure Blue Sage
Overwatering
Excessive moisture can lead to root rot and fungal diseases, severely impacting azure Blue Sage's root establishment and growth.
Deep planting
Planting azure Blue Sage's cuttings too deeply can reduce oxygen availability to the roots, hindering proper root development and potentially causing decay.
Neglecting humidity
Ignoring the need for a humid environment when propagating azure Blue Sage can cause the cuttings to dehydrate and fail to root.
Using non-sterile tools
Propagation with contaminated tools can introduce pathogens to azure Blue Sage, leading to infections that impede or prevent successful rooting.
Tips For Propagating Azure Blue Sage
Semi-hardwood cuttings
Using semi-hardwood cuttings from azure Blue Sage increases the chances of successful rooting and plant development.
Rooting hormone
Applying a rooting hormone to azure Blue Sage's cuttings can stimulate root growth and improve propagation outcomes.
Well-draining medium
Propagating azure Blue Sage in a well-draining medium prevents waterlogging, which is crucial for healthy root establishment.
Indirect light
Providing indirect light to azure Blue Sage's cuttings encourages rooting without causing the stress that direct sunlight can inflict.



