How to Propagate Woolly willow?
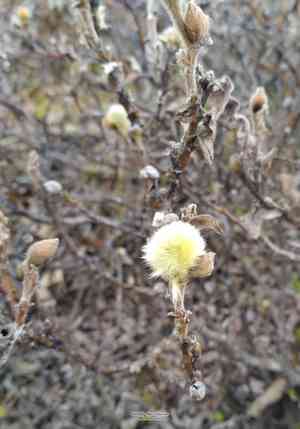
Salix lanata, a leaf-shedding shrub indigenous to northern territories, flourishes optimally in damp, adequately drained substrates. Its propagation is efficiently achieved via cuttings, by choosing robust stems, ensuring the severed ends remain hydrated, and embedding them in a free-draining medium. Consistent irrigation and safeguarding against harsh climatic conditions are crucial during its early developmental phases. After establishment, Salix lanata demands little upkeep, rendering it perfect for forming robust natural barriers or enriching ecological variety in landscapes.
Optimal Time for Woolly Willow Propagation
Propagation Method
Cutting
Propagation Period
Spring,Summer
Tools Required for Woolly Willow Propagation
Pruning Shears
Pruning shears are vital for taking precise cuttings from woolly willow. A clean cut is essential to prevent plant tissue damage and encourage rooting. High-quality, sharp blades are particularly beneficial for ensuring smooth cuts.
Rooting Hormone Powder or Gel
Rooting hormone enhances the root formation process in cuttings of woolly willow. By applying it to the cut end, it stimulates faster and stronger root development, increasing the success rate of propagation.
Propagation Trays or Pots
Propagation trays or pots offer a controlled environment for woolly willow cuttings to root and grow. Using these containers ensures adequate space, proper drainage, and optimal moisture levels.
Misting Bottle
A misting bottle helps to maintain high humidity around woolly willow cuttings. Frequent misting prevents the cuttings from drying out, which is crucial for rooting success.
Heating Mat
A heating mat provides consistent bottom heat to propagation trays or pots, promoting soil warmth which is beneficial for the root formation of woolly willow.
Sterilized Potting Mix
A sterilized potting mix is essential to prevent fungal infections and diseases in cuttings of woolly willow. The mix should be well-draining to avoid waterlogged conditions.
Humidity Dome
A humidity dome creates a mini greenhouse effect, maintaining high humidity and warmth around woolly willow cuttings. This environment reduces moisture loss and encourages rooting.
How to Propagate Woolly Willow?
Propagation Type
Moderately Difficult
Caring for Your Newly Propagated Woolly Willow
Caring for Your Newly Propagated Woolly Willow
Once the cuttings have established roots and new growth is visible, gradually acclimate them to outdoor conditions by increasing their exposure to sunlight and reducing humidity. Transplant the rooted cuttings to a larger container or directly into the garden with well-drained soil. Water regularly, maintaining soil moisture but avoiding waterlogging. Apply a balanced, slow-release fertilizer during the growing season to support vigorous growth. Prune as necessary to shape the plant and encourage bushiness, ensuring it does not become leggy.
Common Mistakes to Avoid When Propagating Woolly Willow
Incorrect Soil Composition
Using soil that is too compact or not well-draining can lead to root rot and poor root development.
Overwatering
Excessive watering causes waterlogged soil, which can suffocate roots and promote fungal diseases.
Improper Cutting Techniques
Using dull tools or cutting at the wrong angle can damage the cuttings, reducing their ability to take root.
Inadequate Light
Placing cuttings in areas with insufficient light can hinder photosynthesis, leading to weak growth.
Lack of Humidity
Failing to maintain the necessary humidity levels can cause the cuttings to dry out and fail to root.
Tips For Propagating Woolly Willow
Use Well-Draining Soil
Ensure the use of a soil mix that allows for good drainage to prevent root rot and encourage strong root development.
Monitor Watering
Water the cuttings moderately, ensuring the soil is moist but not waterlogged to provide the right balance for rooting.
Sharp and Clean Cutting Tools
Use sterilized, sharp tools to make clean cuts at a 45-degree angle, which helps promote quicker and healthier rooting.
Provide Adequate Light
Place the cuttings in a location with indirect, bright light to facilitate photosynthesis without causing stress from intense sunlight.
Maintain Humidity
Cover the cuttings with a plastic bag or use a humidity dome to retain moisture, creating an ideal microenvironment for root development.



