How to Propagate Hooker's orchid?
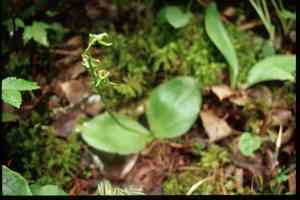
Hooker's orchid, a species within the orchidaceae family, necessitates meticulous propagation to achieve thriving development. During division, delicately detach the plant's root system, making certain that every segment possesses viable sprouts and roots. Replant these segments in a porous, shaded location featuring fertile, organic substrate, and maintain consistent moisture levels. Following these guidelines fosters robust establishment and vivid flowering for hooker's orchid.
Optimal Time for Propagating Hooker's Orchid
Propagation Method
Separation
Propagation Period
Spring,Autumn
Tools Required for Hooker's Orchid Propagation
Garden Fork
A garden fork is essential for carefully lifting hooker's orchid from the ground without harming its root system. Its slender tines are specifically designed to minimize root disturbance, which is crucial for successful division.
Sharp Knife or Pruning Shears
A sharp knife or pruning shears are vital for dividing the root ball of hooker's orchid into smaller portions. Clean cuts help prevent infection and promote healthy regrowth of new plants.
Sterilizing Solution
Utilizing a sterilizing solution to sanitize tools between cuts prevents the spread of diseases and ensures each new division has the best chance of flourishing.
Rooting Hormone
Applying a rooting hormone to the cut sections of hooker's orchid can stimulate root development and enhance the success rate of the divisions. This is particularly important for encouraging robust new roots.
Planting Containers
Containers or pots are necessary for planting the divided sections of hooker's orchid. Using appropriately sized containers with good drainage helps maintain ideal moisture levels and provides space for root development.
Watering Can with Fine Rose
A watering can with a fine rose is crucial for gently irrigating the newly divided hooker's orchid. This tool helps avoid excessive moisture that can lead to root rot, while providing consistent hydration.
Labeling Stakes
Labeling stakes help keep track of the different divisions of hooker's orchid. Identifying each container ensures proper care and monitoring of each plant’s progress.
How to Propagate Hooker's Orchid?
Propagation Type
Simple
How to Care for Your Newly Propagated Hooker's Orchid?
How to Care for Your Newly Propagated Hooker's Orchid?
After propagation, maintain high humidity around hooker's orchid by misting regularly and using a humidity tray. Water moderately, allowing the top layer of the potting mix to dry out slightly between waterings. Fertilize lightly with a balanced orchid fertilizer monthly during the growing season. Monitor for pests and diseases, and provide adequate ventilation to prevent fungal infections. Gradually acclimate hooker's orchid to their regular growing conditions over the next few weeks.
Common Mistakes to Avoid When Propagating Hooker's Orchid
Improper Soil Composition
Using soil that does not replicate hooker's orchid's natural forest floor environment can impede germination and growth.
Overwatering
Excessive moisture can lead to root rot, which is detrimental for hooker's orchid's development.
Incorrect Light Levels
Providing too much direct sunlight or too little light can stress the plant and impede propagation.
Neglecting Mycorrhizal Association
Failing to include mycorrhizal fungi in the soil can prevent successful seed germination and plant growth.
Tips For Propagating Hooker's Orchid
Use Well-Draining, Rich Soil
Mimic the natural forest floor conditions with soil rich in organic matter and good drainage to support healthy roots.
Maintain Moderate Moisture
Keep the soil consistently moist but not waterlogged to prevent root rot.
Provide Indirect Light
Ensure hooker's orchid receives filtered sunlight or partial shade to mimic its natural woodland environment.
Include Mycorrhizal Fungi
Incorporate mycorrhizal fungi in the growing medium to aid in seed germination and root health, crucial for hooker's orchid's growth.


