How to Propagate Red pipturus?
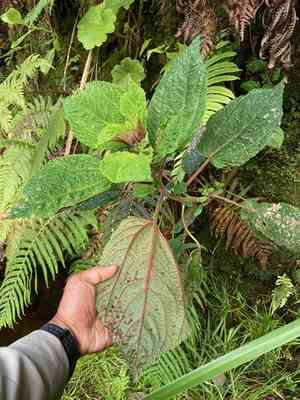
Red pipturus can be multiplied via cuttings, providing an accessible technique for cultivators. For peak development, choose robust, partially matured stems and sustain a moist atmosphere. Guarantee a potting blend that drains effectively to avert root decay. Applying a rooting stimulant can boost successful establishment. Vigilance for infestations and ailments is crucial to preserve plant well-being throughout the propagation phase. With diligent attention, these cuttings can evolve into vigorous specimens.
Optimal Time for Red Pipturus Propagation
Propagation Method
Cutting
Propagation Period
Spring,Summer
Tools for Red Pipturus Propagation
Pruning Shears
Utilized for taking neat and precise cuttings from red pipturus. A sharp blade ensures minimal harm to the parent plant and the cuttings, which is crucial for successful rooting and reducing disease risks.
Rooting Hormone
Applied to the base of cuttings to stimulate root growth. For red pipturus, this can significantly boost the speed and success rate of propagation.
Propagation Trays
Offer a controlled environment to position the cuttings with appropriate spacing. These trays ensure that each cutting of red pipturus can develop without competition for resources.
Humidity Dome
Maintains high humidity levels, which is essential for red pipturus cuttings to prevent dehydration and encourage rooting. Sustaining high humidity is particularly beneficial for this plant species.
Sterile Potting Mix
Provides a clean and disease-free medium for the cuttings to root. A suitable mix for red pipturus would typically be well-draining yet moisture-retentive, catering to its rooting requirements.
Misting Bottle
Helps maintain moisture levels around the cuttings without over-saturating the soil. Regular misting of red pipturus cuttings keeps the leaves hydrated and supports the rooting process.
Heating Mat
Delivers consistent bottom warmth, which can enhance root development in cuttings of red pipturus. Optimizing the temperature around the root zone is critical for successful propagation.
Propagating Red Pipturus Guide
Propagation Type
Moderately Difficult
Post-Propagation Care for Red Pipturus
Post-Propagation Care for Red Pipturus
Once rooted, transfer red pipturus into individual containers with well-draining soil. Ensure they receive filtered light or partial shade. Water consistently to keep the soil moist but avoid waterlogging. Apply a balanced, diluted fertilizer monthly during the active growth period. Monitor for pests and diseases, and provide adequate air circulation. Prune as needed to maintain shape and encourage bushier growth.
Common Errors to Avoid When Propagating Red Pipturus
Overwatering
Excessive moisture can lead to root rot and fungal infections, which are harmful to red pipturus.
Inadequate Light
Insufficient light hinders the growth and development of red pipturus, making it more susceptible to diseases.
Poor Soil Preparation
Using soil that is not well-draining or lacks nutrients can impede root development and overall plant health.
Improper Cutting Techniques
Using dull or contaminated tools for cuttings can damage plant tissue and introduce pathogens.
Lack of Air Circulation
Crowded planting areas can lead to poor air circulation, encouraging mold and mildew growth.
Ignoring Pests
Not checking for and managing pests can result in significant damage to new cuttings and established plants.
Advice for Propagating Red Pipturus
Use Well-Draining Soil
Ensure the soil mix is rich in organic matter and drains effectively to prevent waterlogging.
Sterilize Tools
Always use sterilized, sharp tools to make clean cuts and minimize the risk of introducing diseases.
Provide Adequate Light
Place red pipturus cuttings in a location with bright, indirect light to support strong growth.
Maintain Optimal Humidity
Keep humidity levels moderate by misting cuttings regularly or using a humidity dome.
Regular Monitoring
Check for pests and diseases frequently to address any issues promptly.
Spacing
Ensure sufficient spacing between cuttings to enhance air circulation and reduce the risk of fungal infections.



