How to Propagate Panicum gymnocarpon?
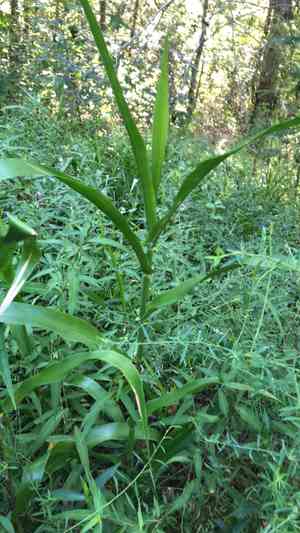
Panicum gymnocarpon belongs to the Poaceae botanical group. Multiply panicum gymnocarpon mainly by means of division. This entails meticulously excavating established clusters and dividing them into smaller portions, making certain each portion possesses sufficient root structure. Promptly re-establish them in soil that drains effectively to sustain prime growth circumstances. Consistent irrigation is crucial throughout the initial settling phase. Implement appropriate distances between plants to prevent excessive density, fostering more robust plant progression.
When Is the Optimal Time to Propagate Panicum Gymnocarpon?
Propagation Type
Division
Propagation Season
Spring,Autumn
What Implements Are Utilized in Panicum Gymnocarpon Propagation?
Hand Trowel
A hand trowel is crucial for carefully excavating around and lifting panicum gymnocarpon clumps for division. Its compact size and pointed blade enable precision and minimal root disturbance, vital for ensuring healthy roots post-division.
Garden Fork
A garden fork is beneficial for loosening the soil surrounding panicum gymnocarpon prior to lifting it. This tool aids in reducing root damage by gently prying the plant without severing roots, ensuring viable segments for replanting.
Sharp Knife or Pruners
These instruments are essential for making clean cuts through panicum gymnocarpon clumps. A sharp knife or pruners help divide the plant into smaller, manageable sections without creating jagged edges that could lead to infection or decay.
Rooting Hormone
While not always required, applying rooting hormone to cut panicum gymnocarpon sections can encourage quicker and stronger root development. This is particularly helpful if the plant is slow to establish new roots.
Watering Can
A watering can allows for gentle and precise irrigation of newly divided panicum gymnocarpon sections. Consistent moisture is critical for root re-establishment, and a watering can ensures evenly moist soil without oversaturation.
Plant Labels
Utilizing plant labels helps track the location of each divided panicum gymnocarpon section. This practice is especially useful in a garden setting to monitor the growth and health of each segment, ensuring proper care.
Garden Spade
For larger panicum gymnocarpon clumps, a garden spade can be used to lift and divide the plant. Its robust construction can handle the weight and entrenched roots of mature plants, facilitating a cleaner and safer division process.
How to Propagate Panicum Gymnocarpon?
Propagation Type
Simple
How to Care for Your Newly Propagated Panicum Gymnocarpon?
How to Care for Your Newly Propagated Panicum Gymnocarpon?
After propagating panicum gymnocarpon, ensure consistent moisture for strong root establishment. Position them where they receive adequate sunlight or partial shade suitable for their growth. Regularly check for signs of stress or pests, and apply a balanced, slow-release fertilizer to support healthy development. Prune as needed to maintain shape and remove any damaged or diseased parts.
Common Errors to Avoid When Propagating Panicum Gymnocarpon
Incorrect Soil Type
Employing soil that retains excessive water or lacks proper drainage can result in root rot and poor sprouting.
Overwatering
Providing too much water can suffocate roots, leading to fungal diseases and stunted development.
Improper Light Conditions
Failing to provide adequate light can lead to weak, elongated seedlings susceptible to disease and pest infestations.
Inadequate Temperature
Exposing seeds or cuttings to unsuitable temperatures can impede germination and root formation.
Neglecting Seedling Care
Not thinning out seedlings or delaying their transplant at the right time can cause overcrowded conditions and poor growth.
Planting Depth
Planting seeds or cuttings too deeply can hinder proper emergence and development.
Advice For Propagating Panicum Gymnocarpon
Well-Drained Soil
Utilize well-drained soil that permits proper air circulation to prevent root ailments.
Moderate Watering
Water the plant moderately; ensure the soil is moist but not waterlogged.
Sufficient Light
Place the plant where it can receive ample sunlight to encourage healthy growth and development.
Optimal Temperature
Maintain a stable temperature that supports germination and root growth.
Seedling Management
Thin out seedlings to prevent overcrowding and ensure healthy, robust growth.
Proper Planting Depth
Ensure seeds or cuttings are planted at the correct depth to facilitate successful emergence.



