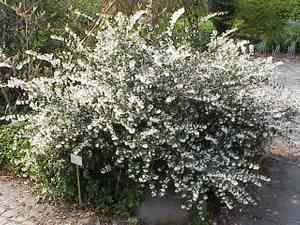
How to Propagate Delavay Teaolive?
Delavay Teaolive flourishes when appropriate propagation methods are employed. To achieve successful development, acquire stem sections from robust, established specimens during their active growth period. Verify that each section possesses multiple leaf junctions, and immerse the cut end into a rooting stimulant prior to embedding them in a porous, sandy substrate. Sustaining uniform dampness without oversaturation is essential. Given ideal circumstances, root systems generally emerge within a few weeks. Gently relocate them once firmly rooted to lessen any disruption to the root structure.
Optimal Time for Delavay Teaolive Propagation
Propagation Type
Cutting
Propagation Season
Spring,Summer
Tools for Delavay Teaolive Propagation
Sharp Pruning Shears
Crucial for making clean cuts, minimizing harm to delavay Teaolive during the cutting process. Sharp blades ensure cuttings are taken without crushing stem tissues, vital for successful rooting.
Rooting Hormone Powder
Enhances the probability of successful root formation for delavay Teaolive cuttings. This hormone stimulates quicker root development, essential for establishing a healthy new plant, especially for woody plants like delavay Teaolive.
Sterile Potting Mix
Offers a disease-free environment, critical for the delicate root development phase of delavay Teaolive cuttings. A sterile medium prevents fungal and soil-borne diseases, supporting healthy root growth.
Propagation Tray
Used to arrange and support delavay Teaolive cuttings in a stable, controlled setting. The tray should ideally have drainage holes and be shallow, aiding in crucial moisture control for rooting.
Humidity Dome
Maintains high humidity levels around delavay Teaolive cuttings, vital for preventing water loss through transpiration until new roots form. This ensures cuttings don't dry out, contributing to overall propagation success.
Delavay Teaolive Propagation Difficulty
Propagation Type
Moderately Difficult
Post-Propagation Care for Delavay Teaolive
How to Care for Your Newly Propagated Delavay Teaolive?
Once roots form, gradually introduce the new delavay Teaolive plant to less humid conditions by removing the humidity cover for longer periods. After acclimation, transfer it to a larger pot with standard potting soil. Place the plant in partial shade to full sun and water regularly to keep the soil moist. During the growing season, fertilize with a balanced, slow-release product to encourage healthy growth.
Common Propagation Mistakes for Delavay Teaolive
Ignoring Soil Type
Using unsuitable soil types can hinder root development in delavay Teaolive. A frequent error is employing overly dense or clay-heavy soils, which can impede root growth and drainage, leading to root rot.
Overwatering
While delavay Teaolive needs moist conditions, excessive water can suffocate roots, preventing proper oxygen intake and increasing disease susceptibility.
Cutting Propagation Errors
Making cuttings that are either too long or too short can impede successful rooting. Improperly sized cuttings may struggle to sustain themselves and develop a robust root system.
Delavay Teaolive Propagation Tips
Soil Preparation
Utilizing well-draining, fertile soil promotes healthy delavay Teaolive growth. Amending the soil with organic matter or using a potting mix designed for shrubs can improve root health and moisture retention.
Water Management
Maintain consistent moisture when propagating delavay Teaolive, but avoid waterlogging the soil. Regularly checking soil dampness helps prevent overwatering issues.
Cutting Technique
Using a sharp, clean cutting tool, make cuttings approximately 4-6 inches long, with several leaves for photosynthesis. Ensure cuts are made just below a leaf node to enhance rooting success.


