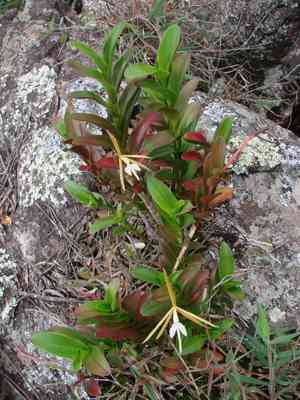
How to Propagate Tiny orchid?
Successful propagation of tiny orchid can be accomplished via division, which entails meticulously splitting the specimen into smaller segments, making sure each possesses a section of roots and new growths. This technique fosters more robust development and aids in controlling the plant's dimensions. Employing sanitized instruments and sustaining elevated humidity after division enhances the likelihood of success. Referring to credible horticultural references such as the American Orchid Society is recommended for comprehensive instructions.
What Is the Best Time To Propagate Tiny Orchid?
Propagation Type
Division
Propagation Season
Spring,Autumn
What Tools Are Used in Tiny Orchid Propagation?
Sterilized Pruning Shears
Pruning shears are vital for making clean cuts when dividing tiny orchid plants. Sterilizing them reduces the risk of introducing pathogens during cutting, which is crucial for the plant's health and successful propagation.
Sharp Knife
A sharp knife enables precise division of tiny orchid plants, especially for separating rhizomes or pseudo-bulbs without excessive damage. This precision helps reduce plant stress and promotes viable new growth.
Sphagnum Moss
Sphagnum moss is used to provide a moist and airy medium around the cut sections of tiny orchid. This moss retains moisture without becoming waterlogged, creating an optimal environment for root development and helping maintain humidity levels.
Plastic Nursery Pots
These pots are ideal for housing the divided sections of tiny orchid. Using appropriately sized pots ensures proper drainage and air circulation around the roots, which is necessary for preventing root rot and promoting healthy growth.
Rooting Hormone
Although tiny orchid generally propagates without the need for rooting hormone, using it can enhance root development for the divided sections, increasing the overall success rate of the propagation process.
Transparent Humidity Dome
A humidity dome helps maintain a consistent and high humidity environment around the divided units of tiny orchid. This tool is particularly important to prevent desiccation and support root establishment post-division.
Fine Spray Bottle
A fine misting spray bottle is used to keep the humidity high and provide gentle moisture to the newly divided sections of tiny orchid without disturbing the planting medium. This aids in reducing transplant shock and stimulates root growth.
Sterile Potting Mix
A high-quality, sterile potting mix tailored for orchids ensures the new divisions of tiny orchid have a nutrient-rich and pathogen-free environment to grow in. This mix typically contains components like bark, perlite, and charcoal, providing excellent drainage.
How to Propagate Tiny Orchid?
Propagation Type
Easy
How to Care for Your Newly Propagated Tiny Orchid?
How to Care for Your Newly Propagated Tiny Orchid?
After propagation, maintain high humidity and provide moderate, indirect light. Keep the substrate slightly moist but never waterlogged. Gradually reintroduce the tiny orchid to normal watering routines. Fertilize sparingly with a balanced orchid fertilizer diluted to half strength during the growing season. Regularly monitor for signs of stress or disease and adjust care as needed to promote healthy growth.
Common Mistakes to Avoid When Propagating Tiny Orchid
Improper humidity levels
Failing to maintain high humidity can lead to dehydration and poor root development. Tiny orchid requires consistent moisture to thrive.
Incorrect light exposure
Providing too much direct sunlight can scorch the plant, while too little can inhibit growth. Tiny orchid prefers bright, indirect light.
Overwatering
This can cause root rot, which is fatal to the delicate roots of tiny orchid. Proper watering techniques are crucial.
Using incorrect potting media
Poorly draining media can lead to waterlogging and root rot. Tiny orchid needs a well-draining, aerated substrate.
Neglecting air circulation
Stagnant air can encourage pests and fungal diseases. Tiny orchid benefits from good air movement to stay healthy.
Tips For Propagating Tiny Orchid
Maintain high humidity
Tiny orchid thrives in environments with high humidity, around 70-80%. Use a humidifier or a humidity tray to achieve this.
Provide bright, indirect light
Ensure tiny orchid receives ample indirect light by placing it near a window with filtered sunlight or under grow lights.
Ensure appropriate watering
Water tiny orchid regularly but allow the substrate to almost dry between waterings to prevent root rot. Mist frequently instead of heavy watering.
Select suitable potting media
Use a well-draining mix such as fine bark or a sphagnum moss blend, which allows for good air circulation around the roots.
Promote air circulation
Place tiny orchid in an area with good air movement, but avoid direct drafts. Use fans if necessary to keep the air moving.


